Error message

  • Deprecated function: Return type of DatabaseStatementBase::execute($args = [], $options = []) should either be compatible with PDOStatement::execute(?array $params = null): bool, or the #[\ReturnTypeWillChange] attribute should be used to temporarily suppress the notice in require_once() (line 2244 of /home/blaalt/www.blairaltman.com/includes/database/database.inc).
  • Deprecated function: Return type of DatabaseStatementEmpty::current() should either be compatible with Iterator::current(): mixed, or the #[\ReturnTypeWillChange] attribute should be used to temporarily suppress the notice in require_once() (line 2346 of /home/blaalt/www.blairaltman.com/includes/database/database.inc).
  • Deprecated function: Return type of DatabaseStatementEmpty::next() should either be compatible with Iterator::next(): void, or the #[\ReturnTypeWillChange] attribute should be used to temporarily suppress the notice in require_once() (line 2346 of /home/blaalt/www.blairaltman.com/includes/database/database.inc).
  • Deprecated function: Return type of DatabaseStatementEmpty::key() should either be compatible with Iterator::key(): mixed, or the #[\ReturnTypeWillChange] attribute should be used to temporarily suppress the notice in require_once() (line 2346 of /home/blaalt/www.blairaltman.com/includes/database/database.inc).
  • Deprecated function: Return type of DatabaseStatementEmpty::valid() should either be compatible with Iterator::valid(): bool, or the #[\ReturnTypeWillChange] attribute should be used to temporarily suppress the notice in require_once() (line 2346 of /home/blaalt/www.blairaltman.com/includes/database/database.inc).
  • Deprecated function: Return type of DatabaseStatementEmpty::rewind() should either be compatible with Iterator::rewind(): void, or the #[\ReturnTypeWillChange] attribute should be used to temporarily suppress the notice in require_once() (line 2346 of /home/blaalt/www.blairaltman.com/includes/database/database.inc).
  • Deprecated function: strlen(): Passing null to parameter #1 ($string) of type string is deprecated in drupal_random_bytes() (line 2268 of /home/blaalt/www.blairaltman.com/includes/bootstrap.inc).
  • Deprecated function: rtrim(): Passing null to parameter #1 ($string) of type string is deprecated in url() (line 2349 of /home/blaalt/www.blairaltman.com/includes/common.inc).
  • Deprecated function: strpos(): Passing null to parameter #1 ($haystack) of type string is deprecated in url_is_external() (line 2393 of /home/blaalt/www.blairaltman.com/includes/common.inc).
  • Deprecated function: str_replace(): Passing null to parameter #3 ($subject) of type array|string is deprecated in url_is_external() (line 2395 of /home/blaalt/www.blairaltman.com/includes/common.inc).
  • Deprecated function: ltrim(): Passing null to parameter #1 ($string) of type string is deprecated in url() (line 2311 of /home/blaalt/www.blairaltman.com/includes/common.inc).

Bluenose Model Boat Project

Category: 
Random

It was probably around the start of October that I was talking to Kamala saying that we needed to make some art for our living room. For some reason she responded with something along the lines of:

"I think it would be cool to have a wooden model ship on the wall instead a painting."

For some reason I agreed to this but decided that we shouldn't buy a complete model; instead we should go on Great Hobbies and try to find a kit that we liked. Being stubborn as I am, it just seemed lame to buy a premade boat. Our first thought was to build an old warship, the Bounty, but quickly realized that that was going to be far too time consuming and maybe a little out of our ability. We toned back our initial excitement a little and decided on building a 1/65 scale Bluenose from Billing Boats. The kit was on sale at the time so I pulled the trigger and ordered it.

That was the start of me having no life for the following 8 weeks.

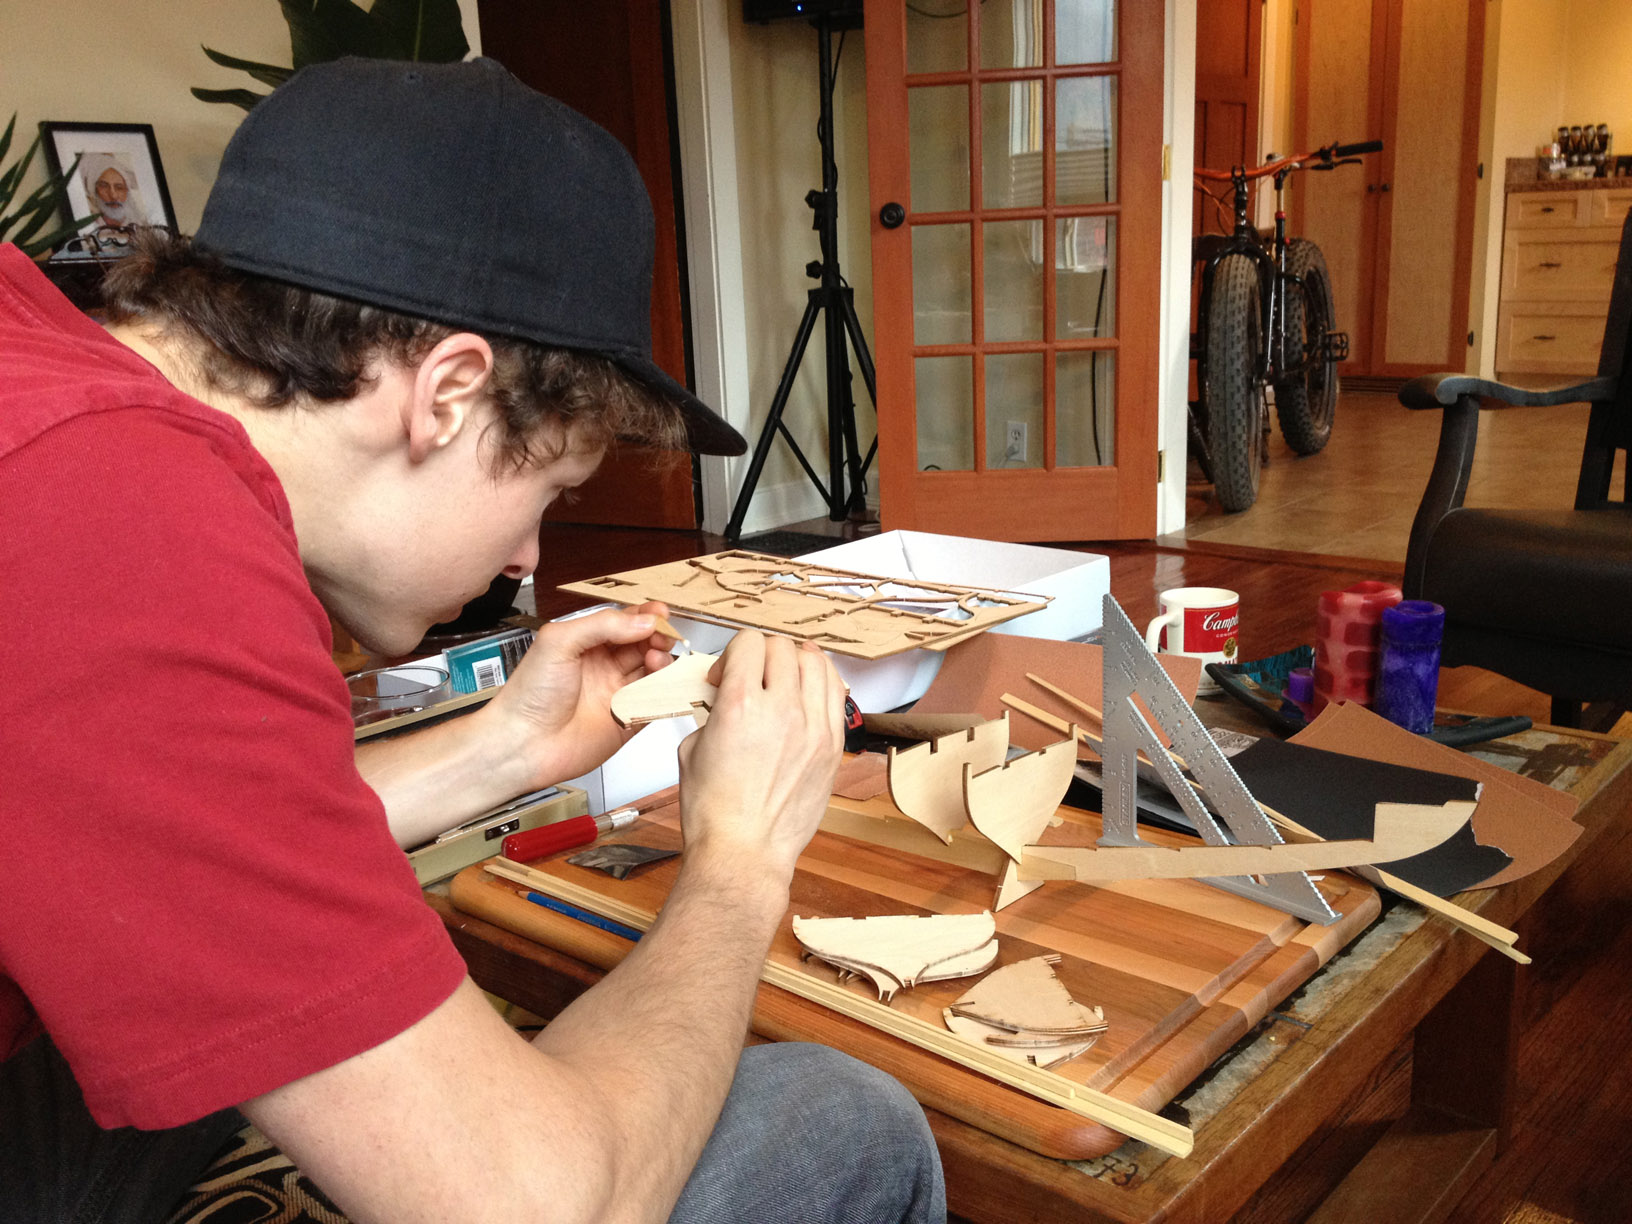
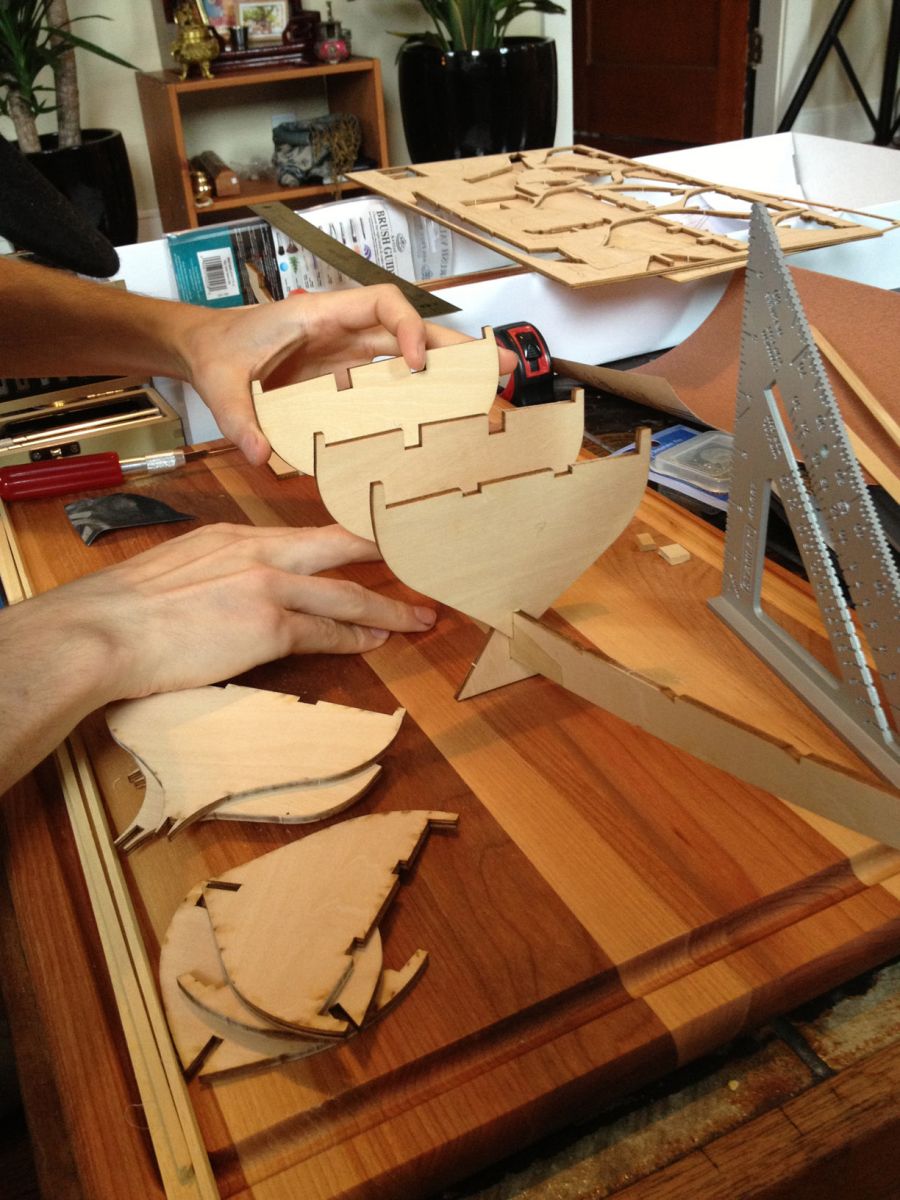
I should probably point out that my knowledge of model ship building or sailing in general is pretty much non existent. I should also point out that Billing Boats has a severe lack of instruction with their kits. By severe, I mean that the instruction book only had 9 steps and none of them were for rigging. With those facts clear before beginning I was still excited to get started and planned on taking six months to complete the boat.


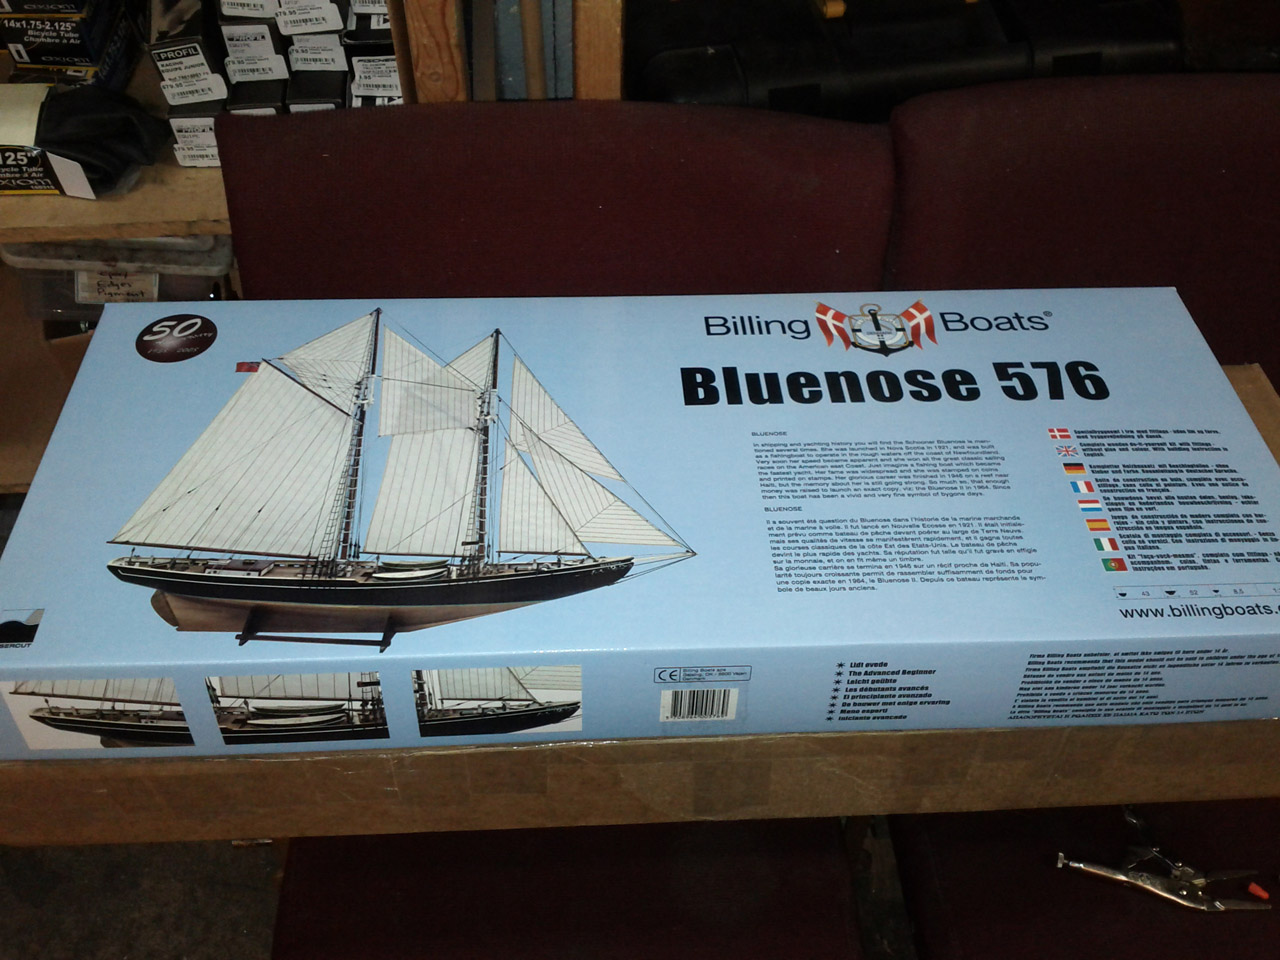
The box arrives at work.


After rooting around through the box trying to figure out what everything was (piles of wood in many sizes, none with any labels) I got started building the keel strip and putting the bulkheads on. It took some time to make sure everything here was totally square. After completing them I clued in that it would have been way smarter to put the deck on while I was installing bulkheads so everything would line up. Miraculously everything lined up anyway.


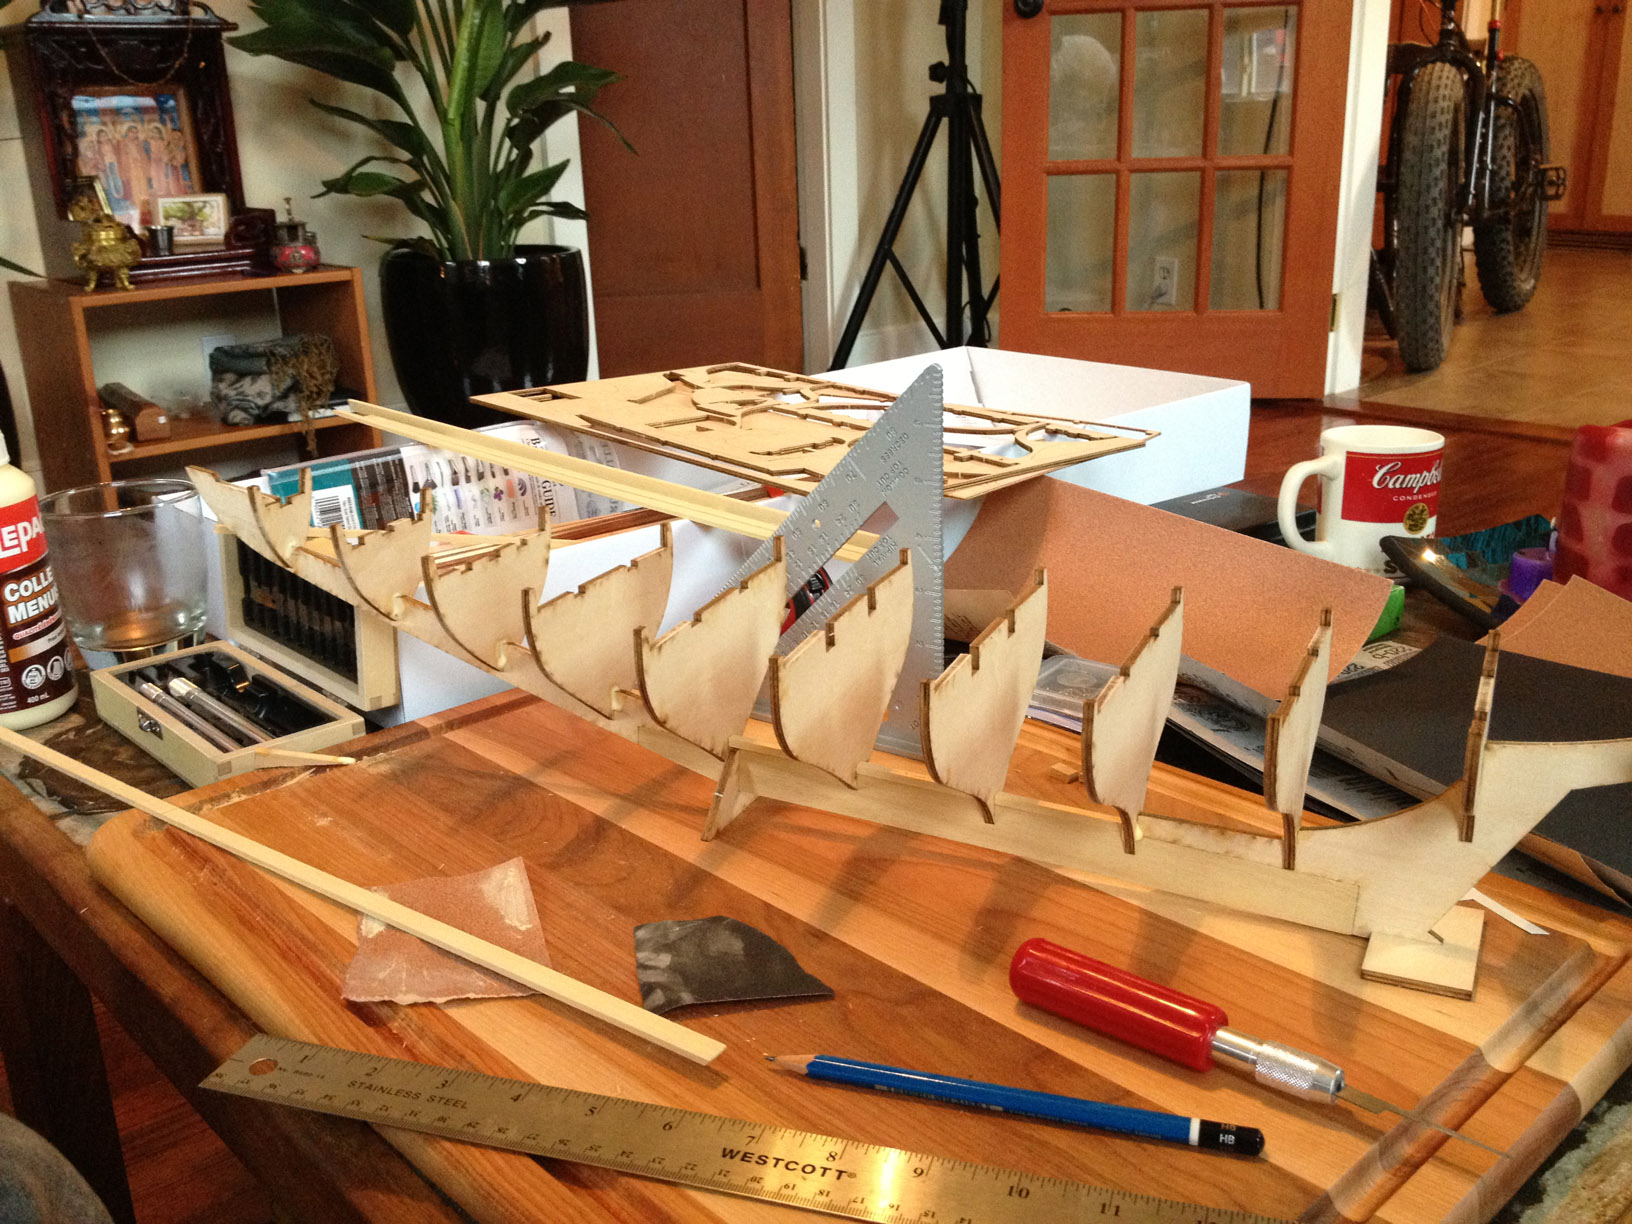
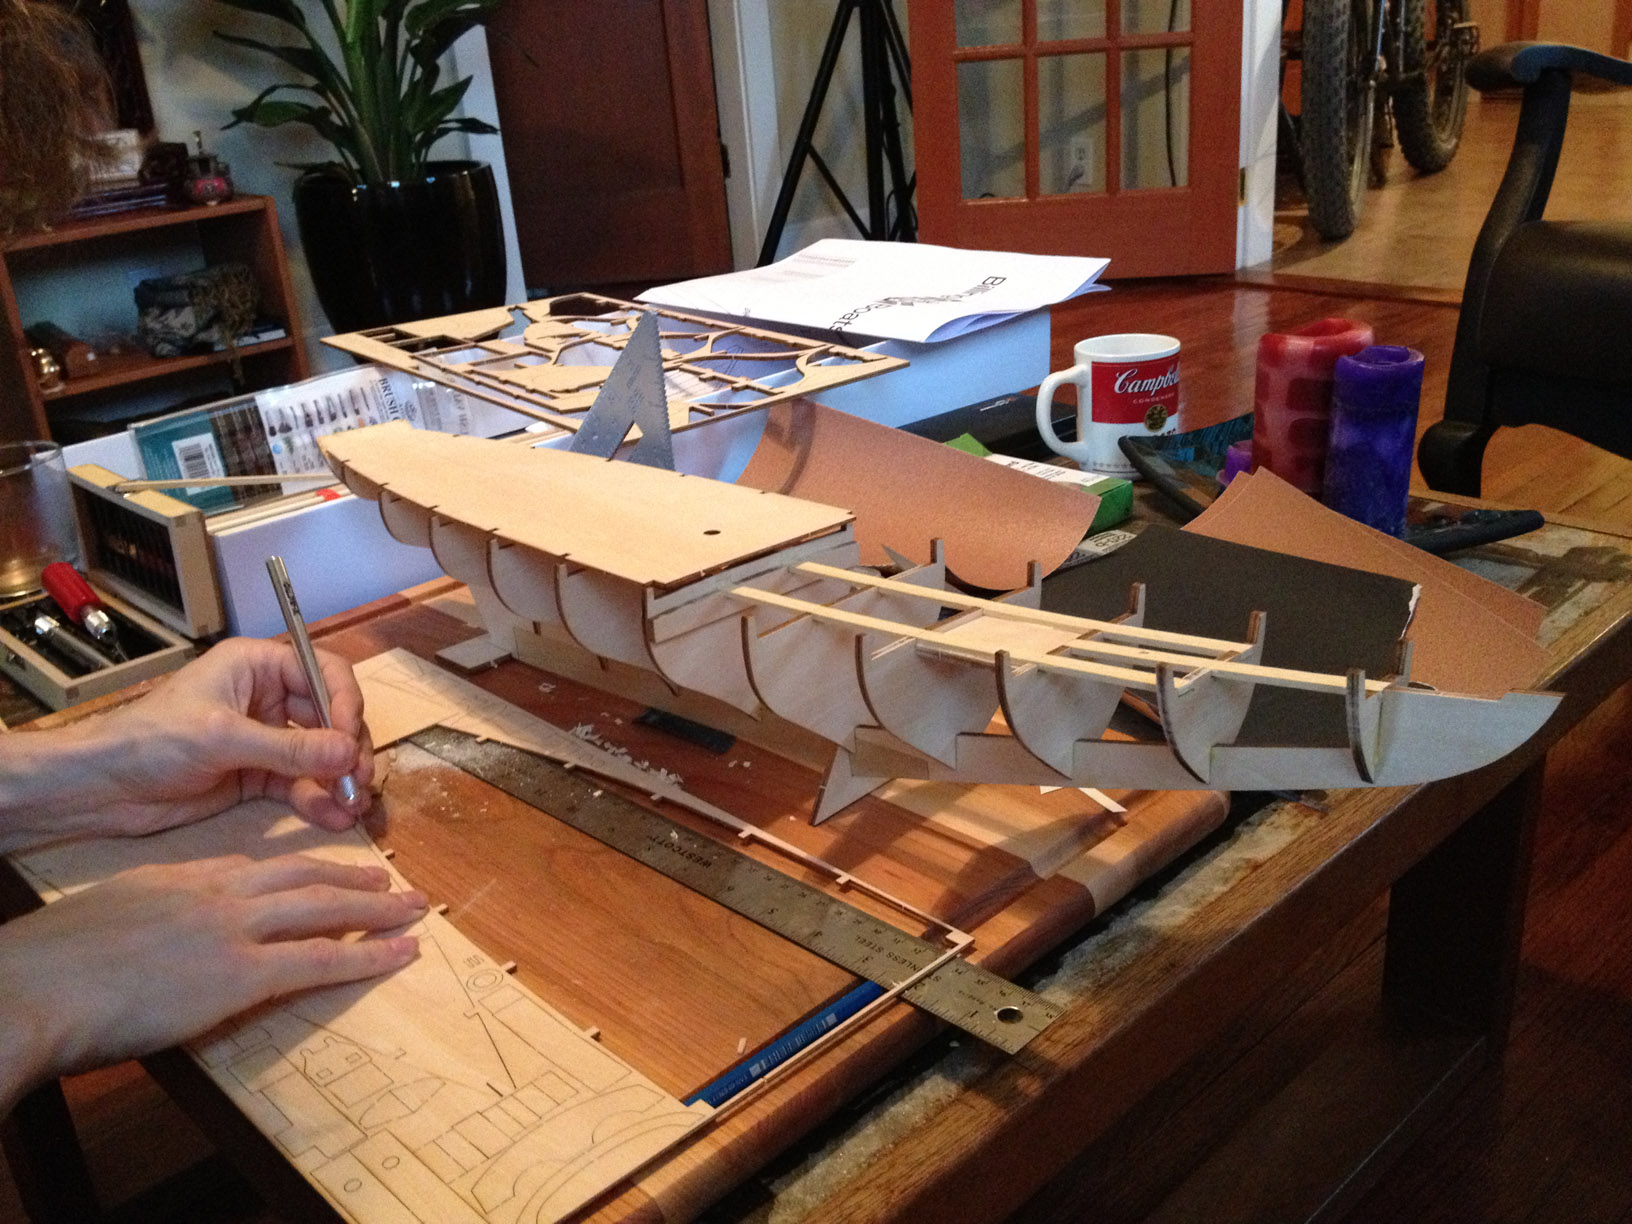
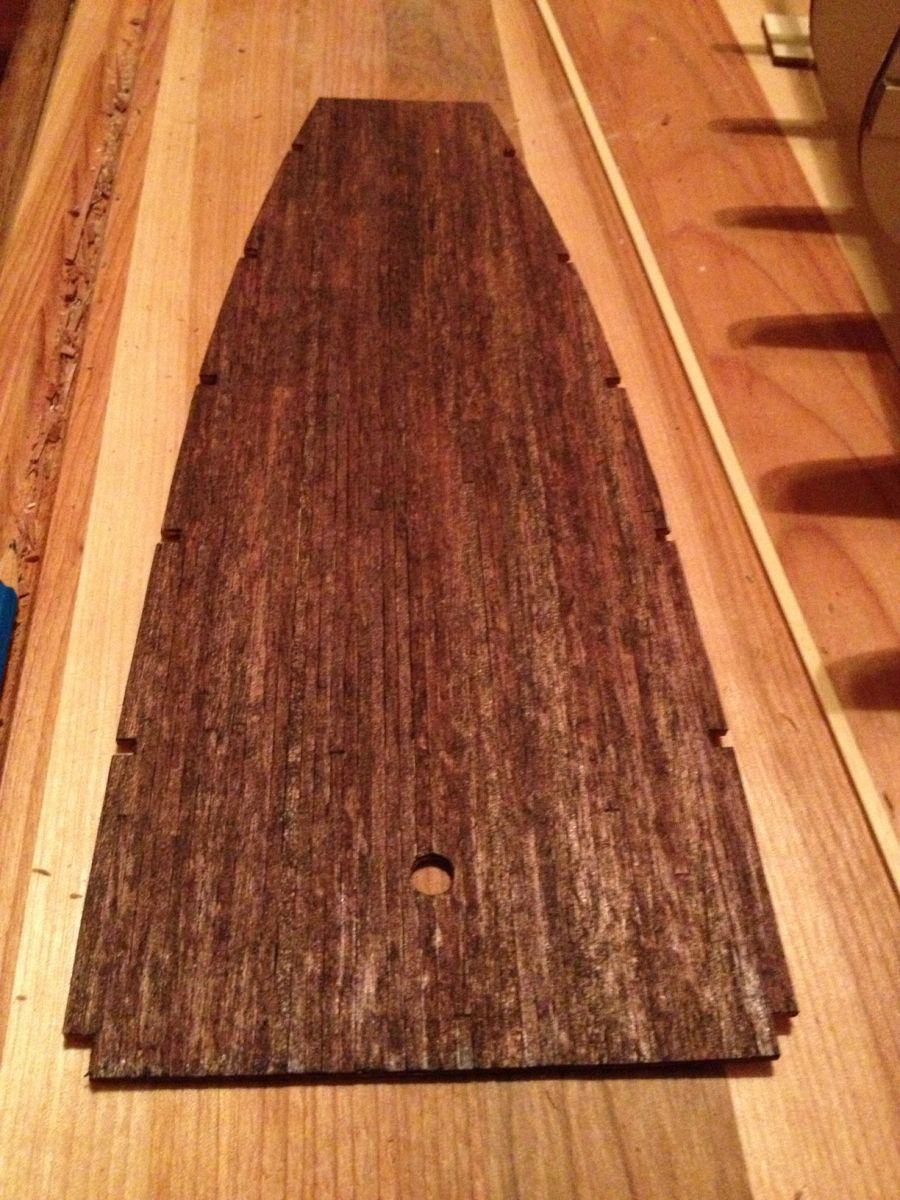
With the 'frame' done it was on to planking. I did the decks before installing them since it seemed way easier to cover them then trim off any excess without them being attached to anything. The decks were pretty straight forward to do and compared to a lot of other parts fairly quick to finish despite the deck planks only being 3mm wide each.


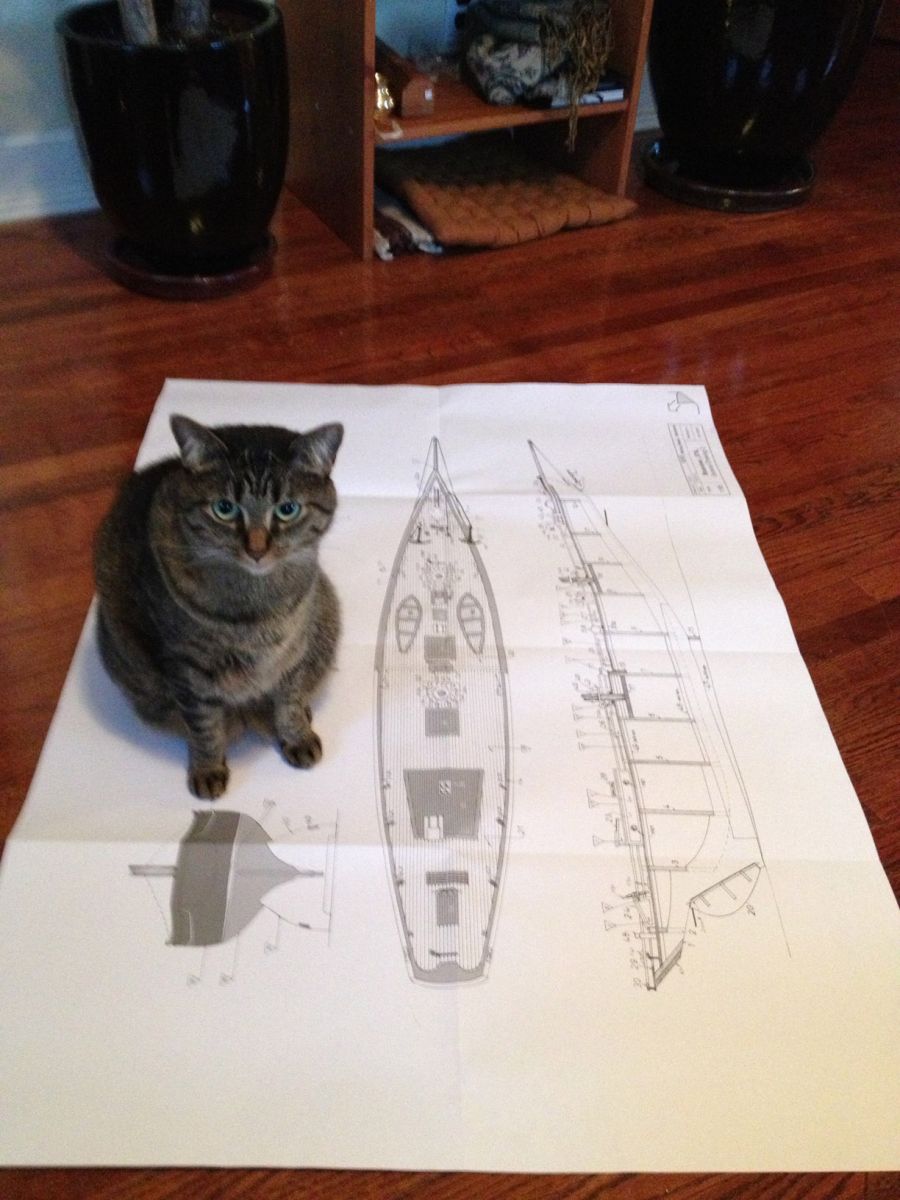
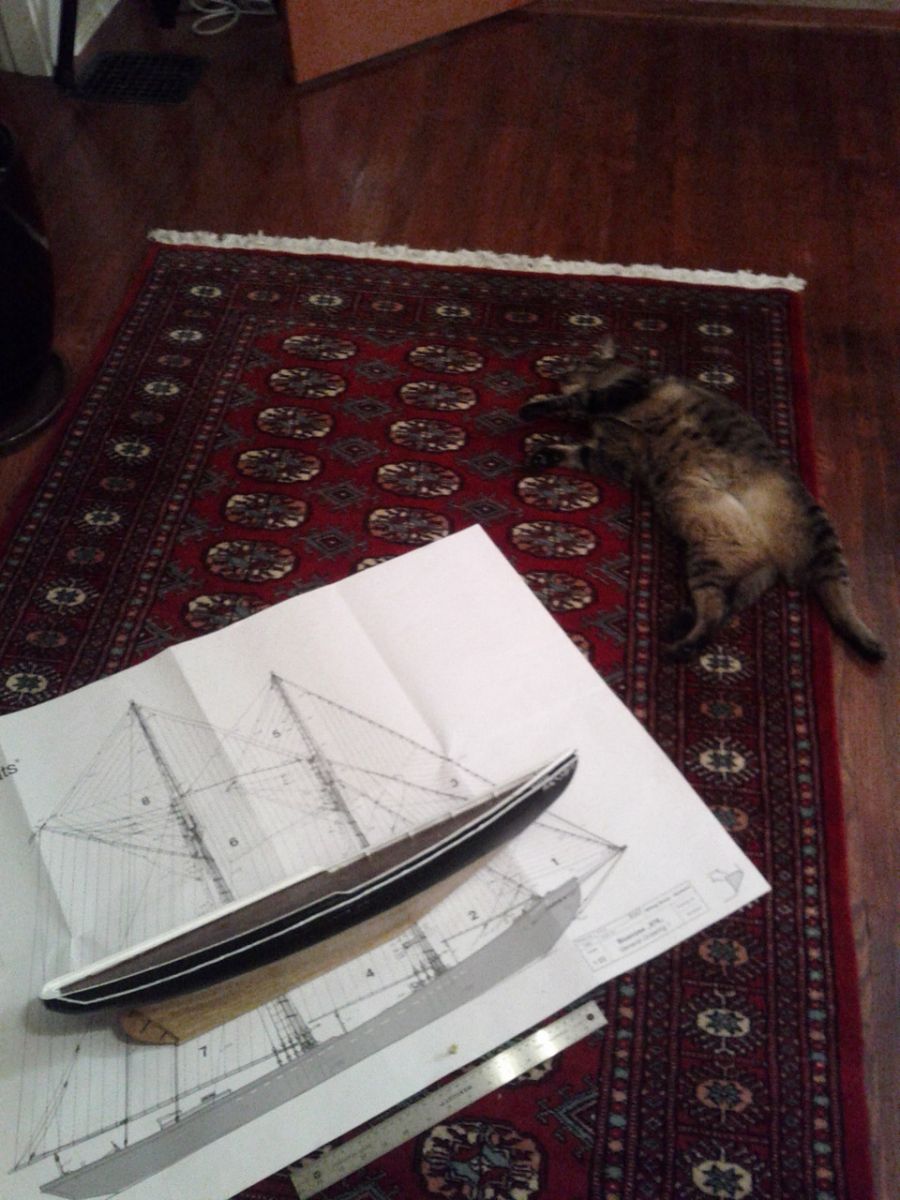
Chali Cat oversaw the progress and enjoys reading blue prints.


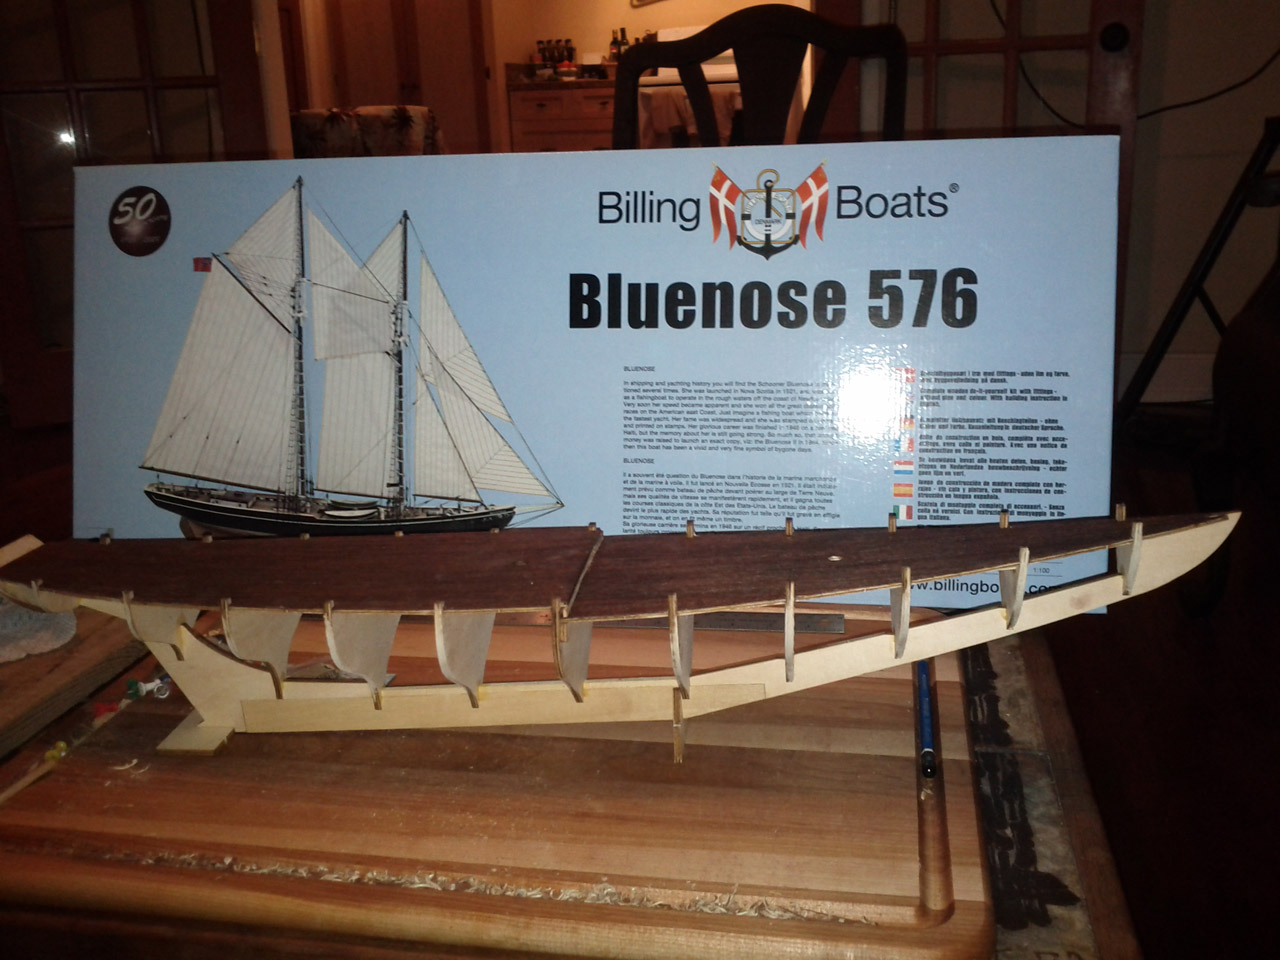
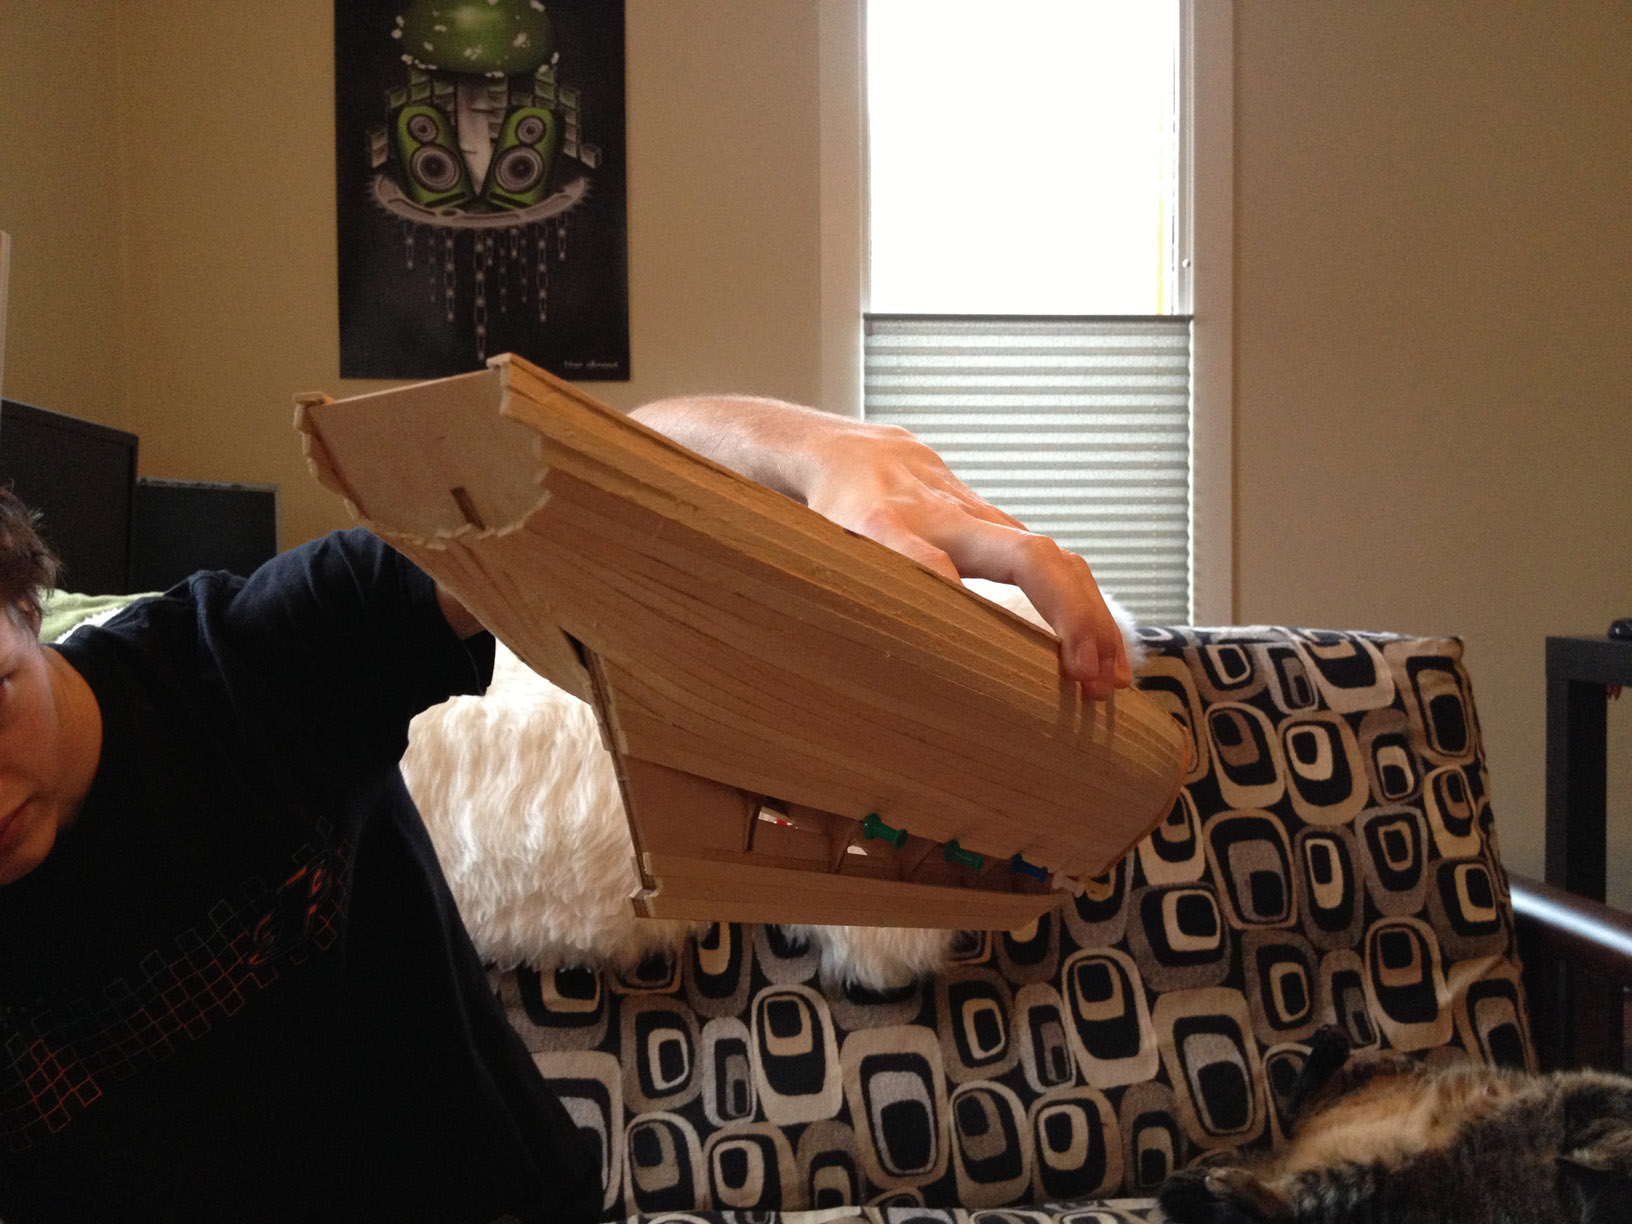
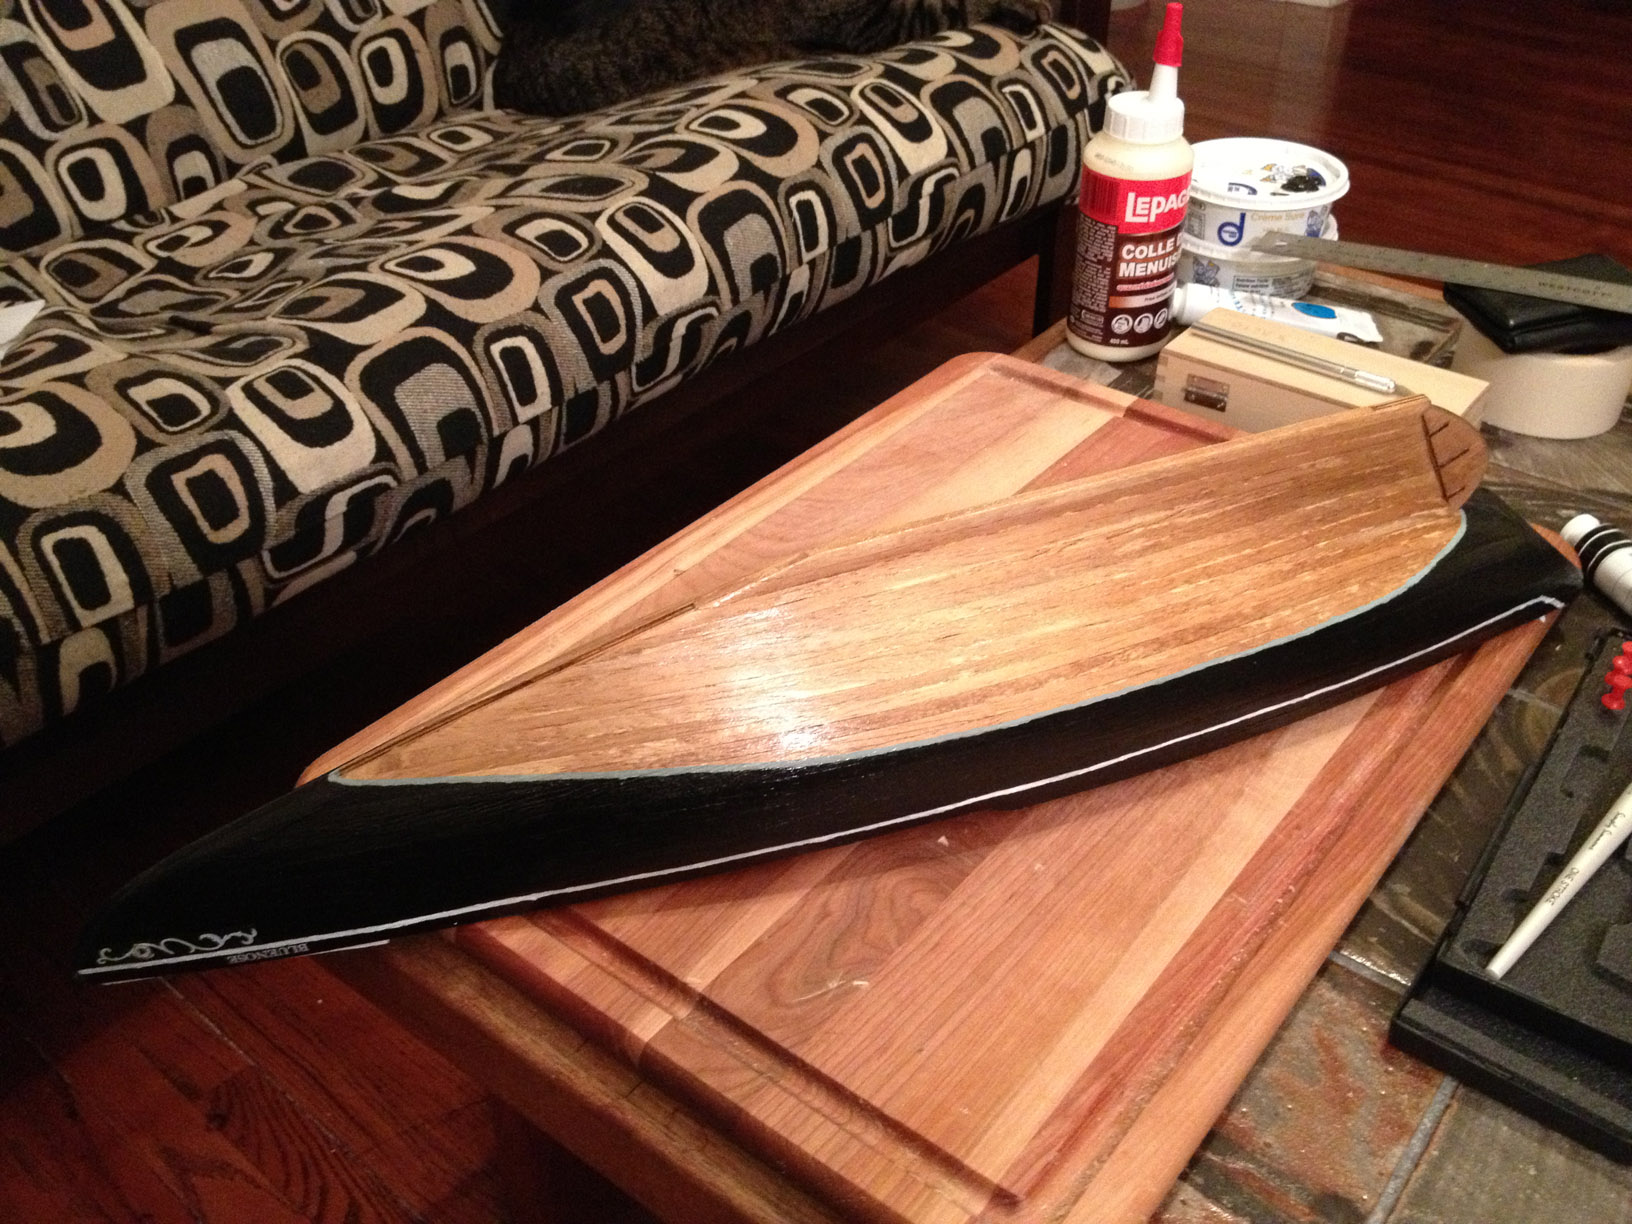
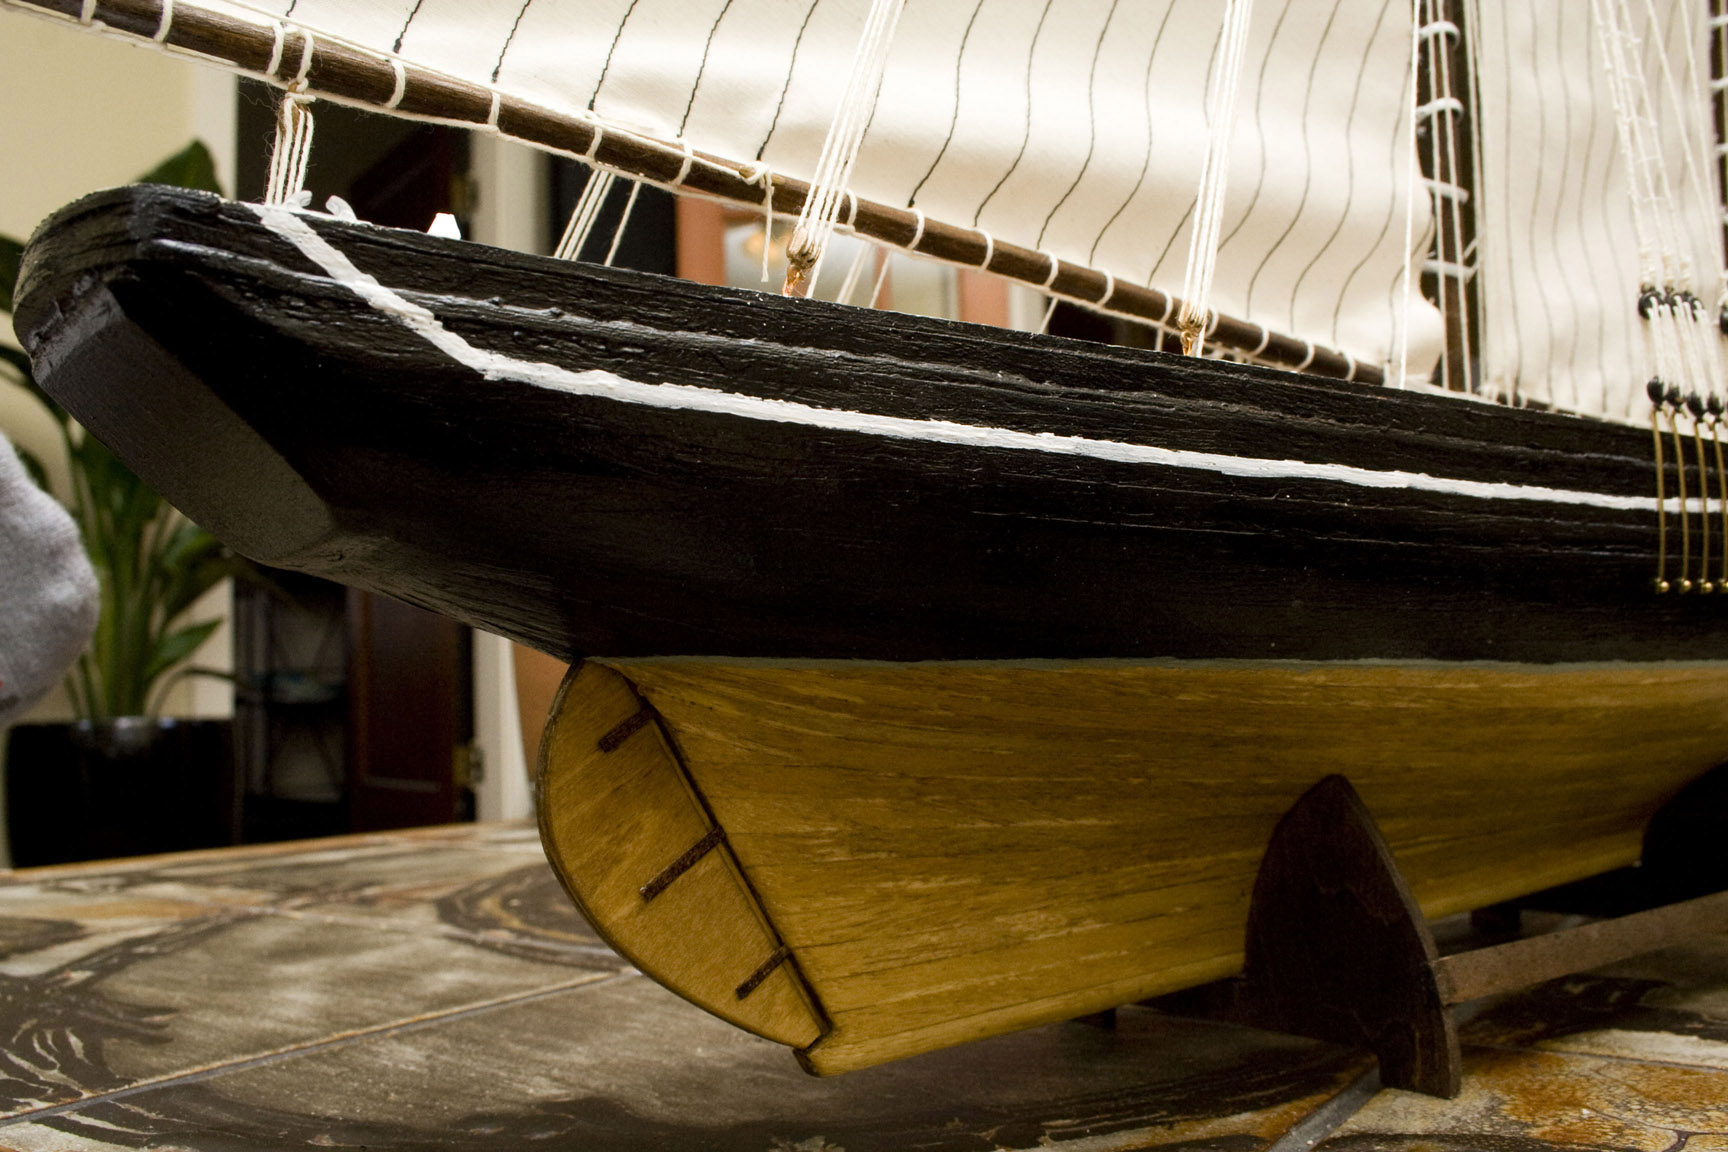
I was a little slow getting into the hull planking because I had no idea how to do it properly. After probably 5 hours of research and reading a 45 page document on planking model ships at least 3 times I said "fuck it" and just went at it. Planking is seriously slow. Almost every board needed to be beveled to fit tightly with the adjacent boards and most of them needed some serious work bending them over a candle to get the right shape. Once the board is glued on you need to pin it down and wait for it to dry before starting another one. You're supposed to alternate one board at a time from starboard to port to make sure that they stay even. By the time I had a pair done the glue was dry enough to start back on the first side again. Quite a bit more internet trolling was done while planking to get an idea of how the stern of the ship was supposed to fit together. The lack of instructions really forces you to assume a lot of things when it comes to tapering, beveling and shaping a lot of the pieces.


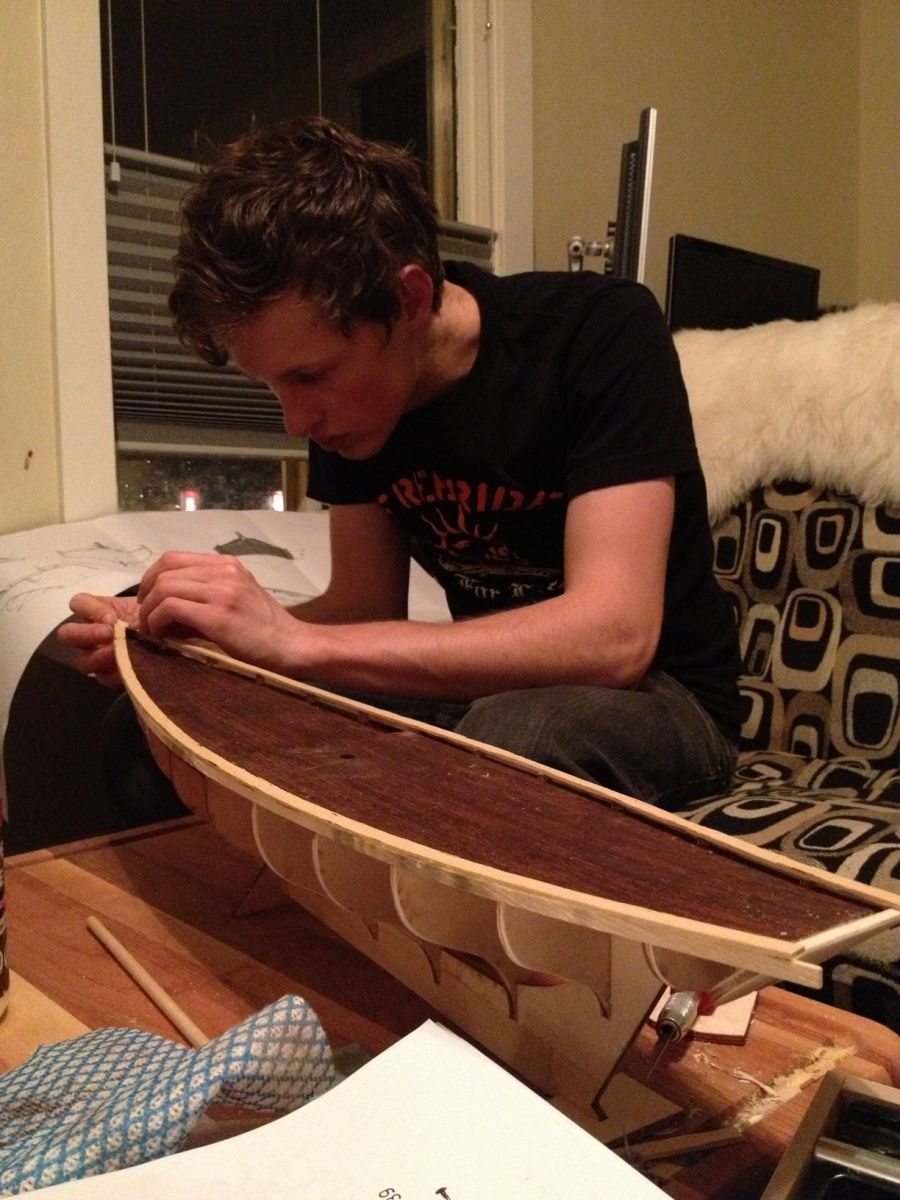
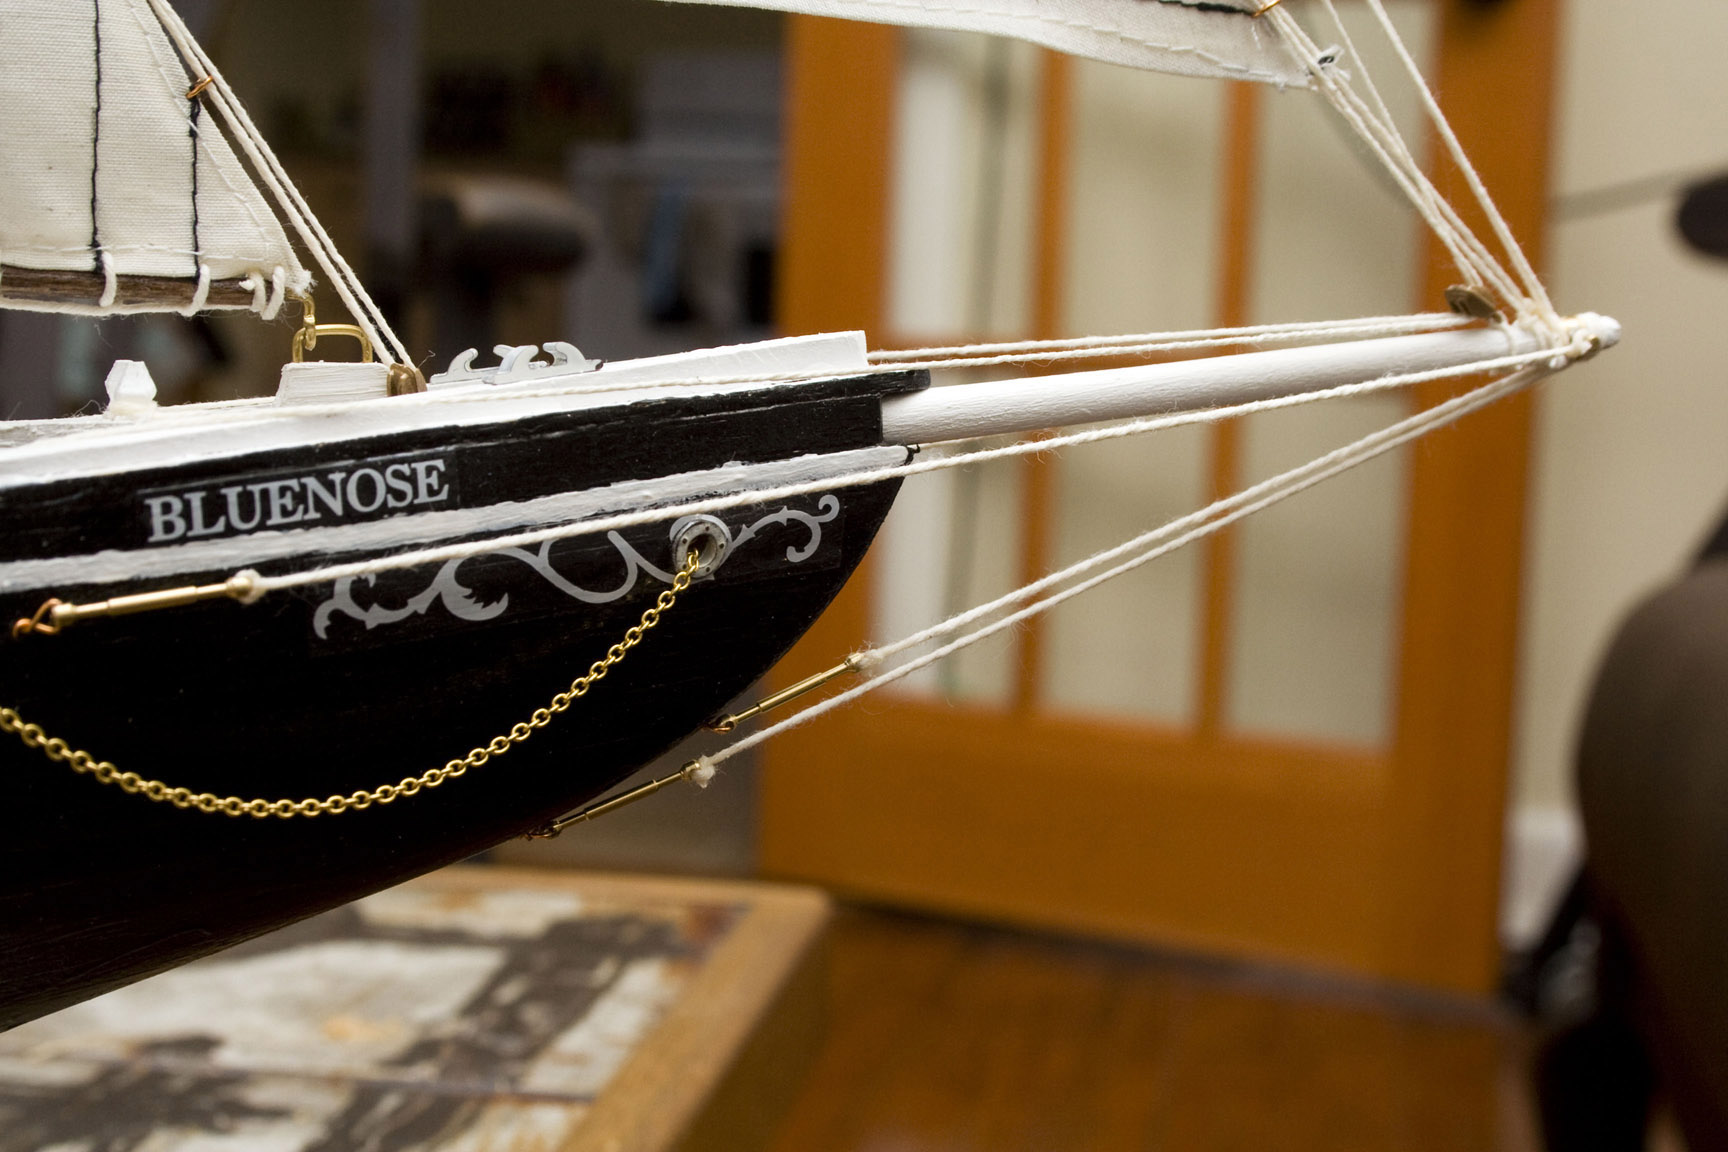
I'm pretty sure it took about 20 minutes on average per hull plank so it was pretty sweet when I was finished and got to sand everything. Things fit together pretty tight and I only needed a few tiny dabs of wood filler to smooth things out. Once the handrails were installed it was time to give things a paint job and clear coat the hull.


According to the the microwave I stayed up way too late that night.


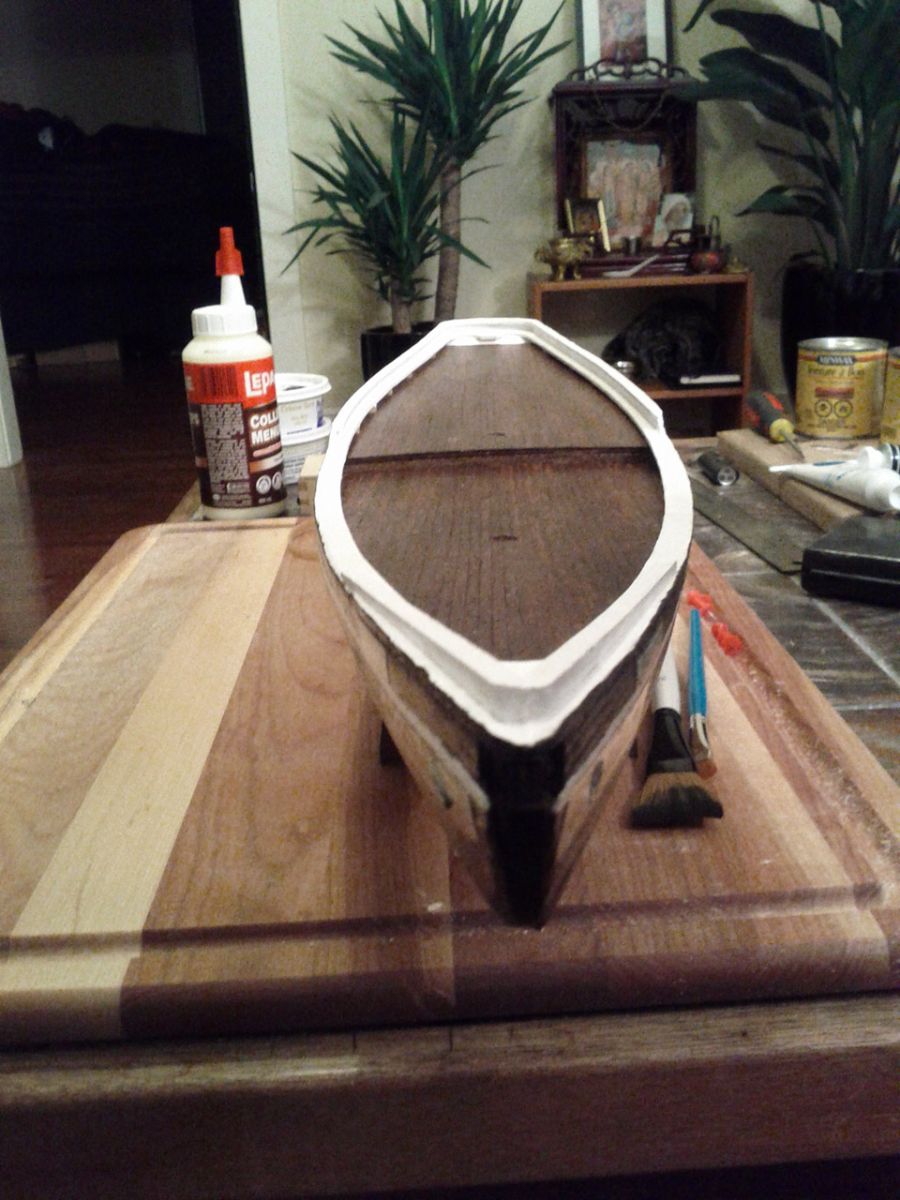
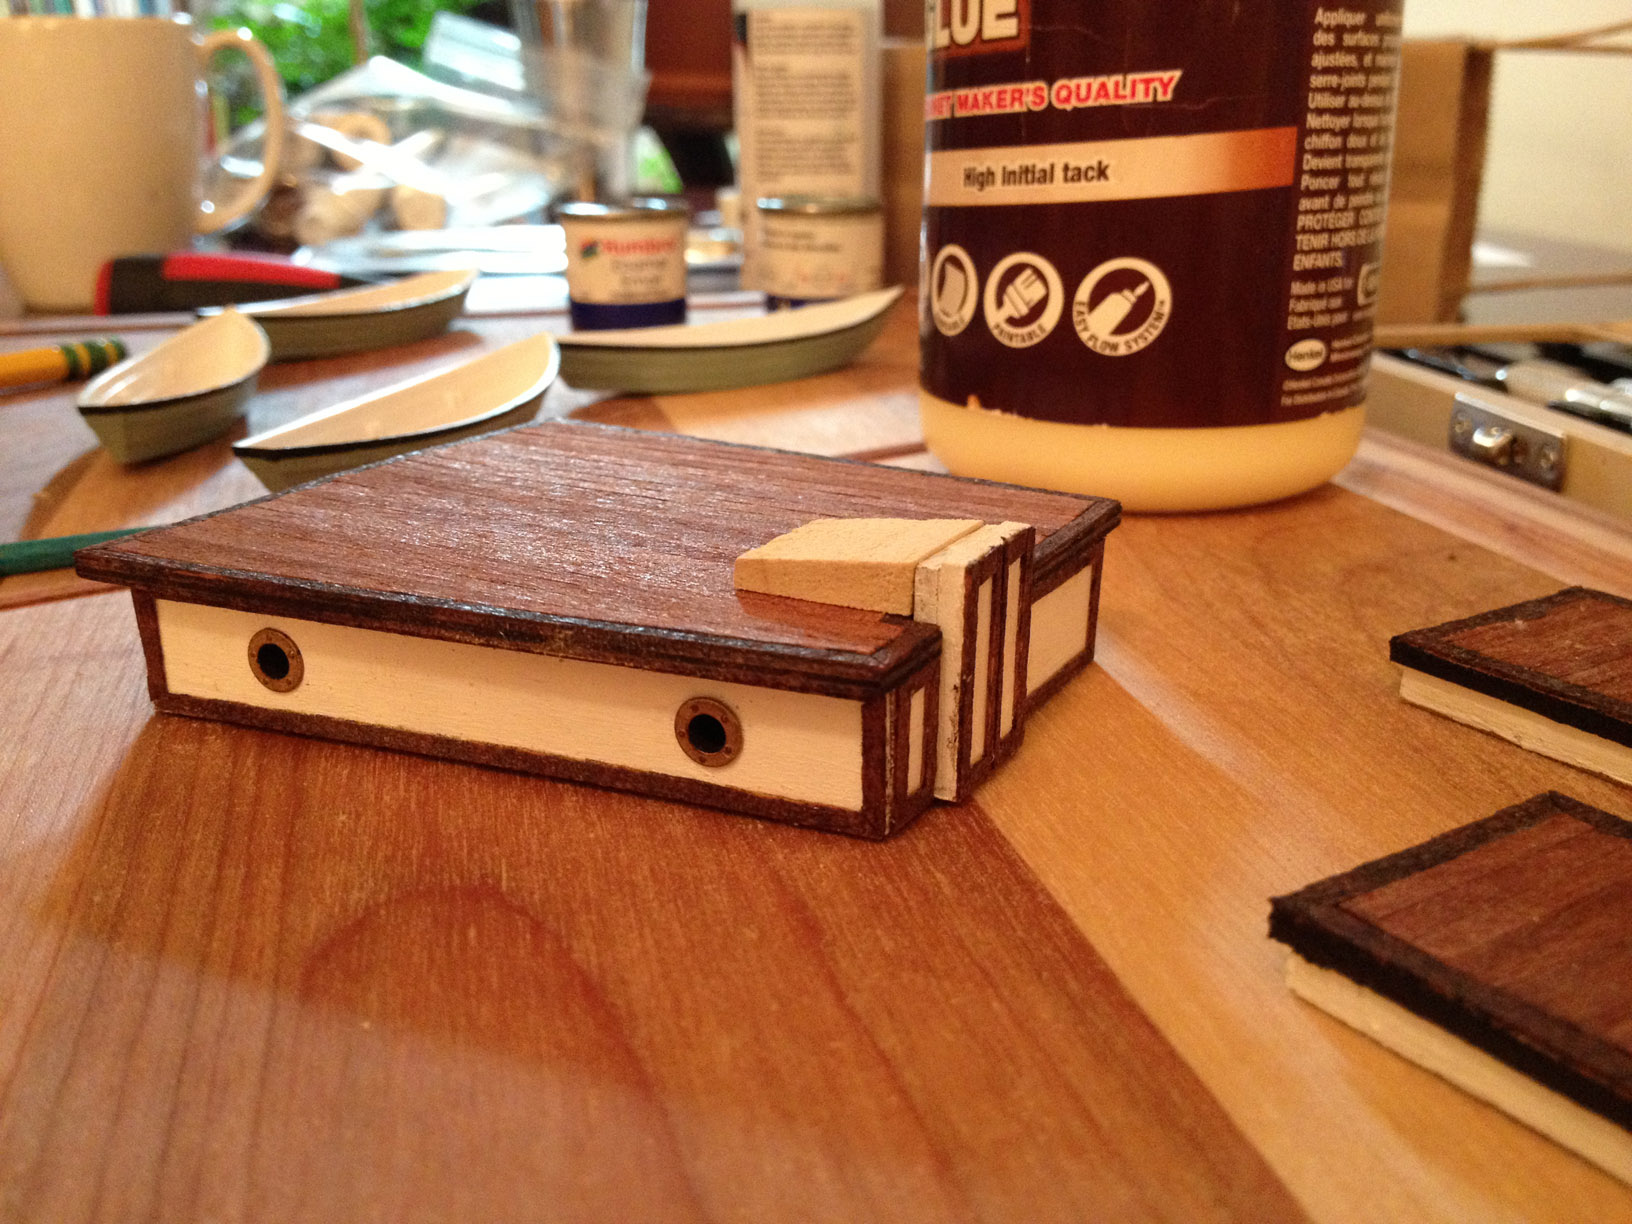
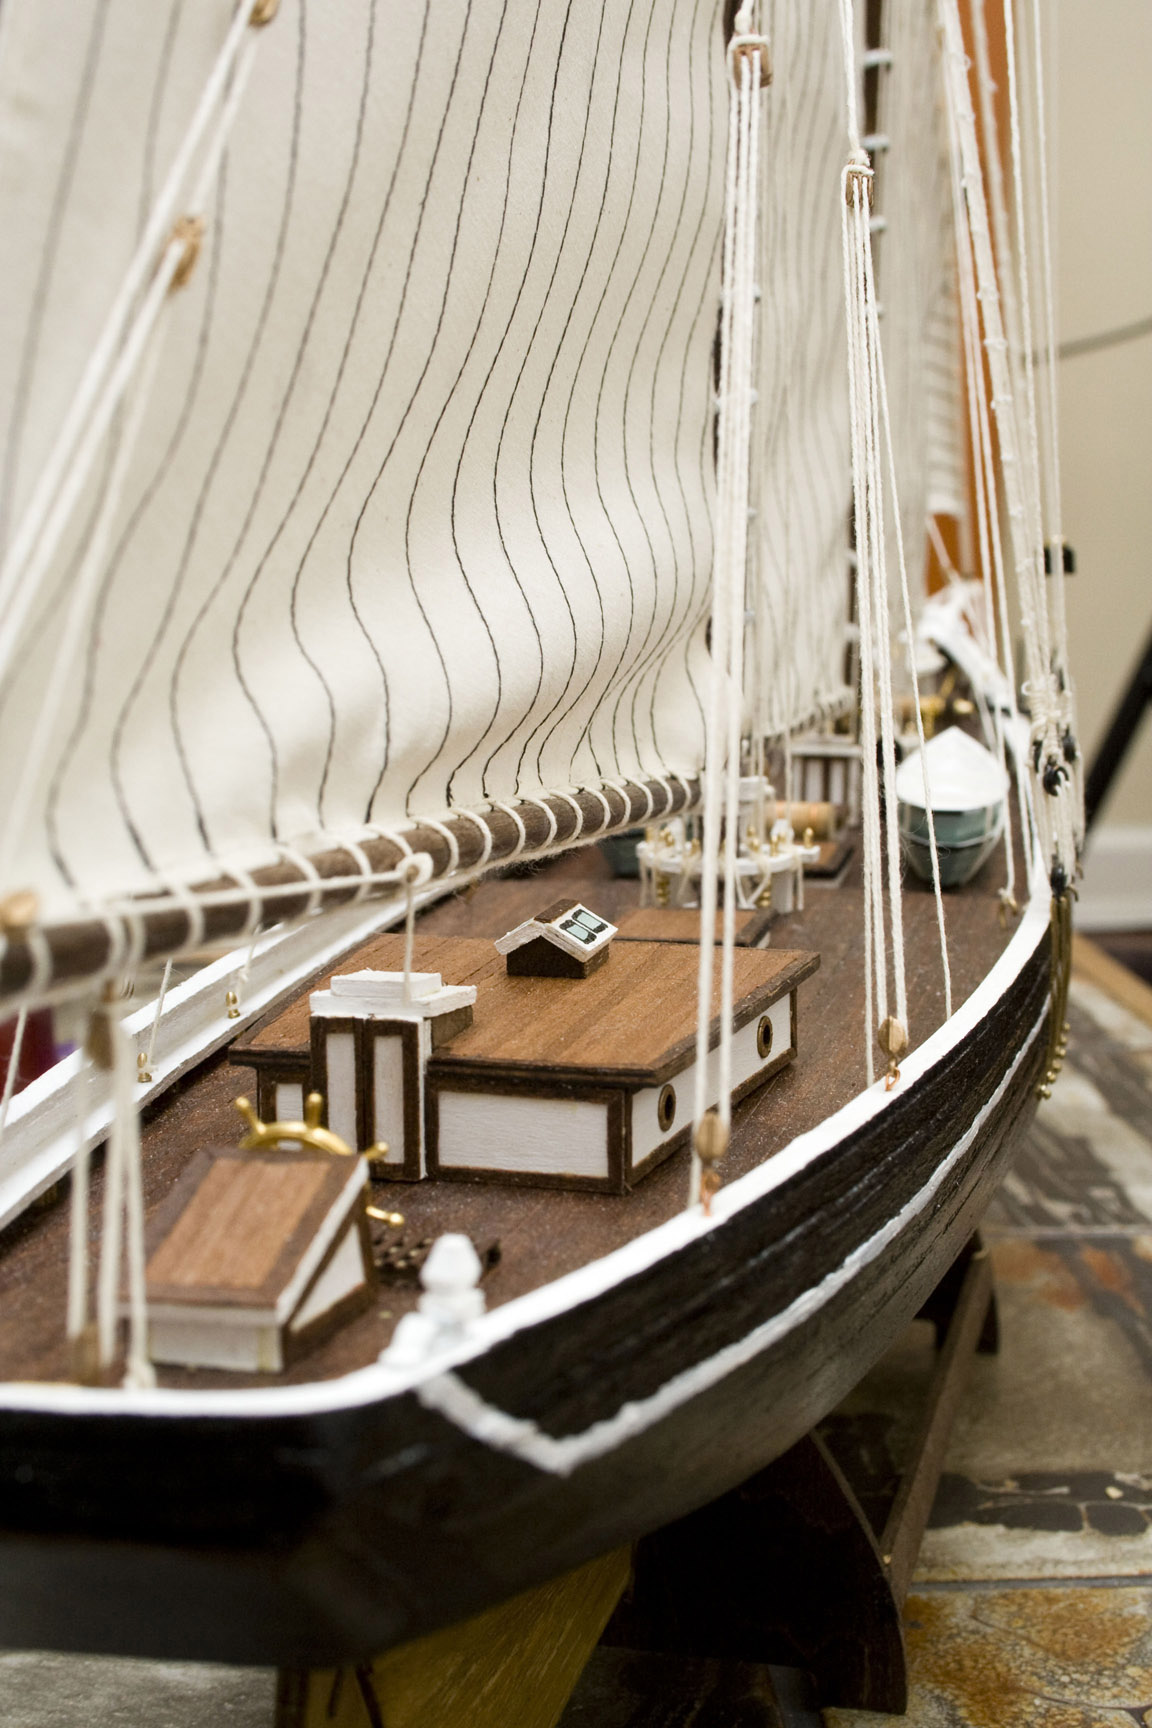
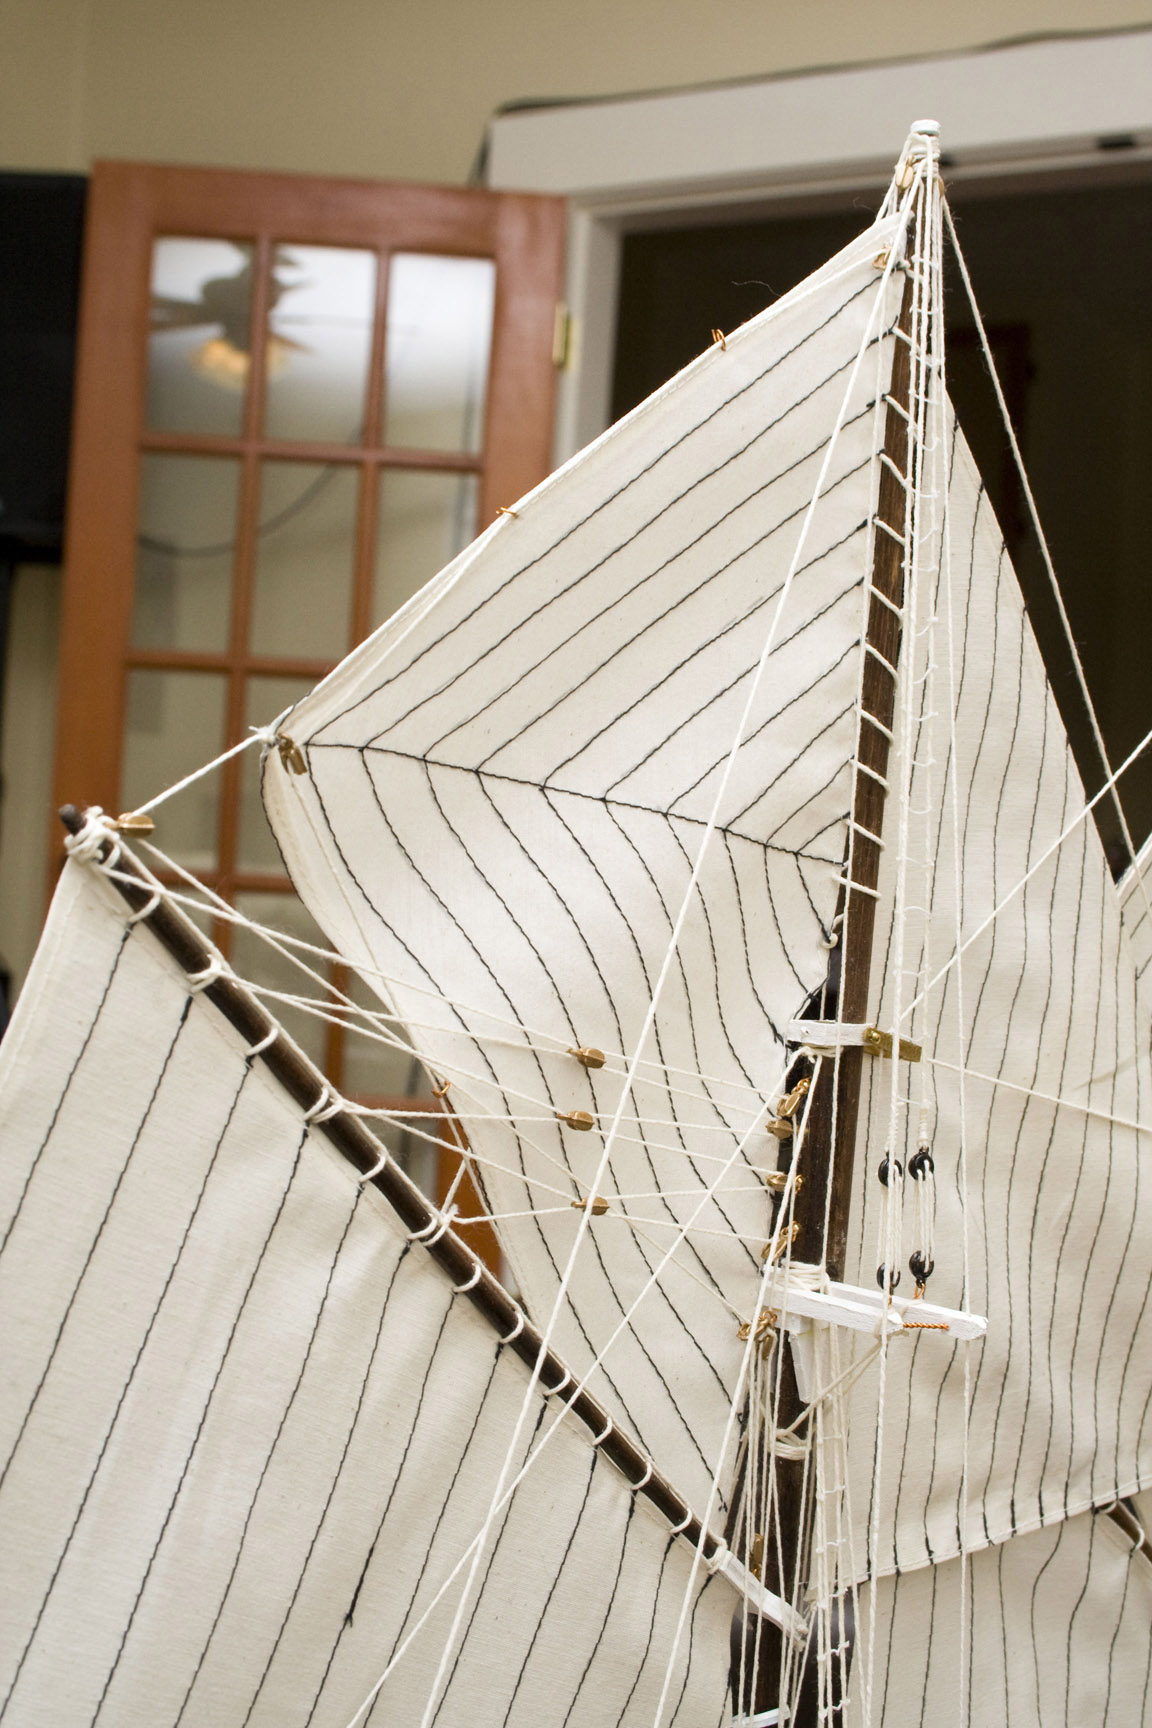
One sloppy paint job later and it was time to move on to the deck objects. Kamala stepped in and helped me with some of this stage since it was something we could work on together. Though it took longer than I had expected to get this part done it was one of the easiest. We also started painting the giant pile of fittings while we worked on cabins to make sure they would be done when I needed them. Some time during this stage we also took a trip up to Kamala's parent's house and got her mom to help us sew all of our sails.


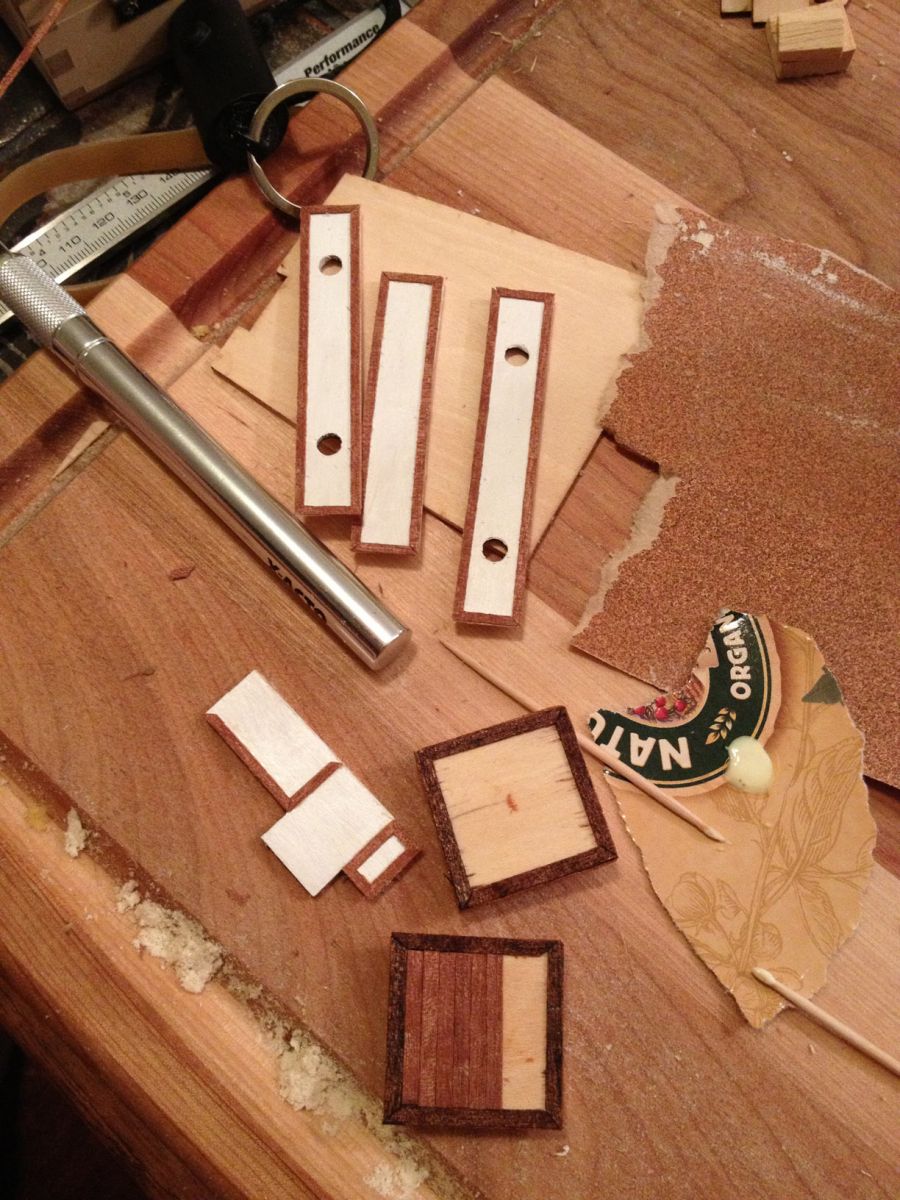
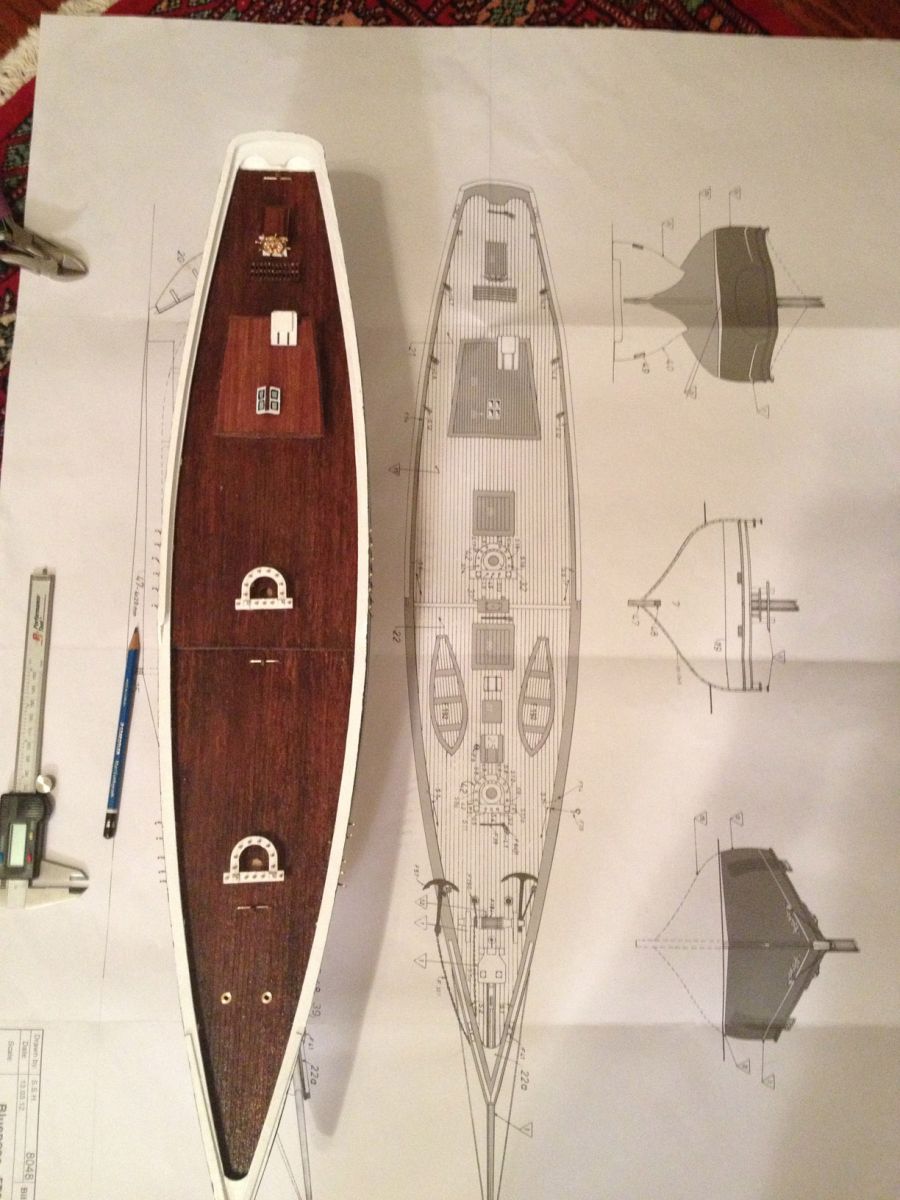
The start of the cabins. Lots of little mahogany planks involved


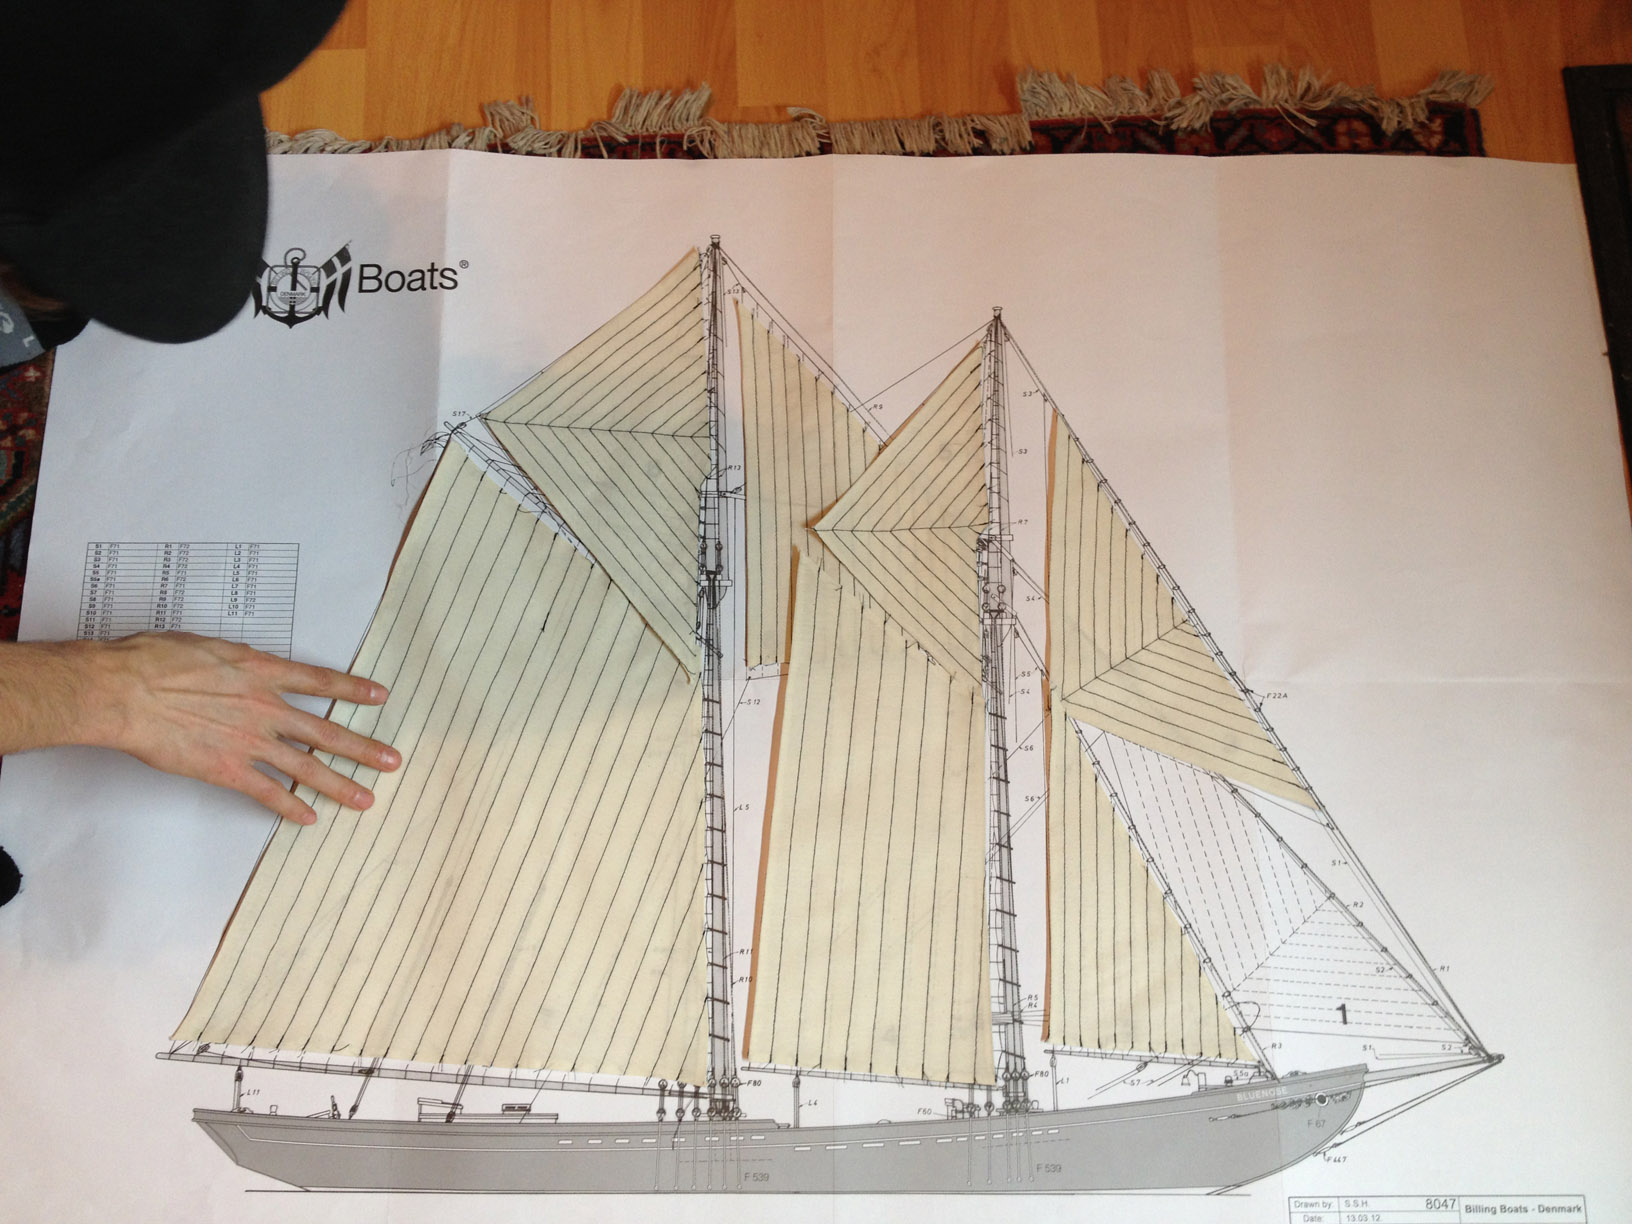
Intermission for sail making


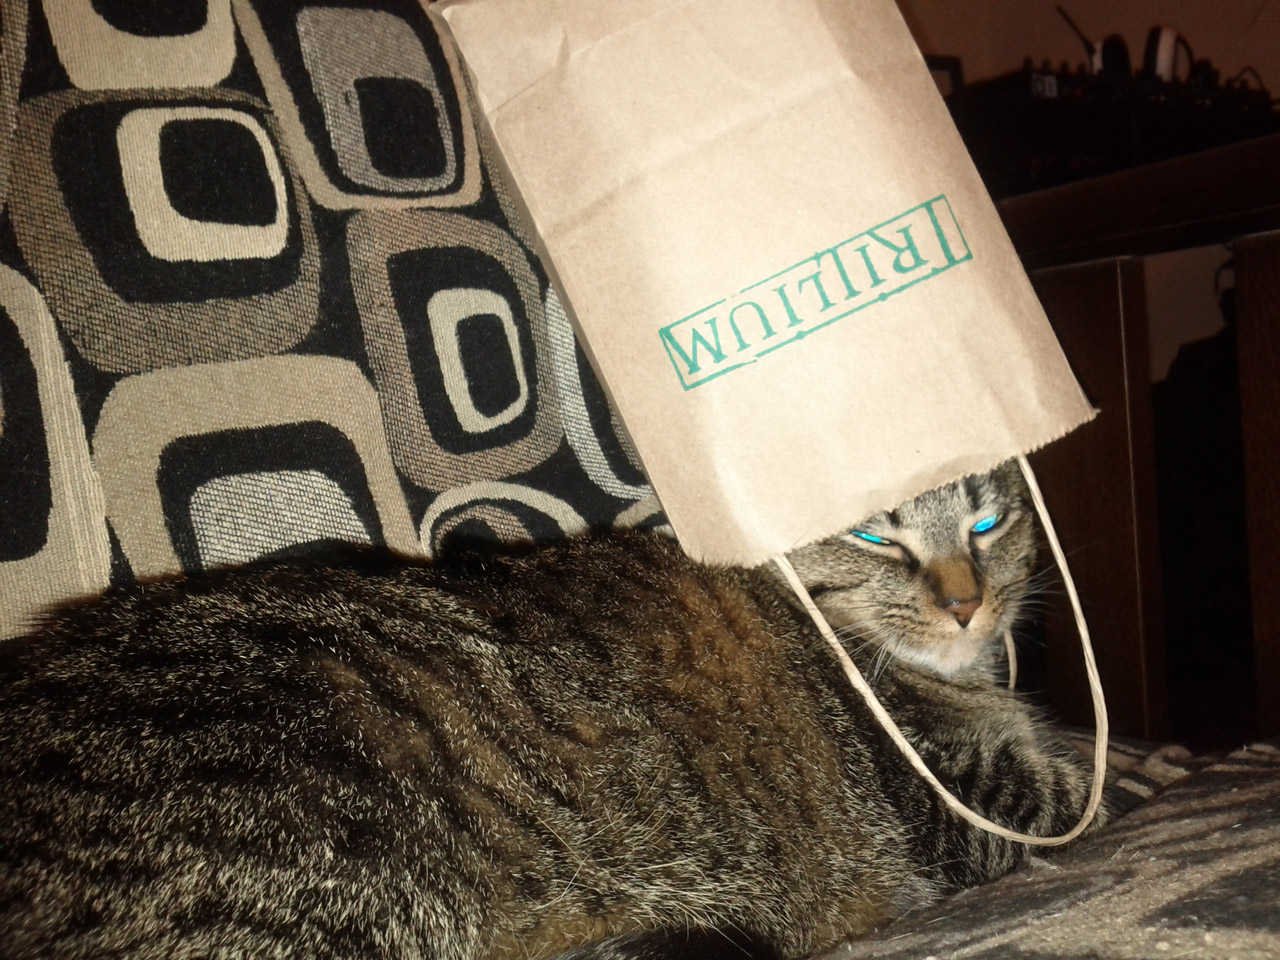
Chali receives a promotion to "Admiral Chali Cat" and continues to observe our progress. We couldn't find a proper sailors hat for her.


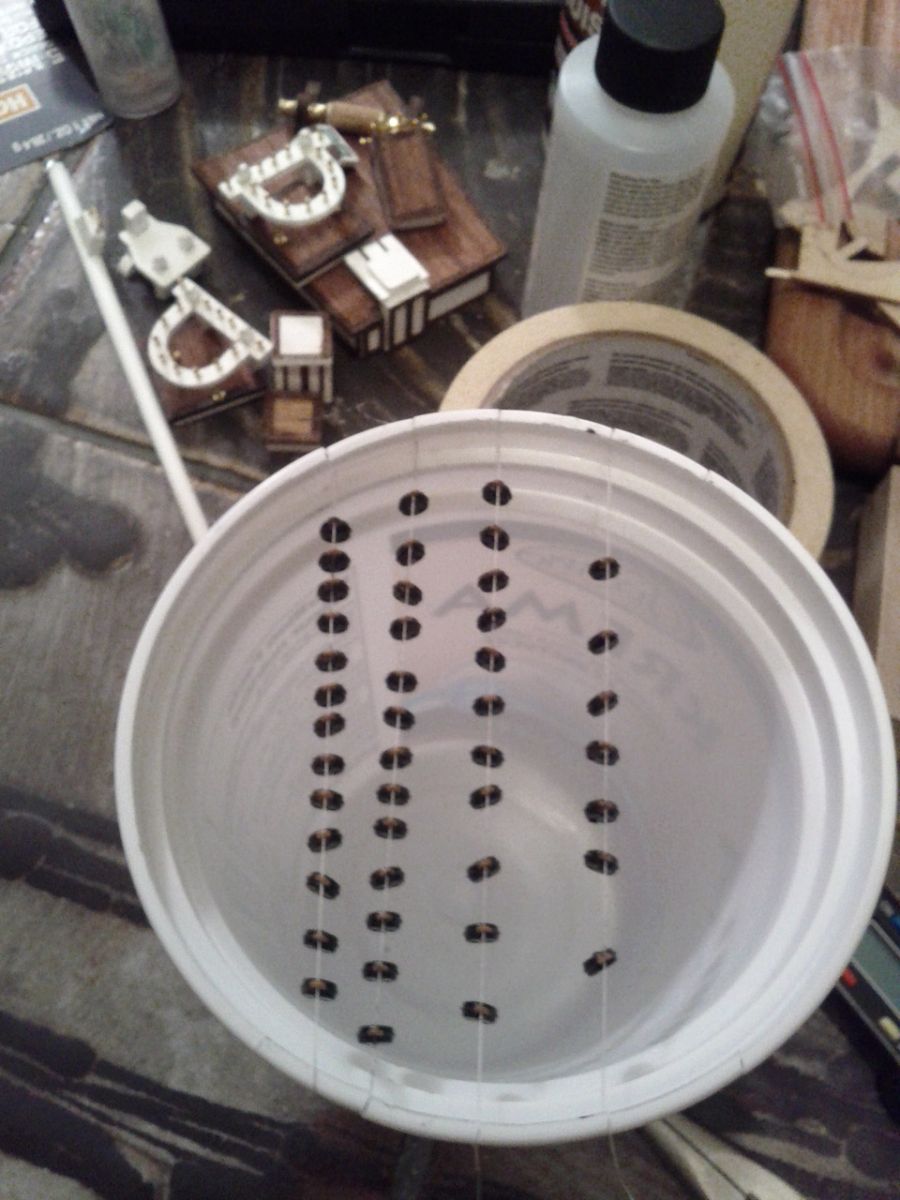
Bucket of painted fittings drying.


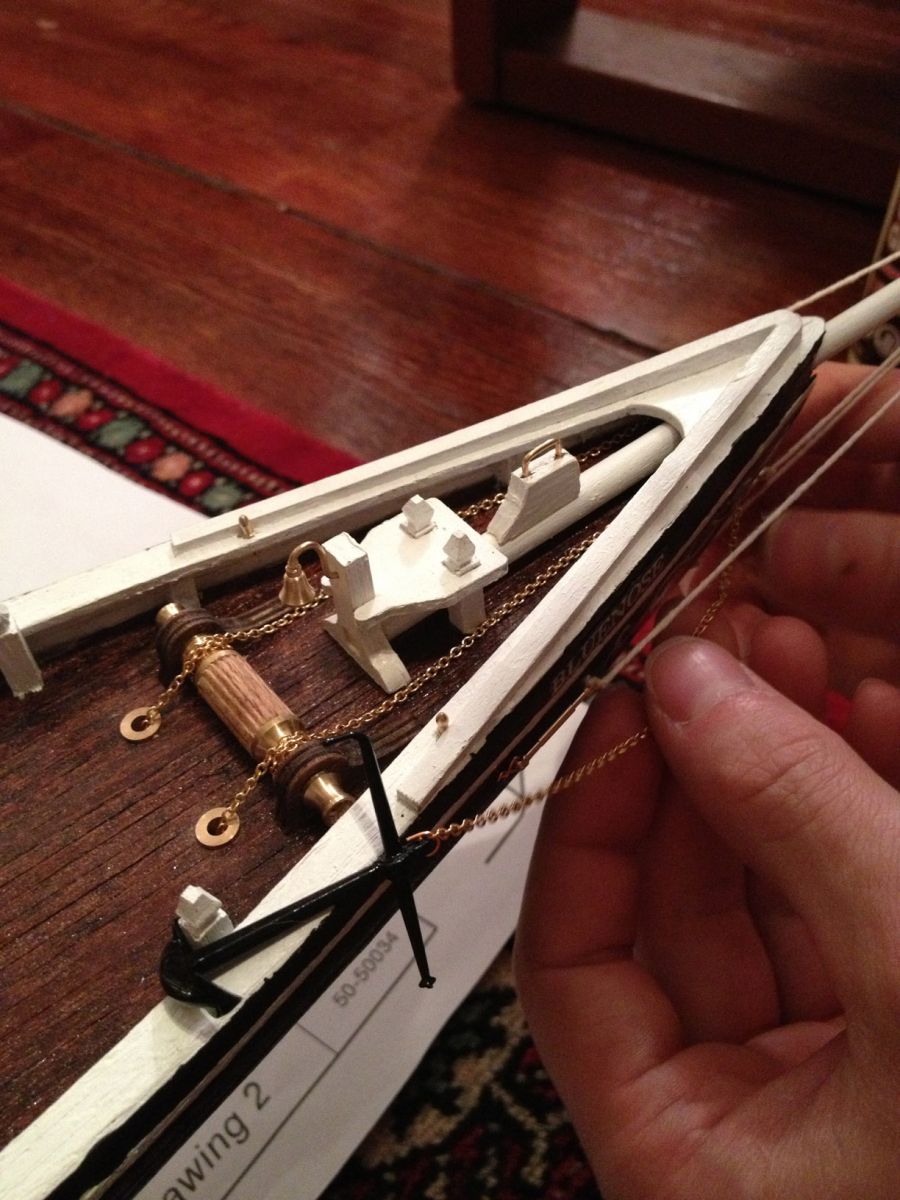
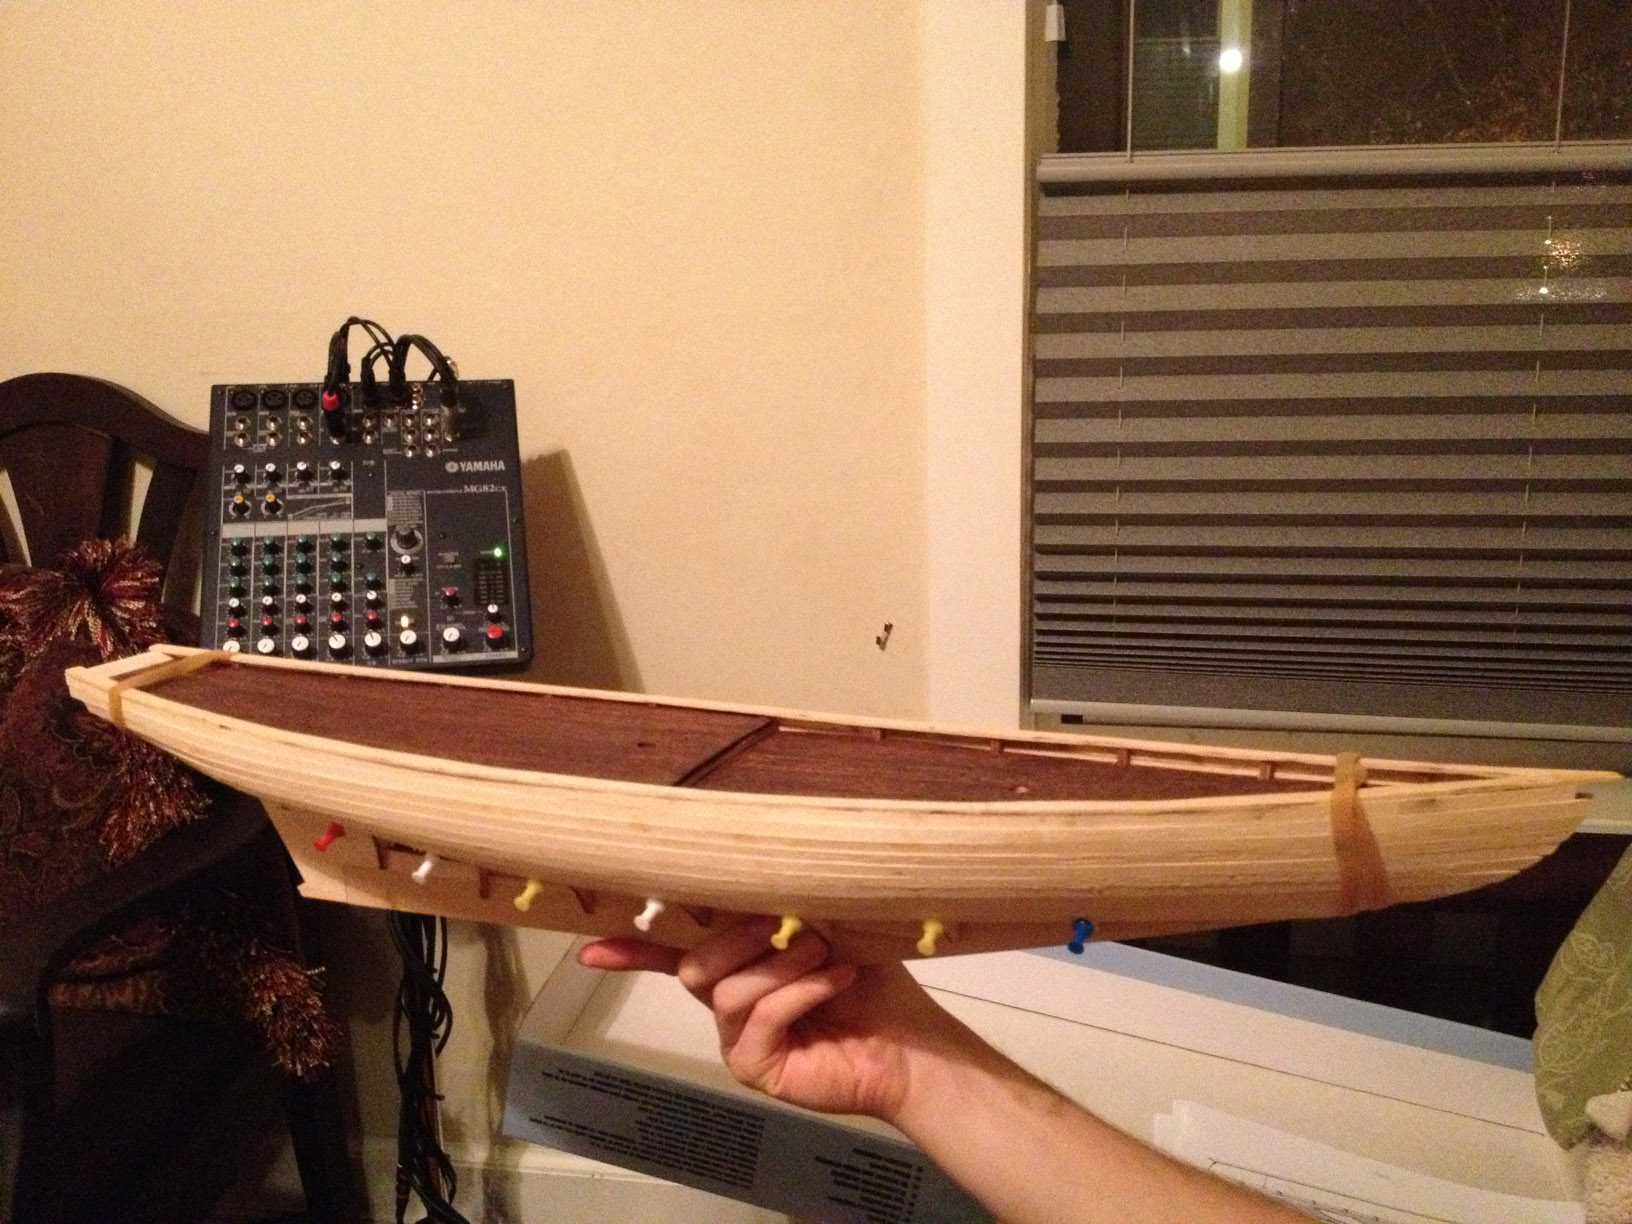
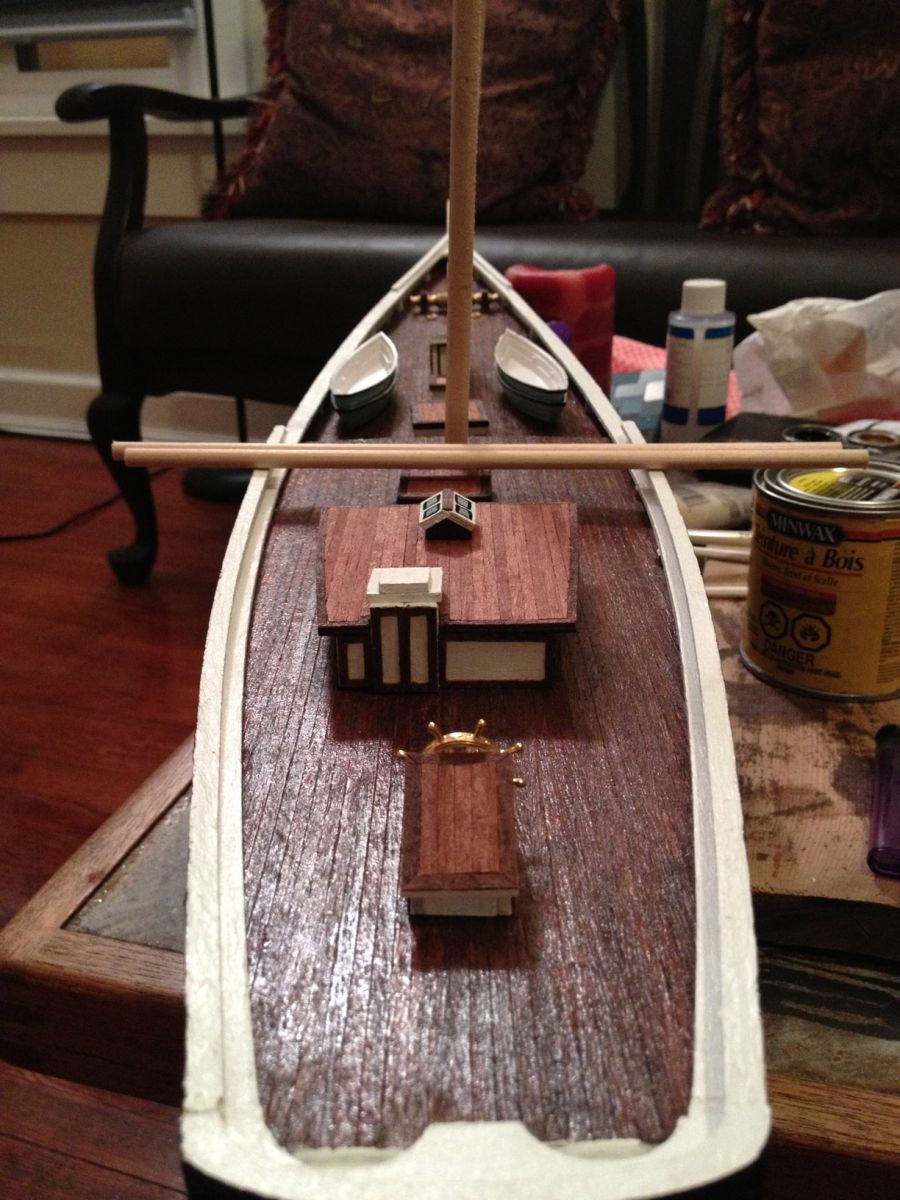
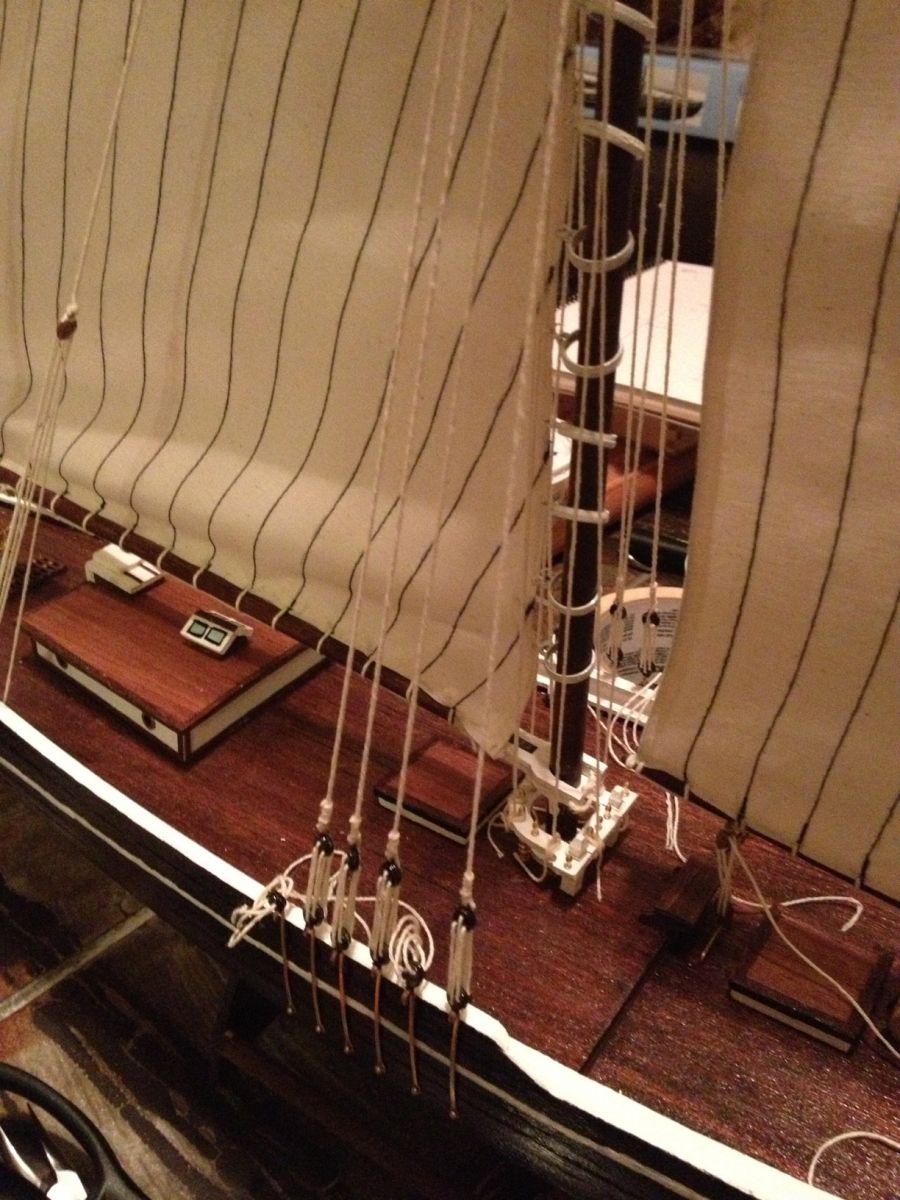
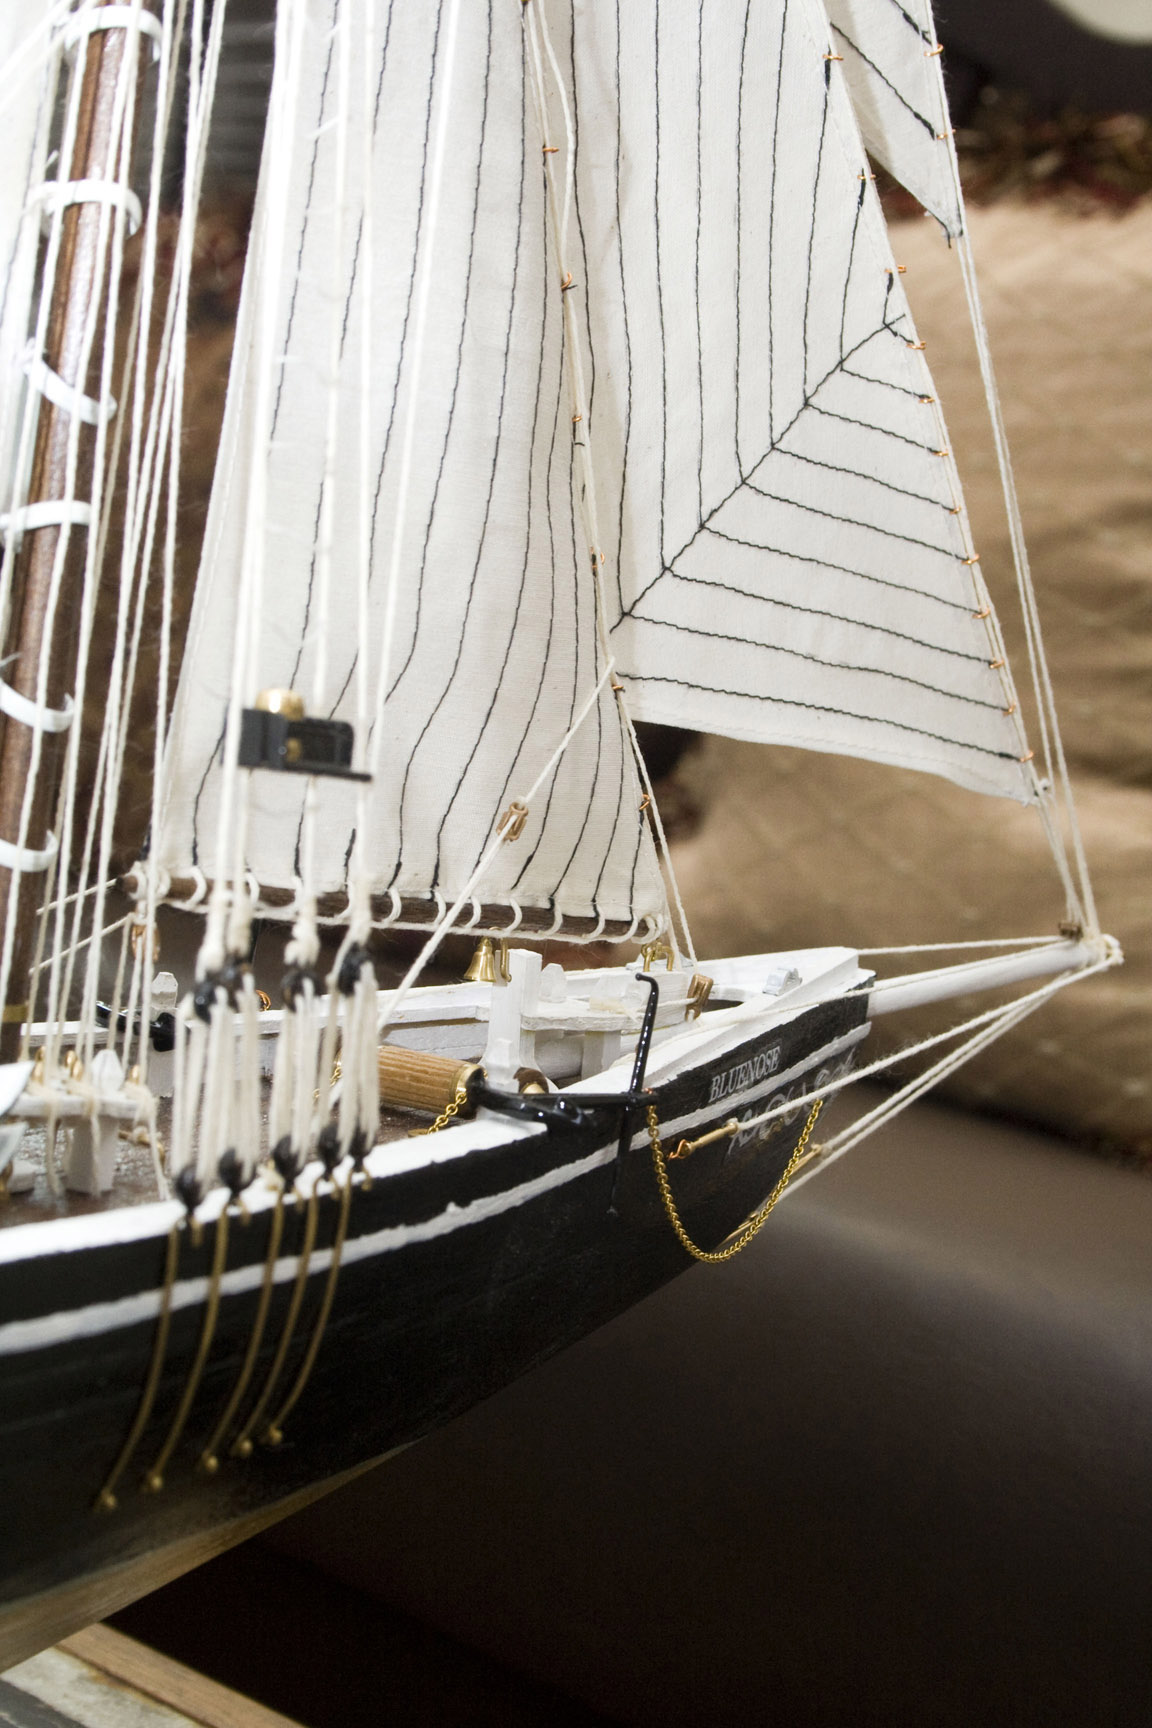
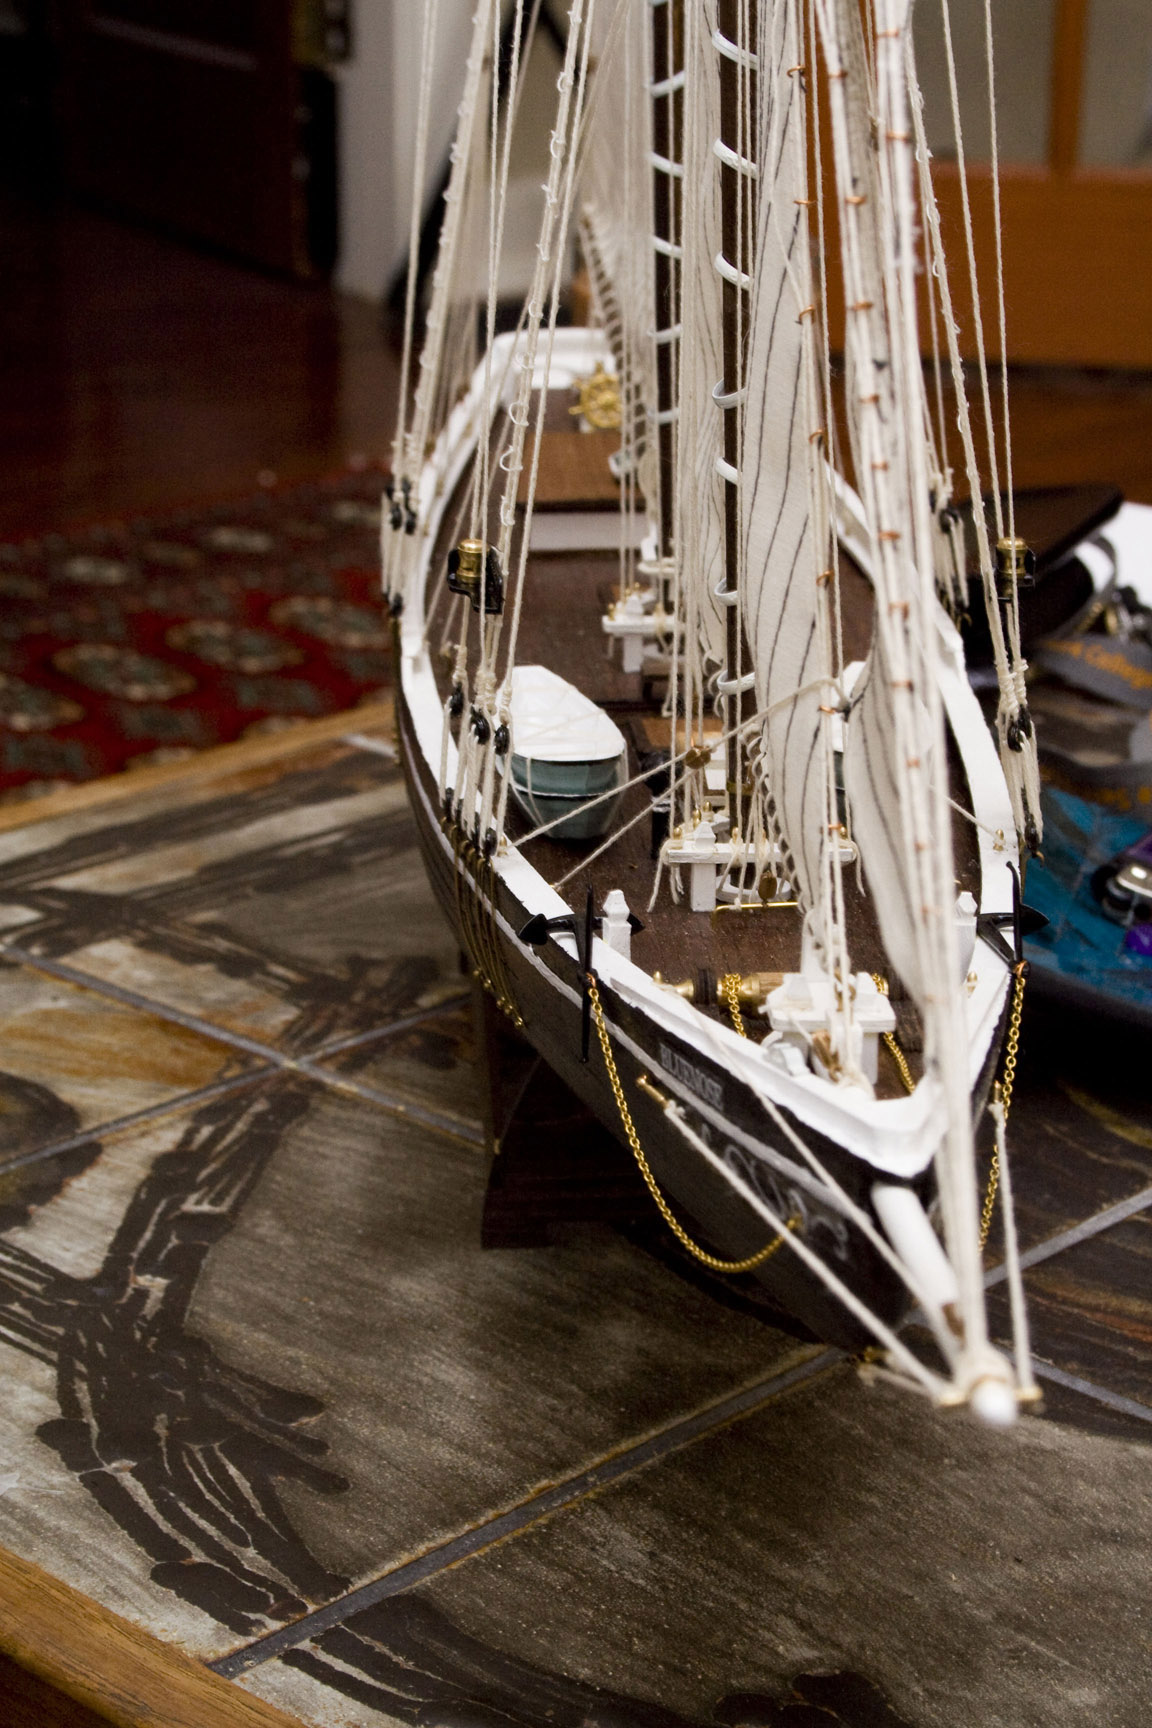
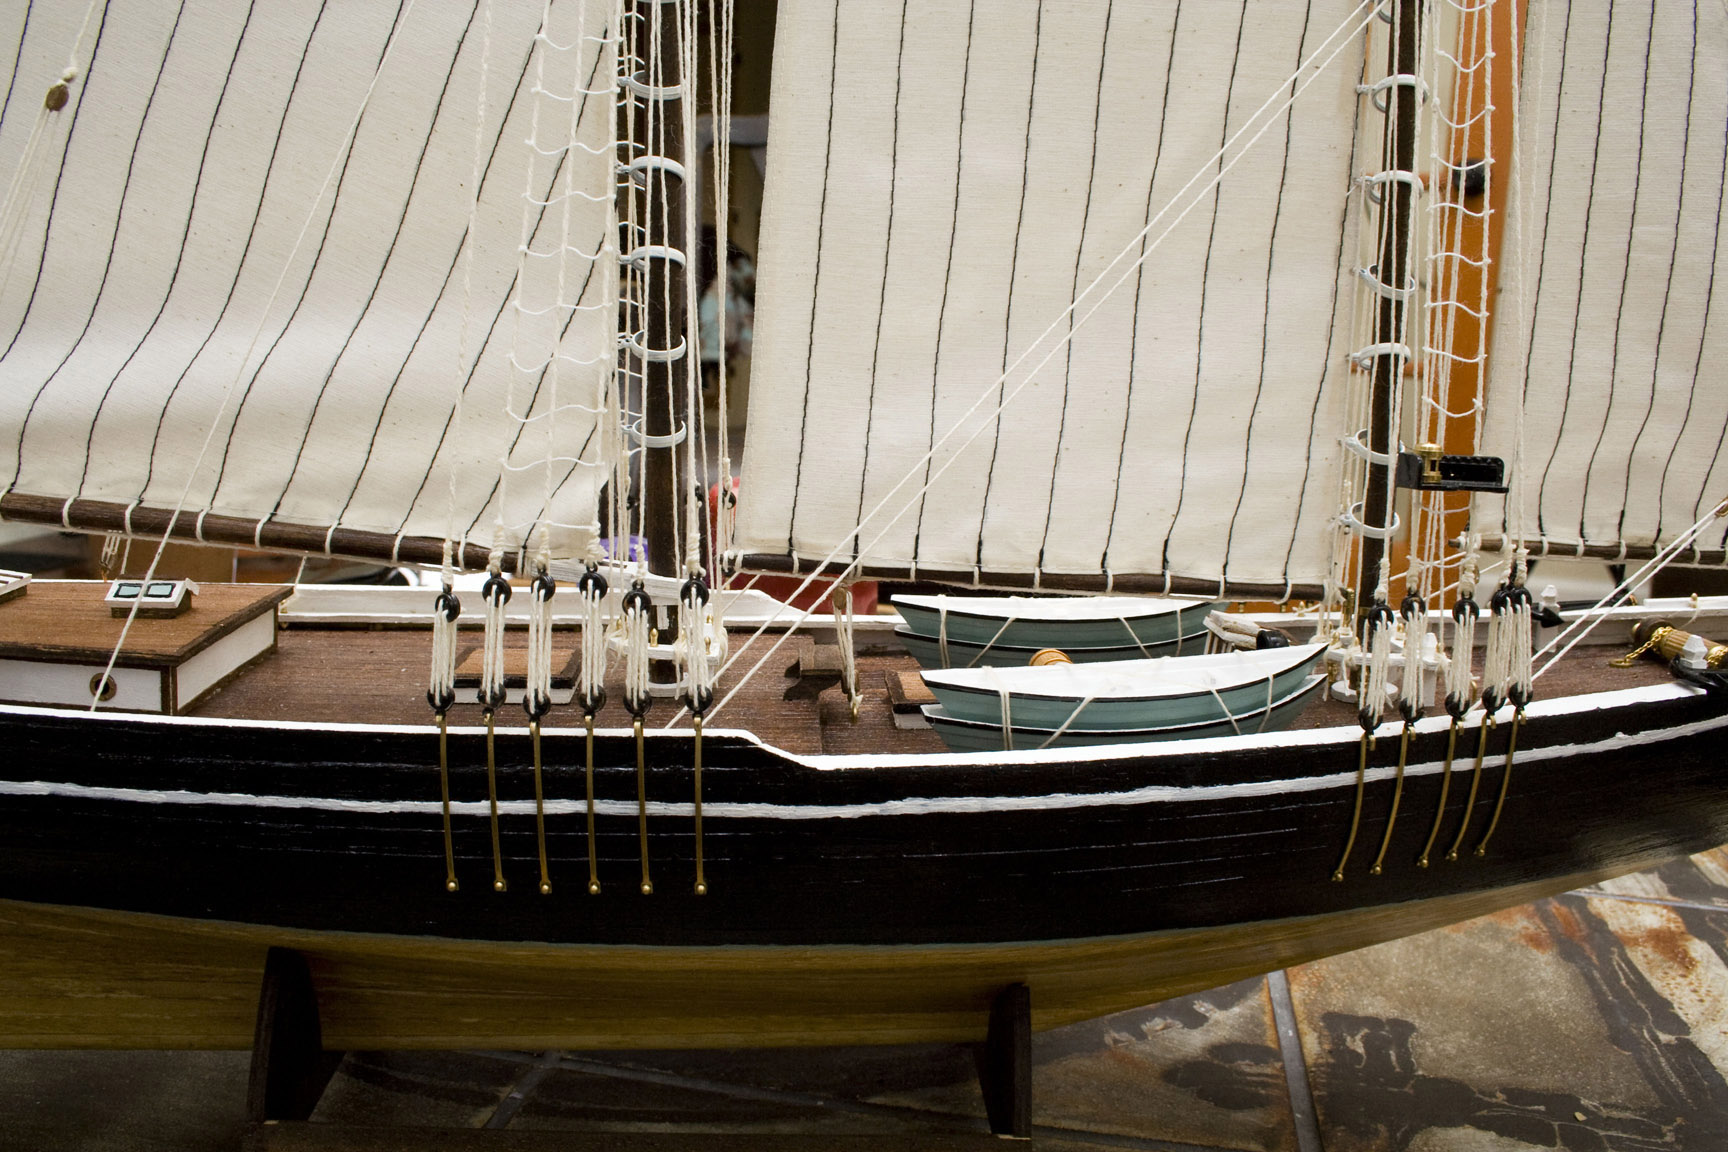
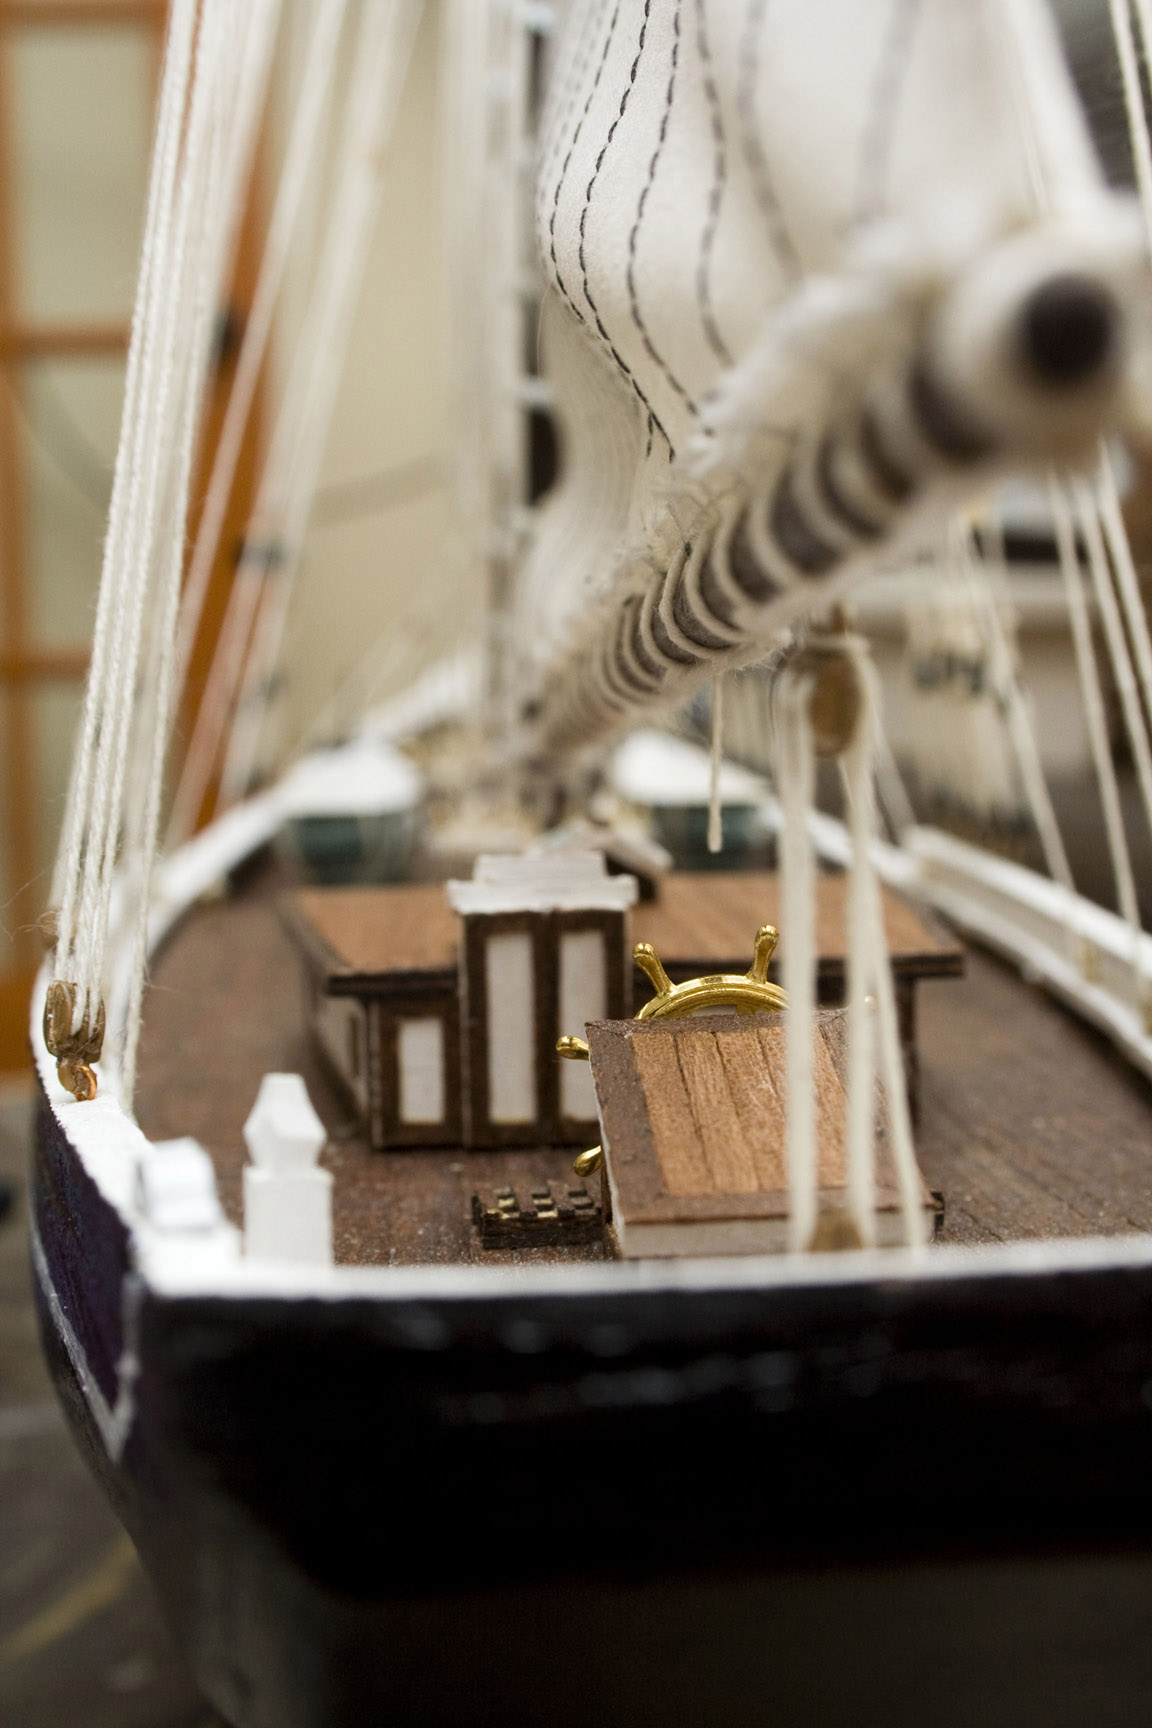
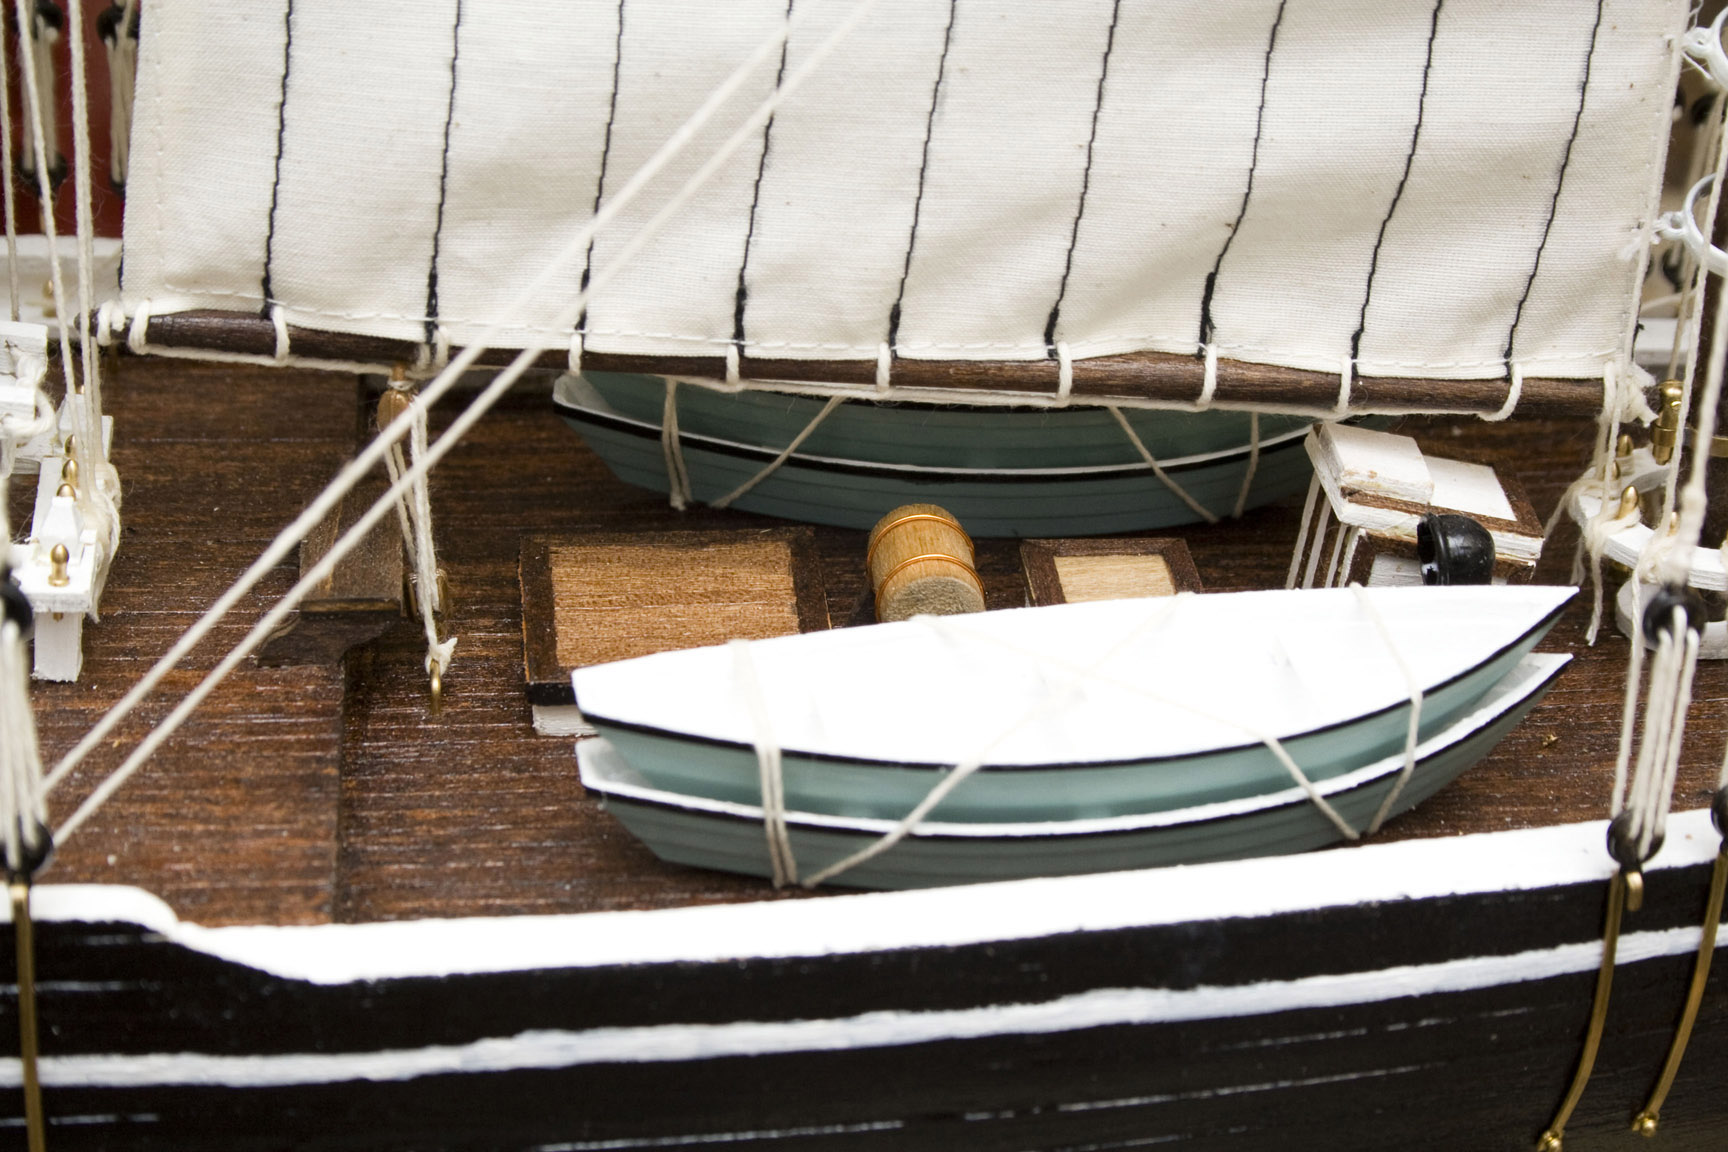
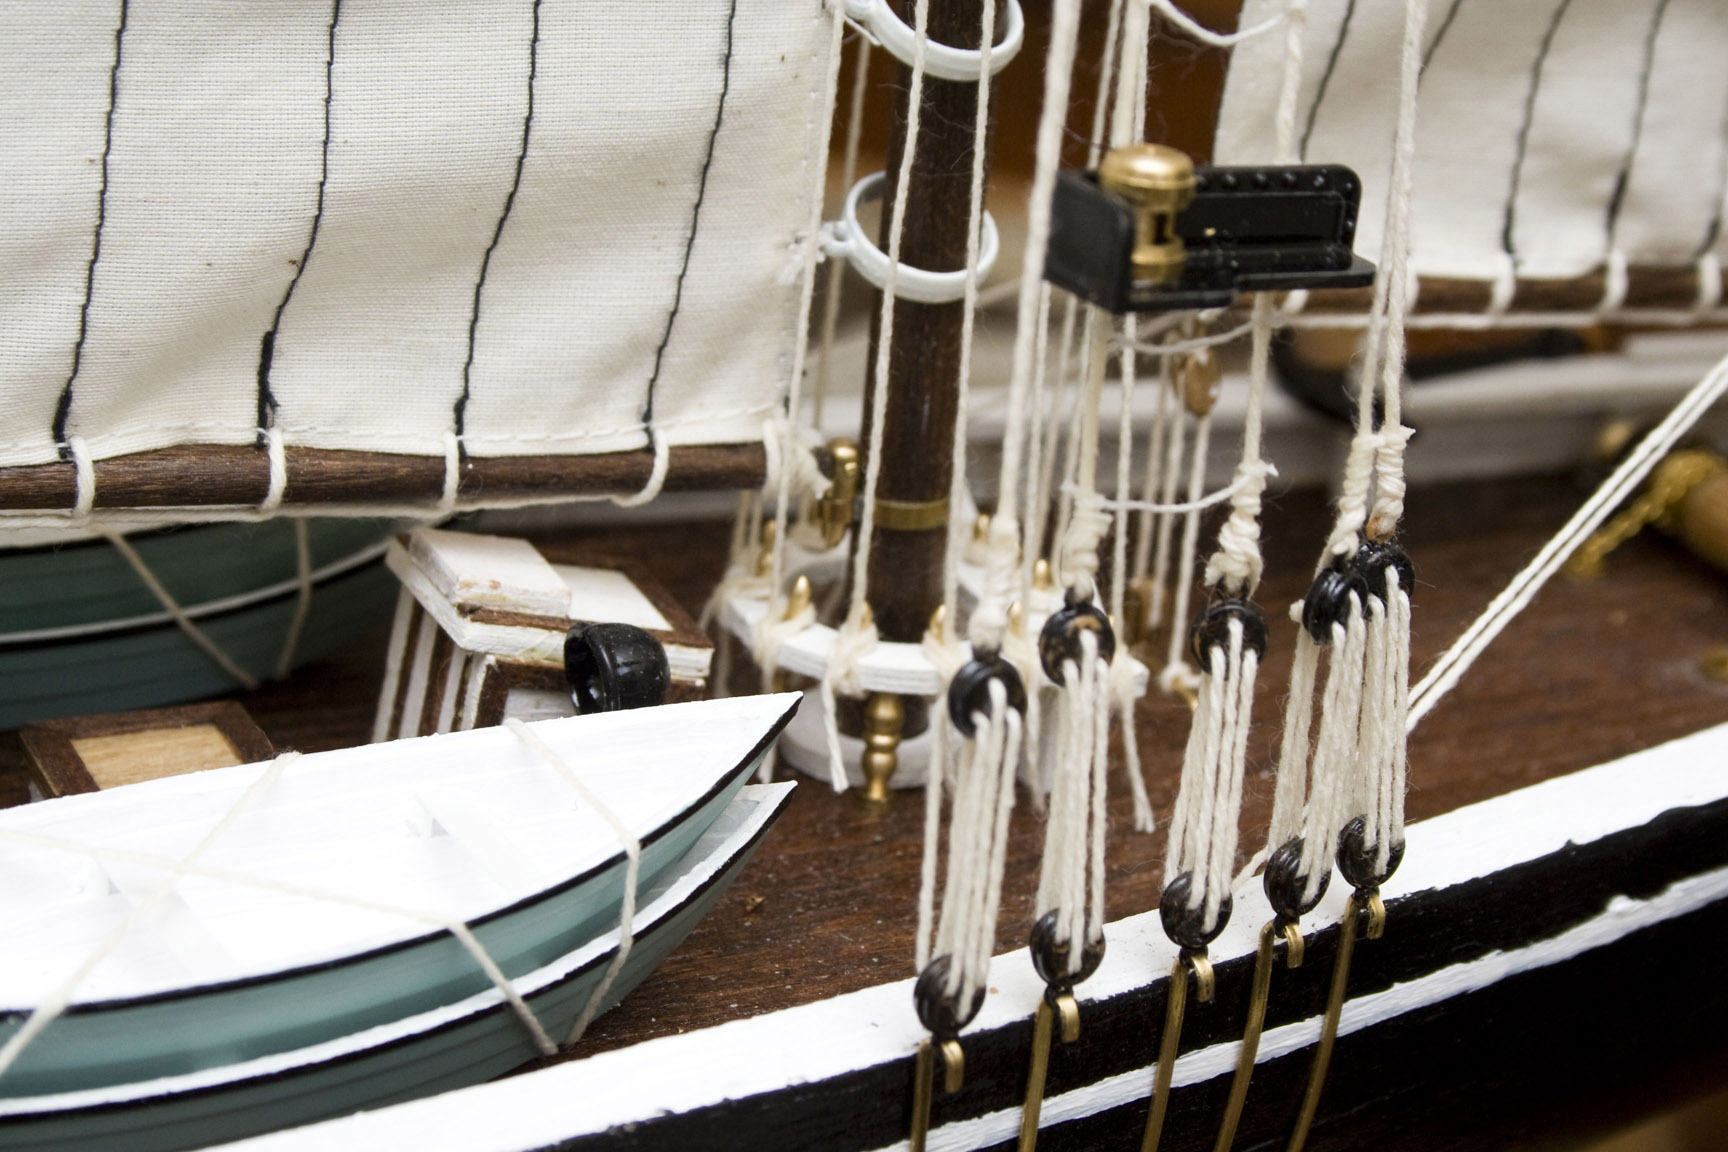
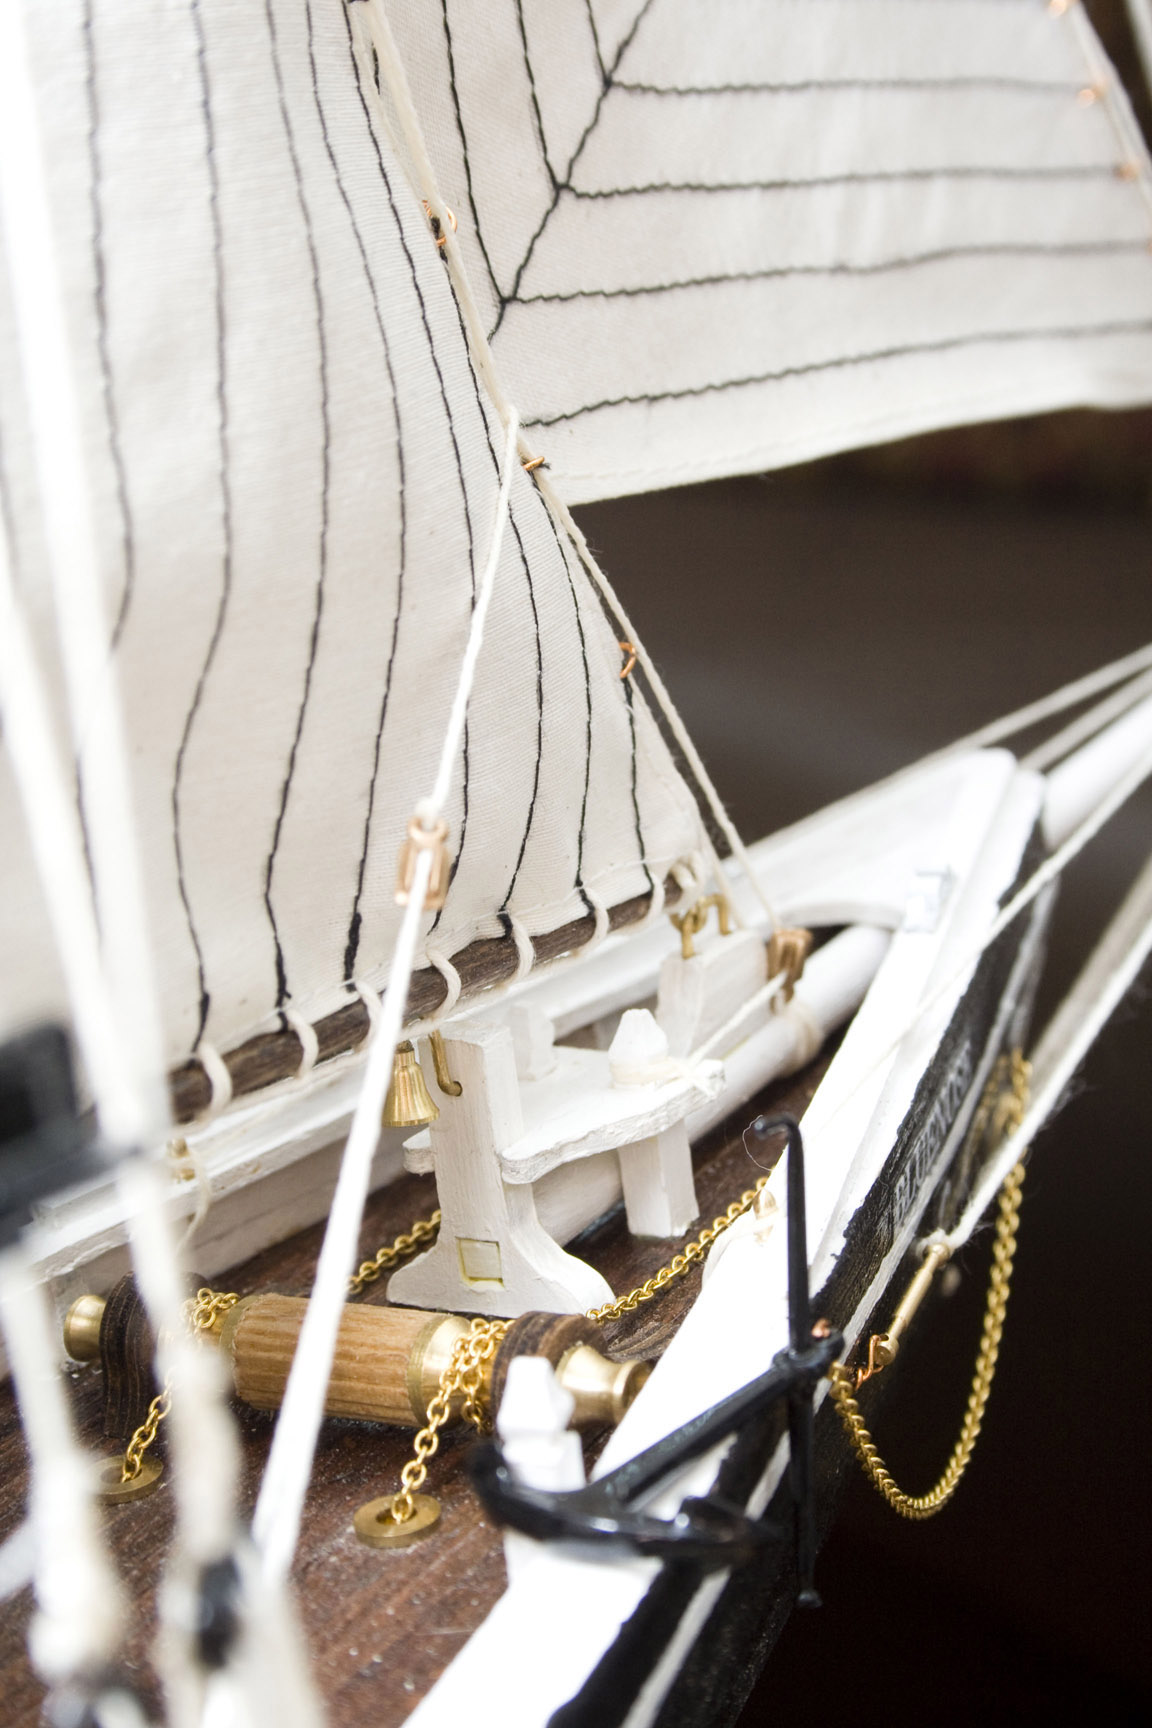
Anchors, bell, and everything else glued to the deck.
 

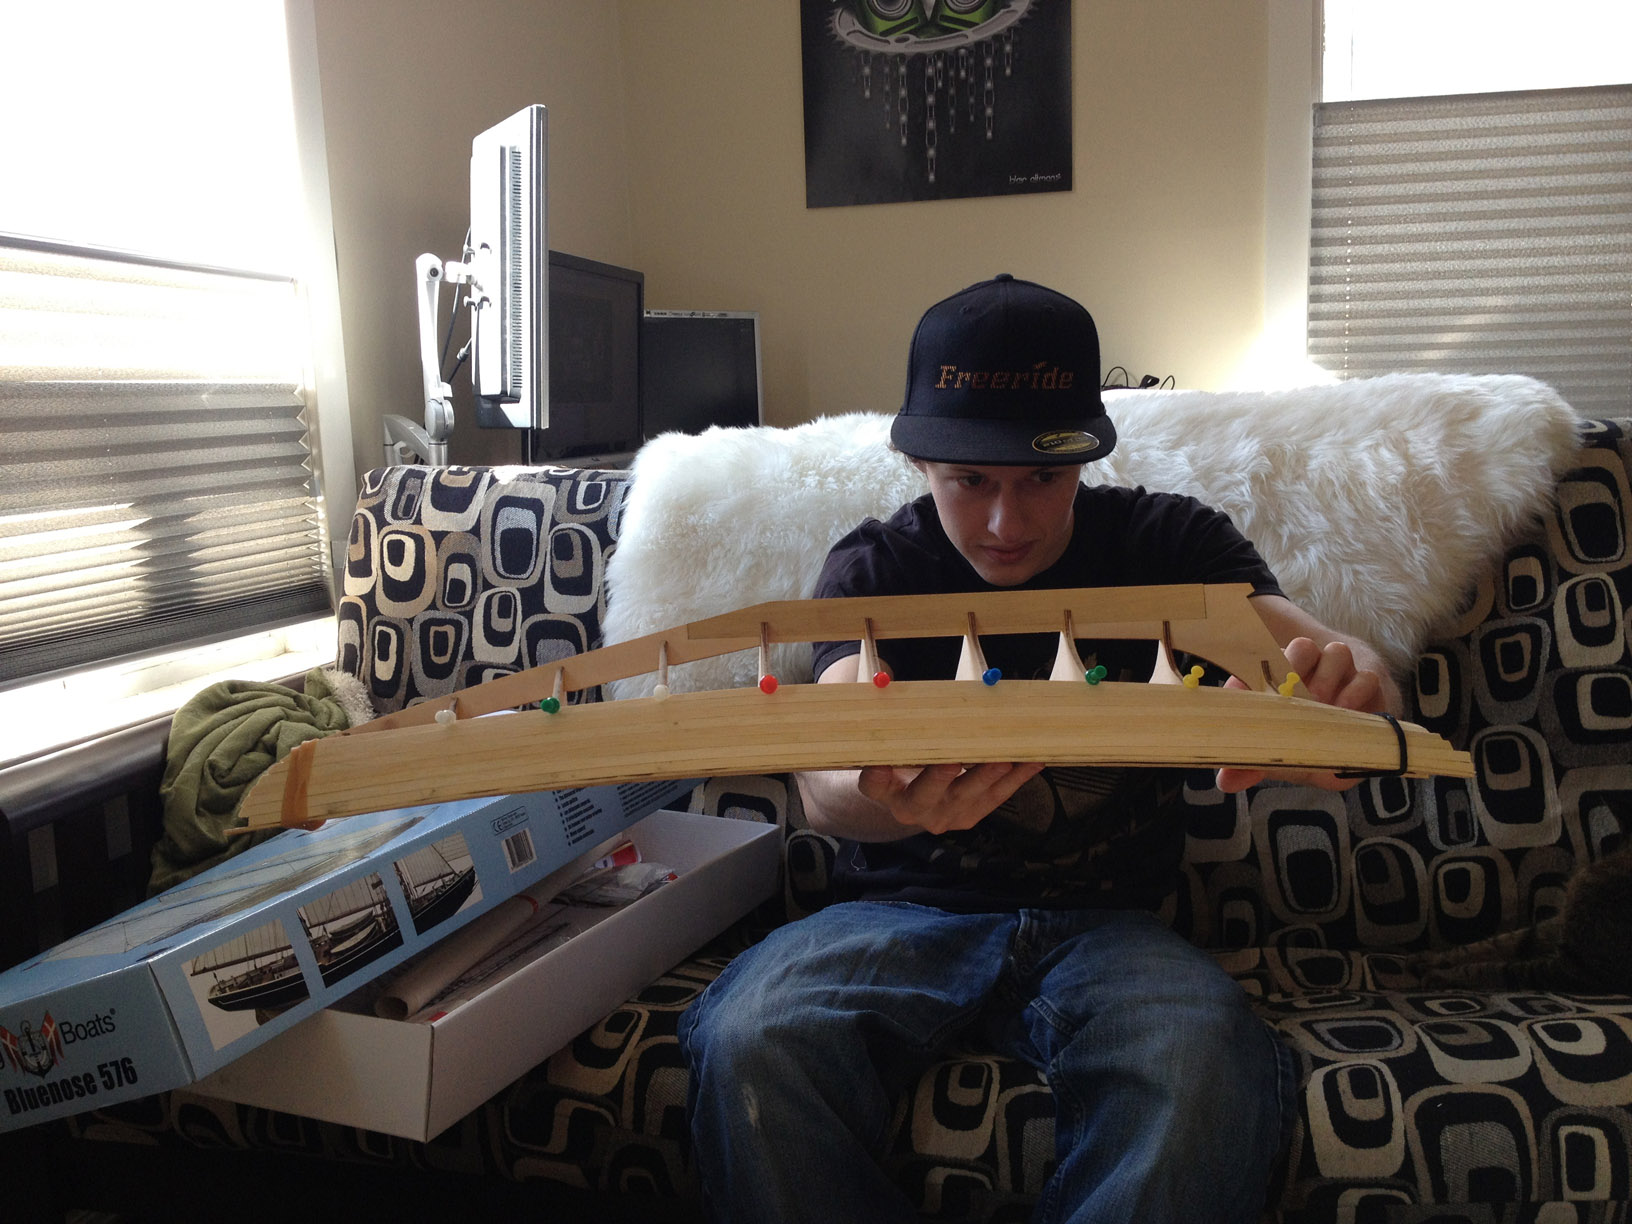
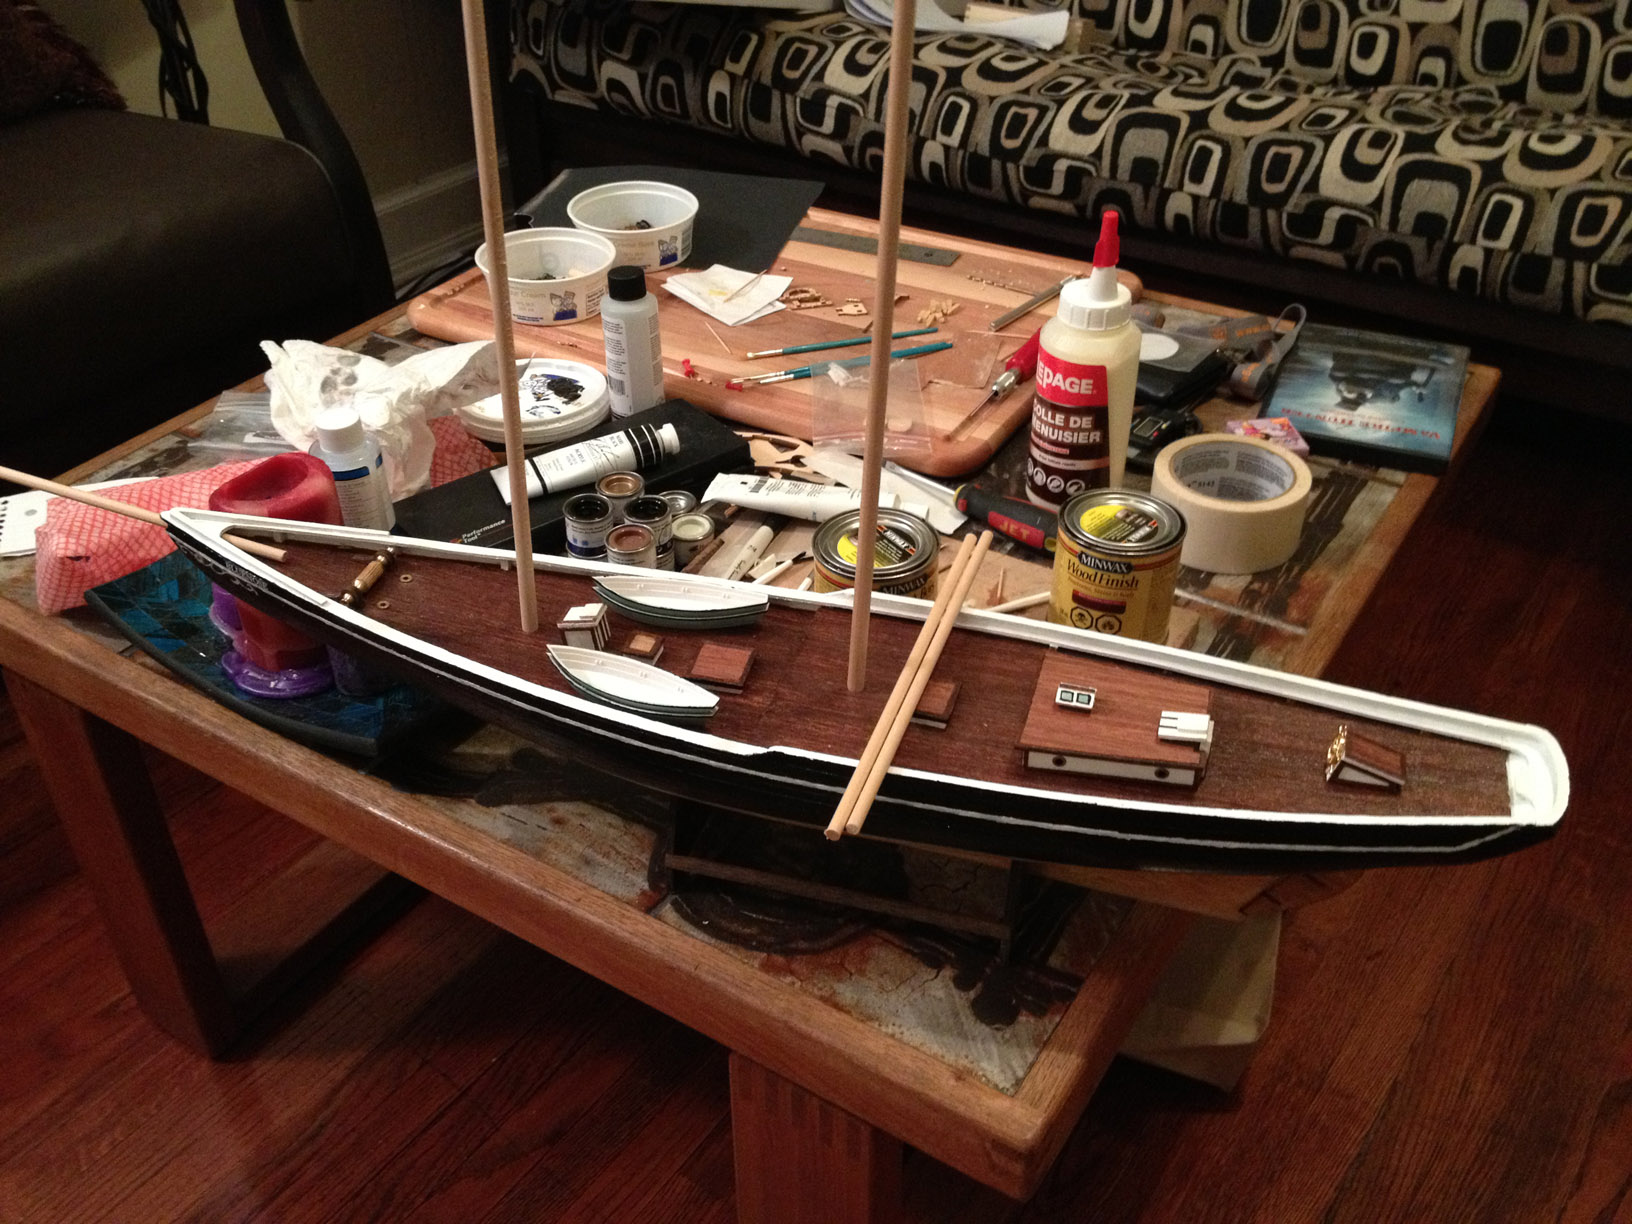
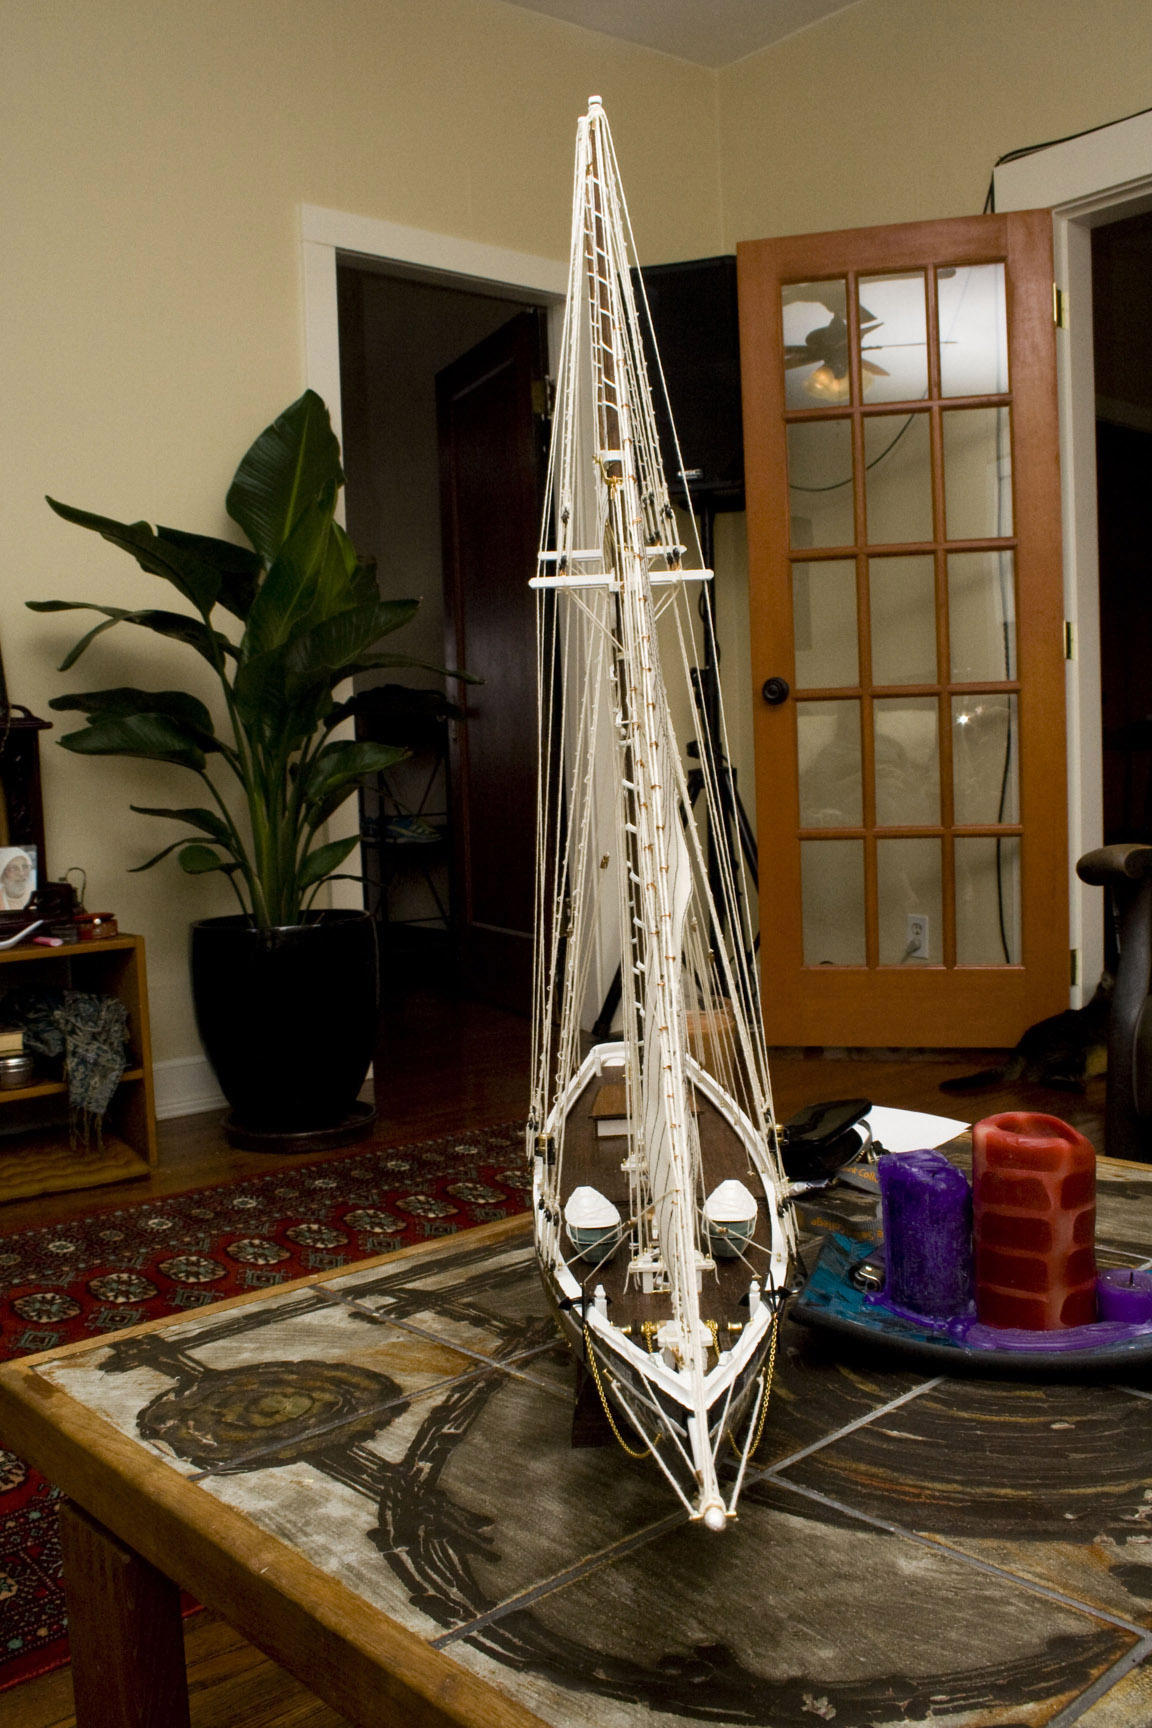
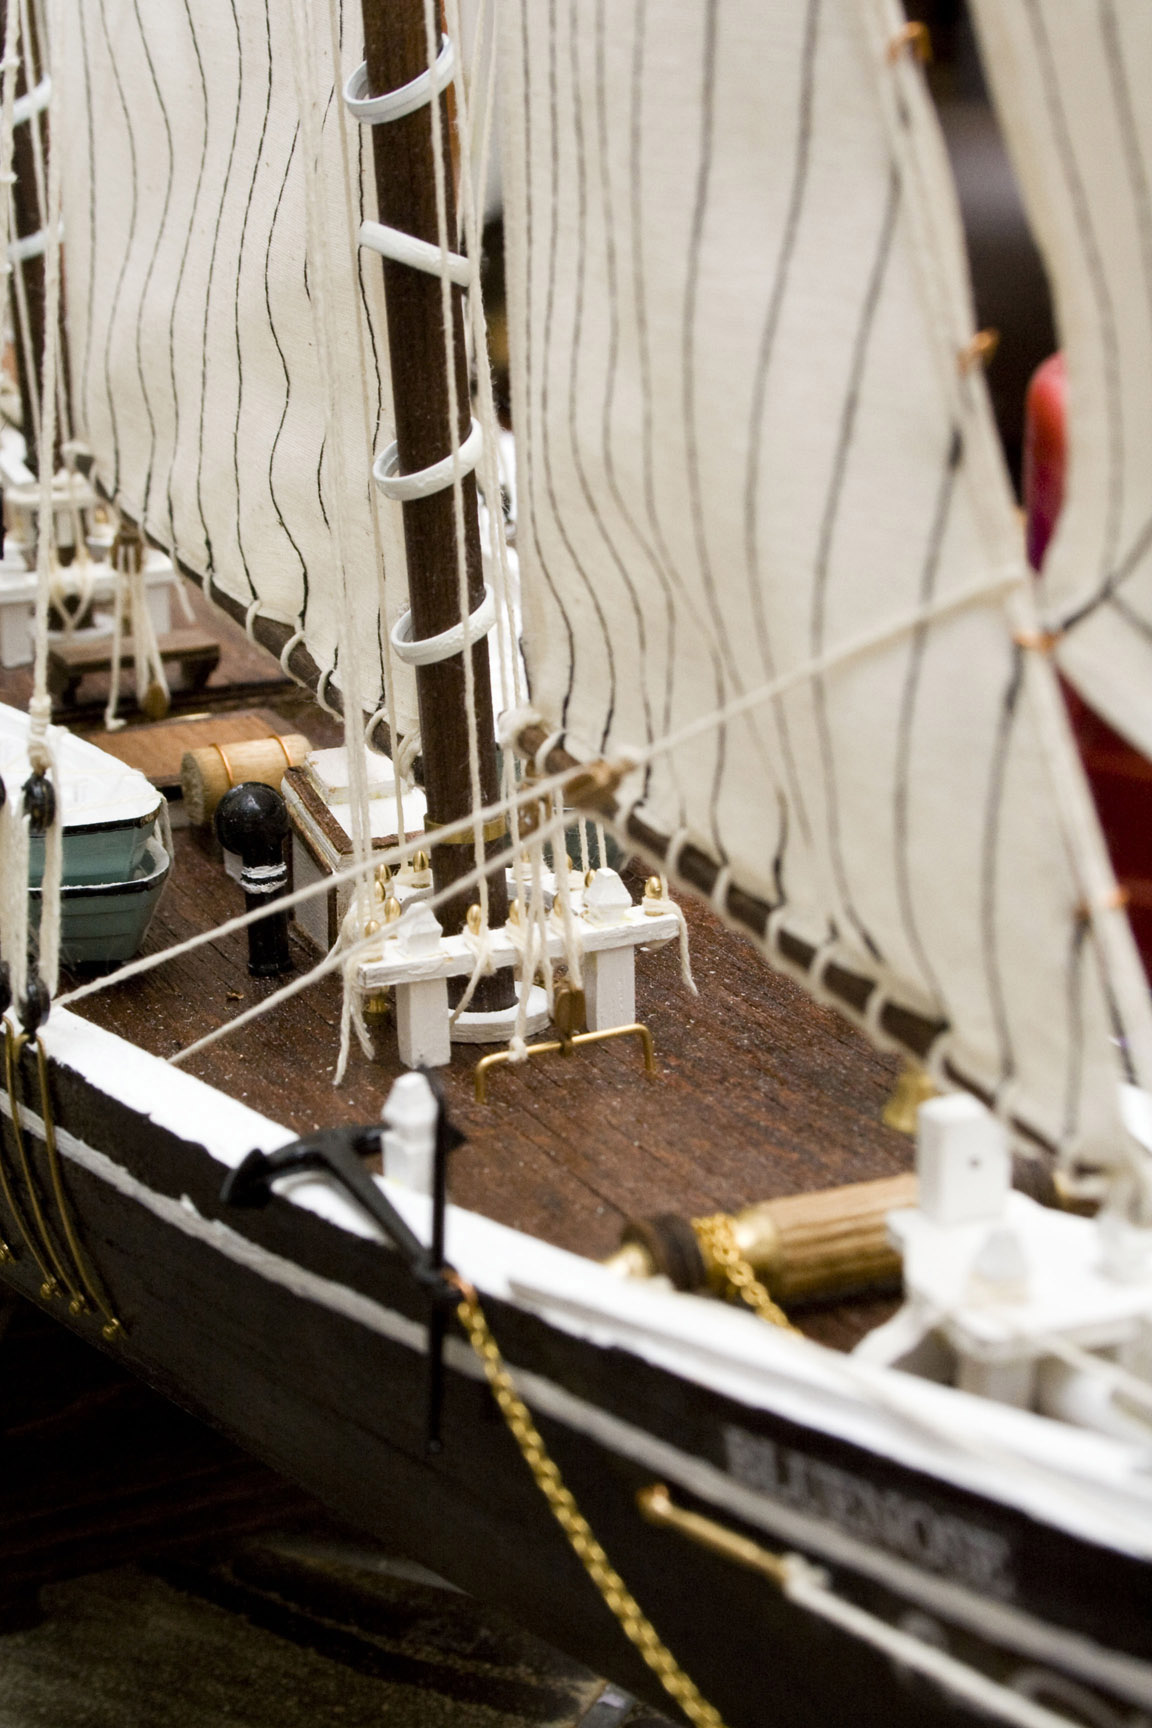
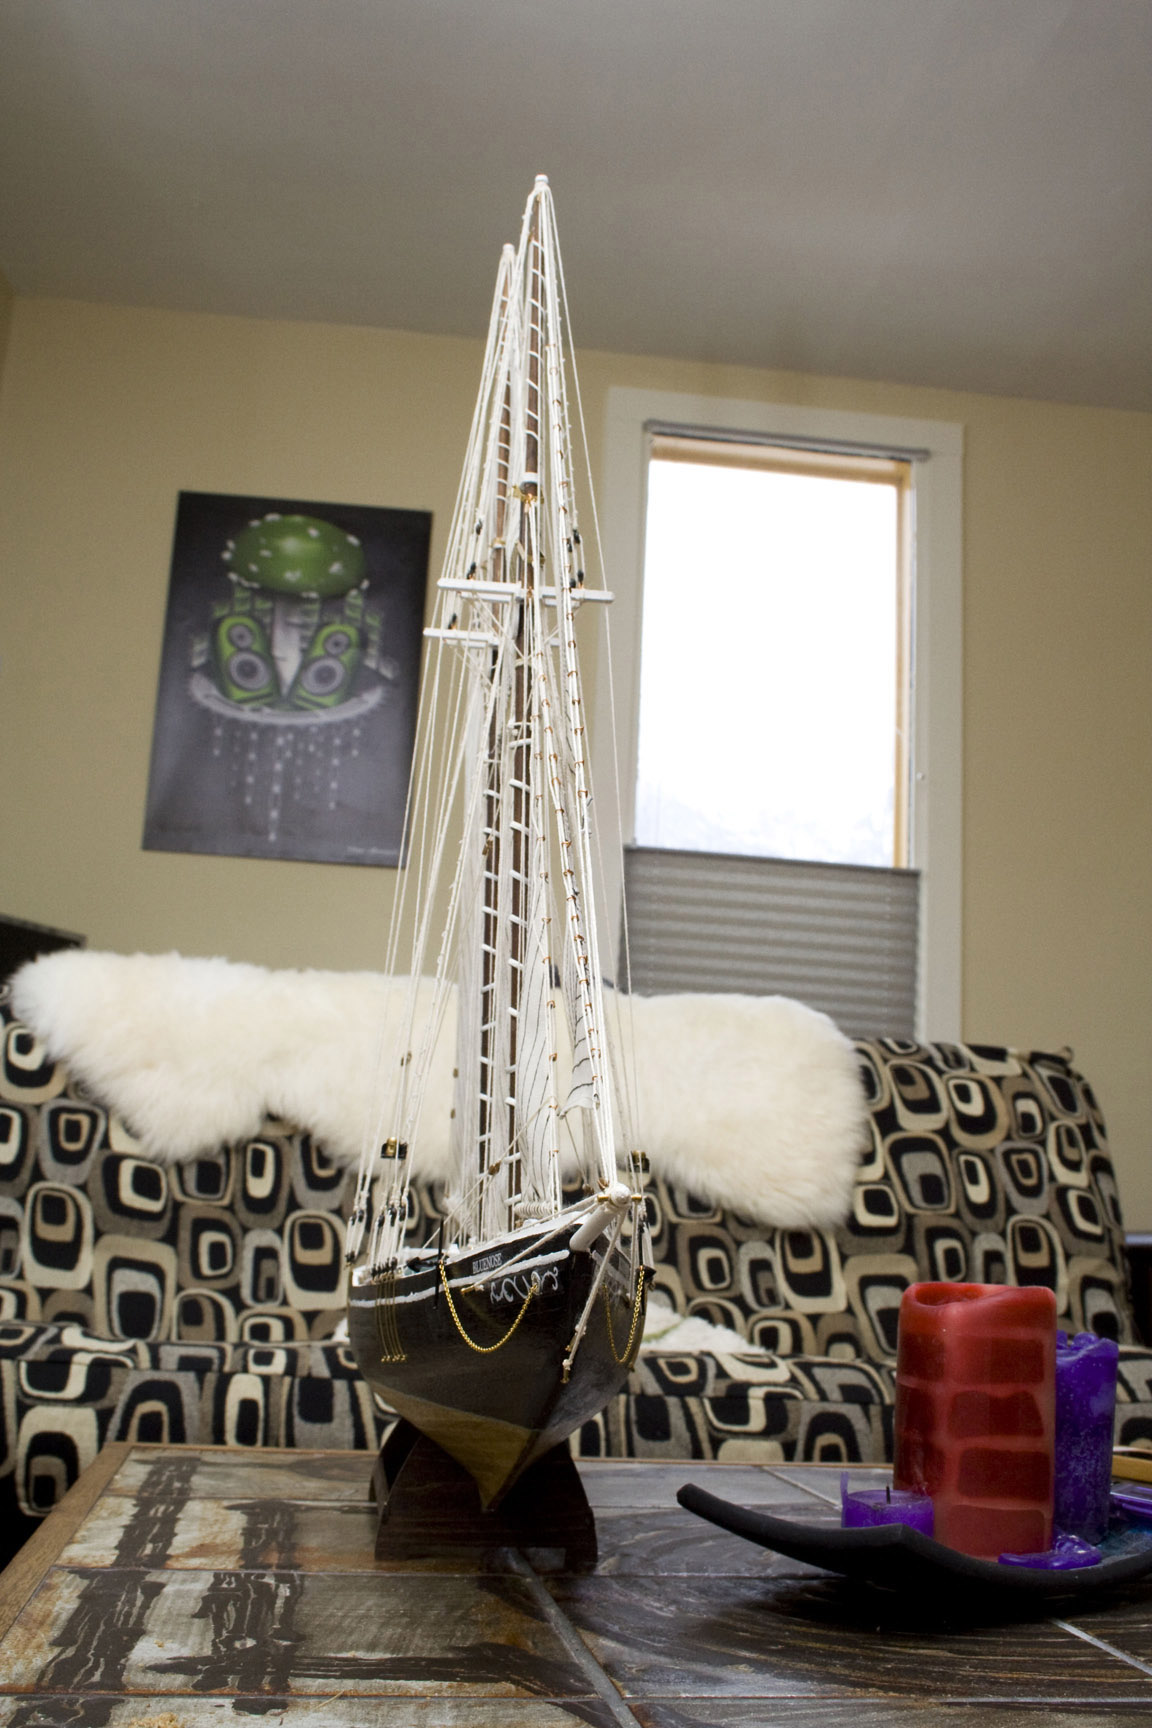
Mast building and rigging are the only things left at this point. Building the masts only took a few evenings. I was pretty surprised that tapering all of the masts and booms didn't take longer by hand.


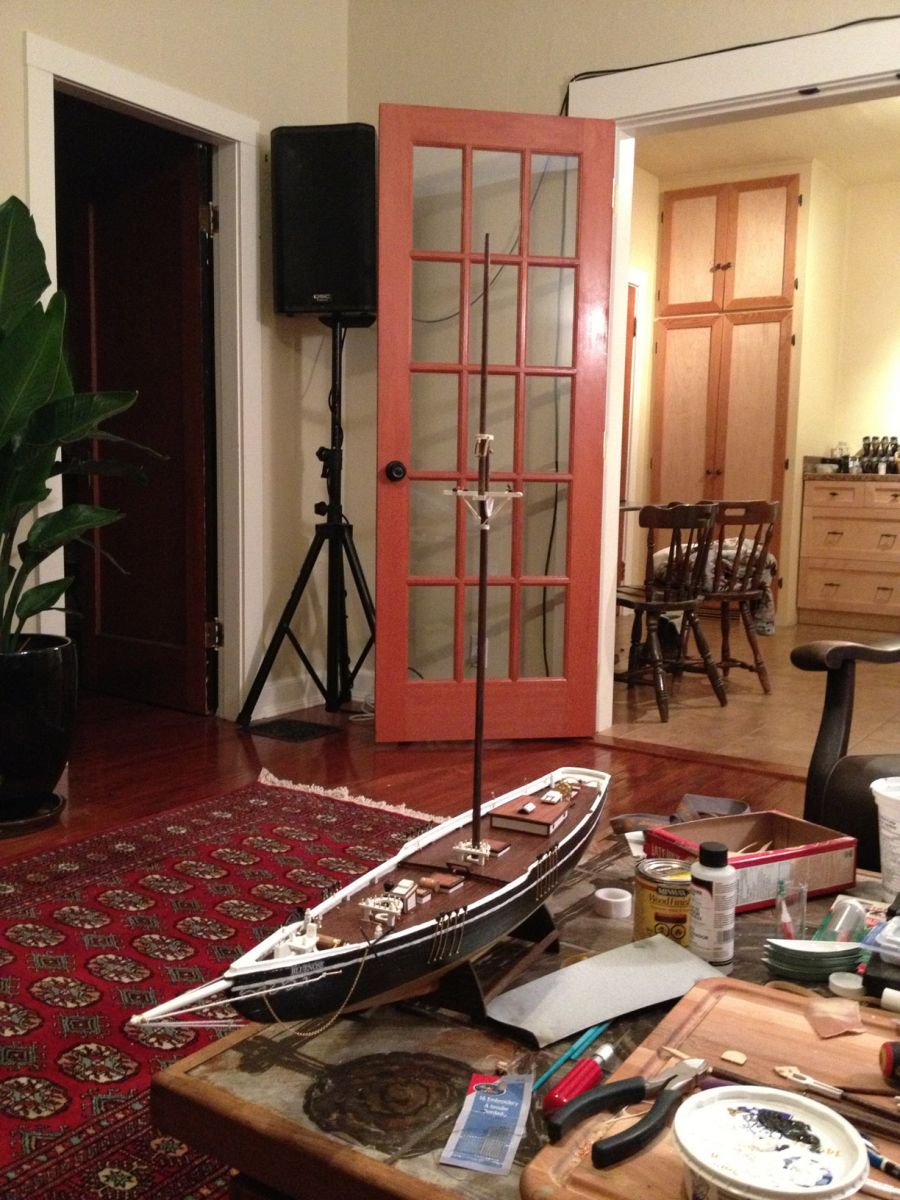
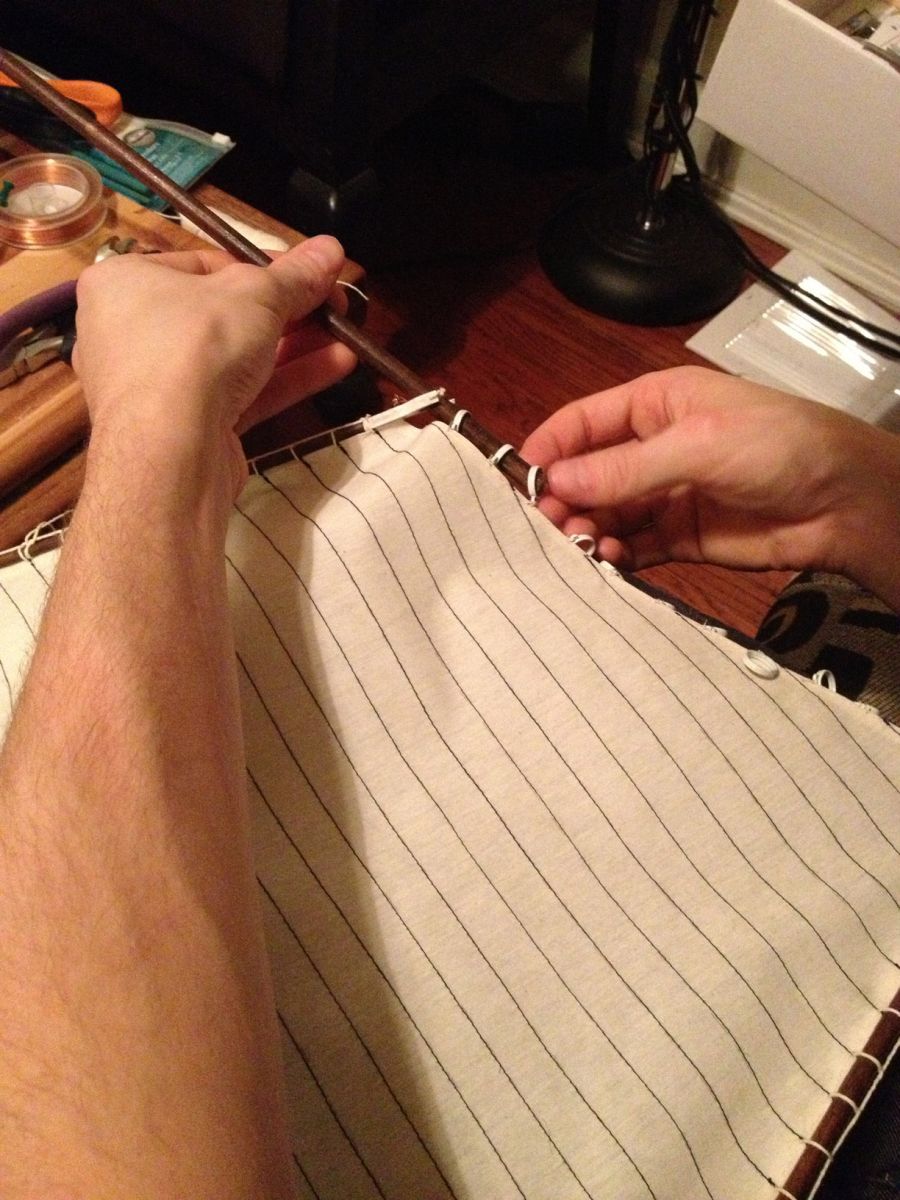
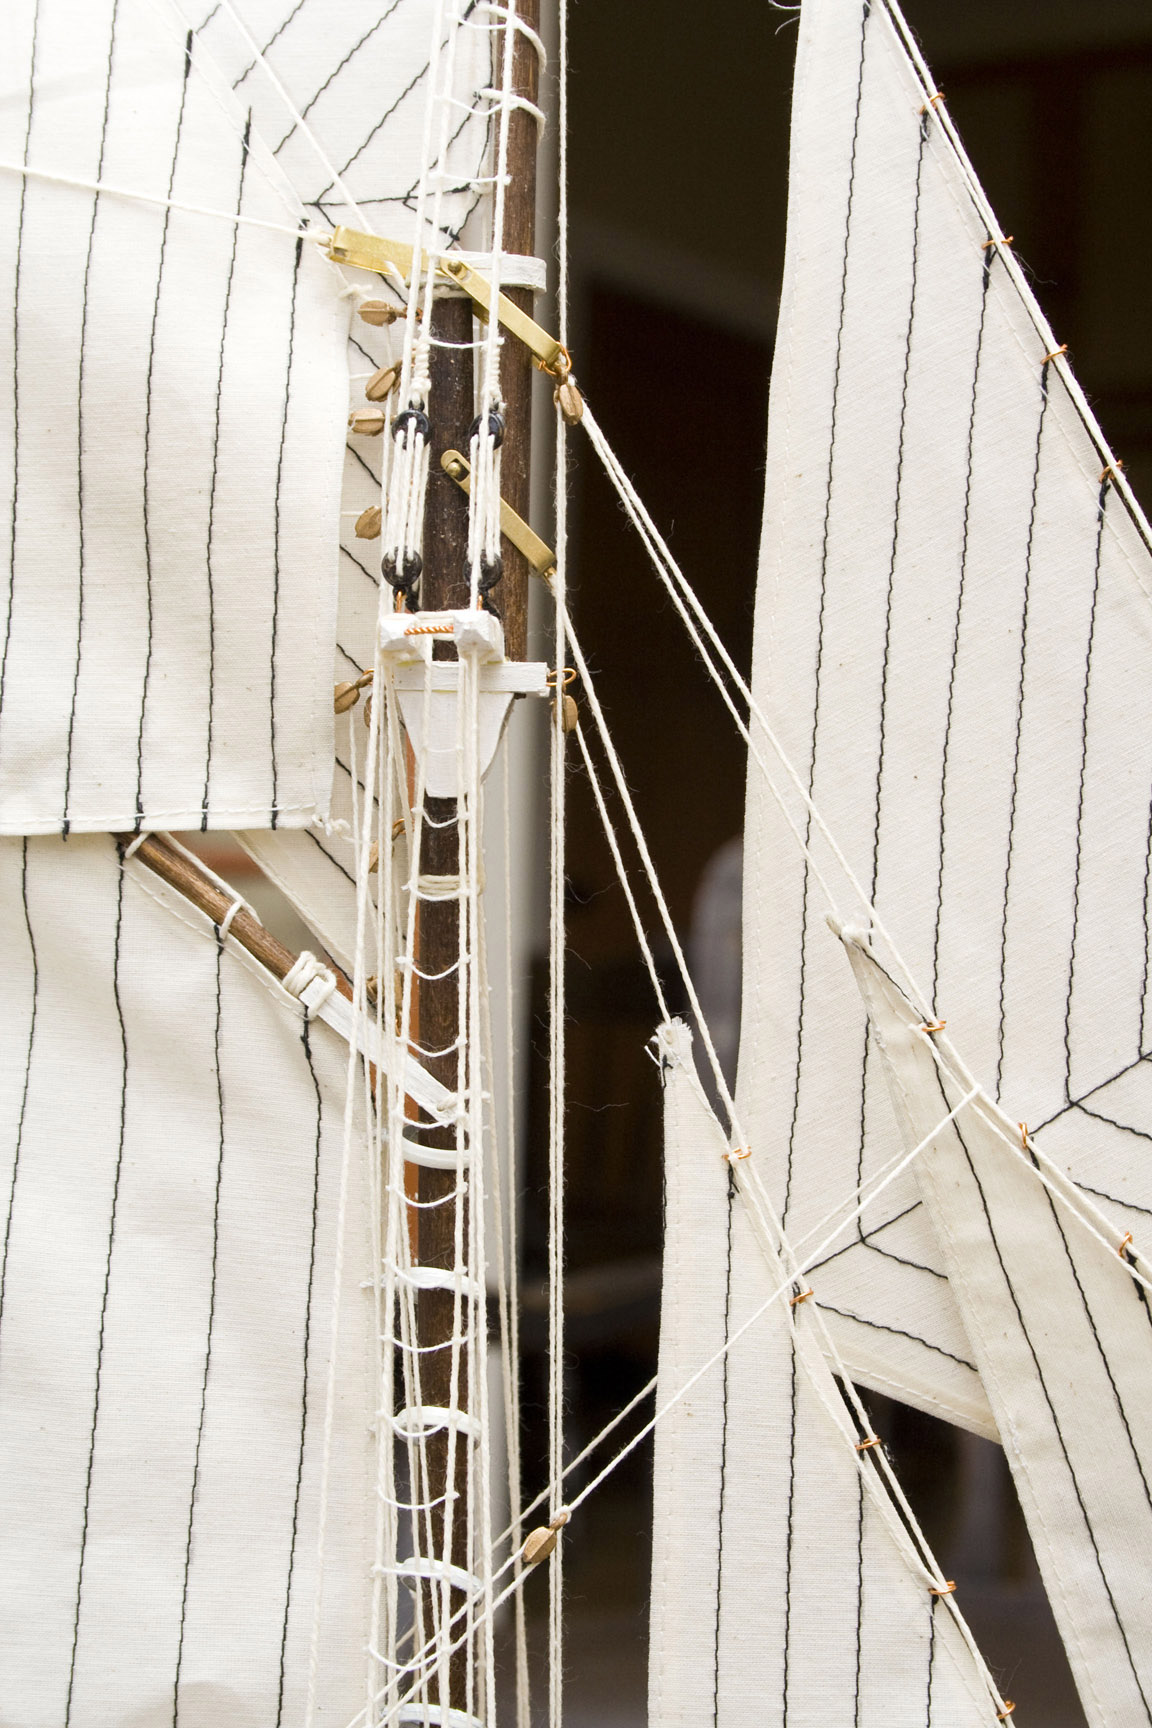
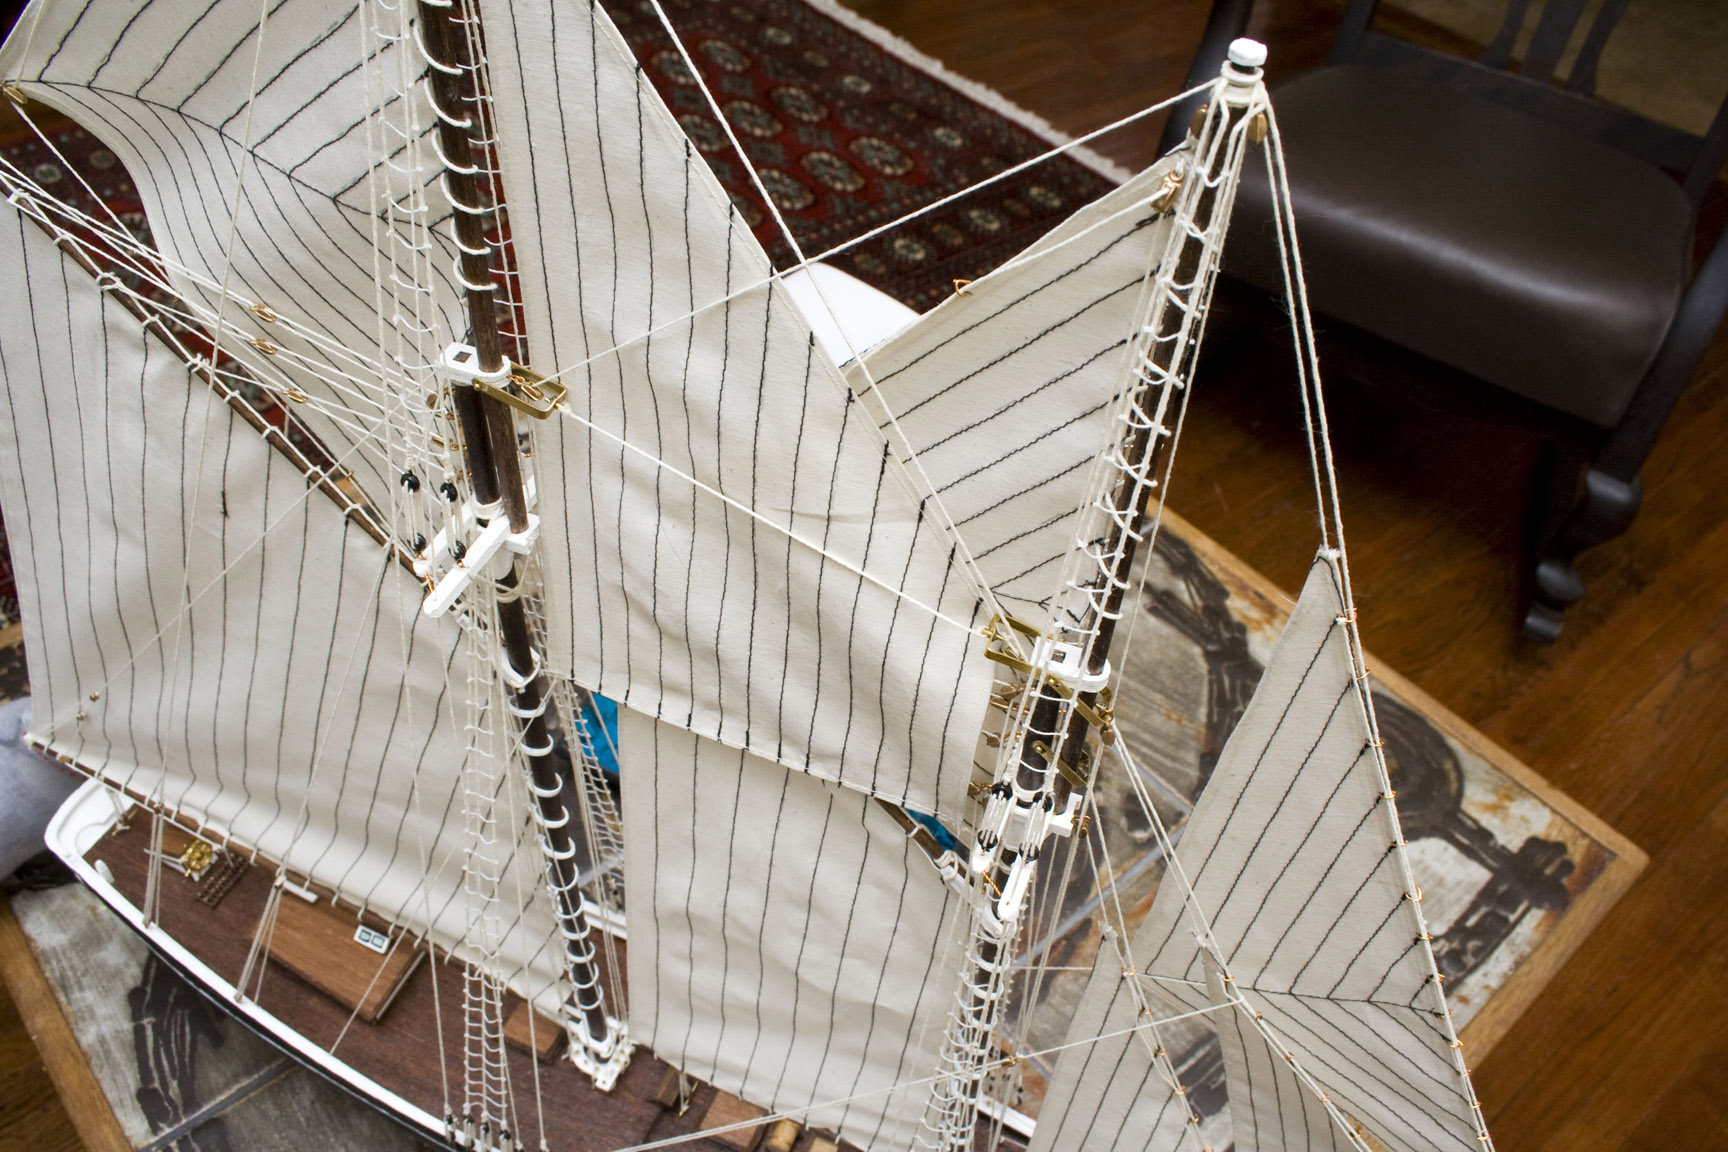
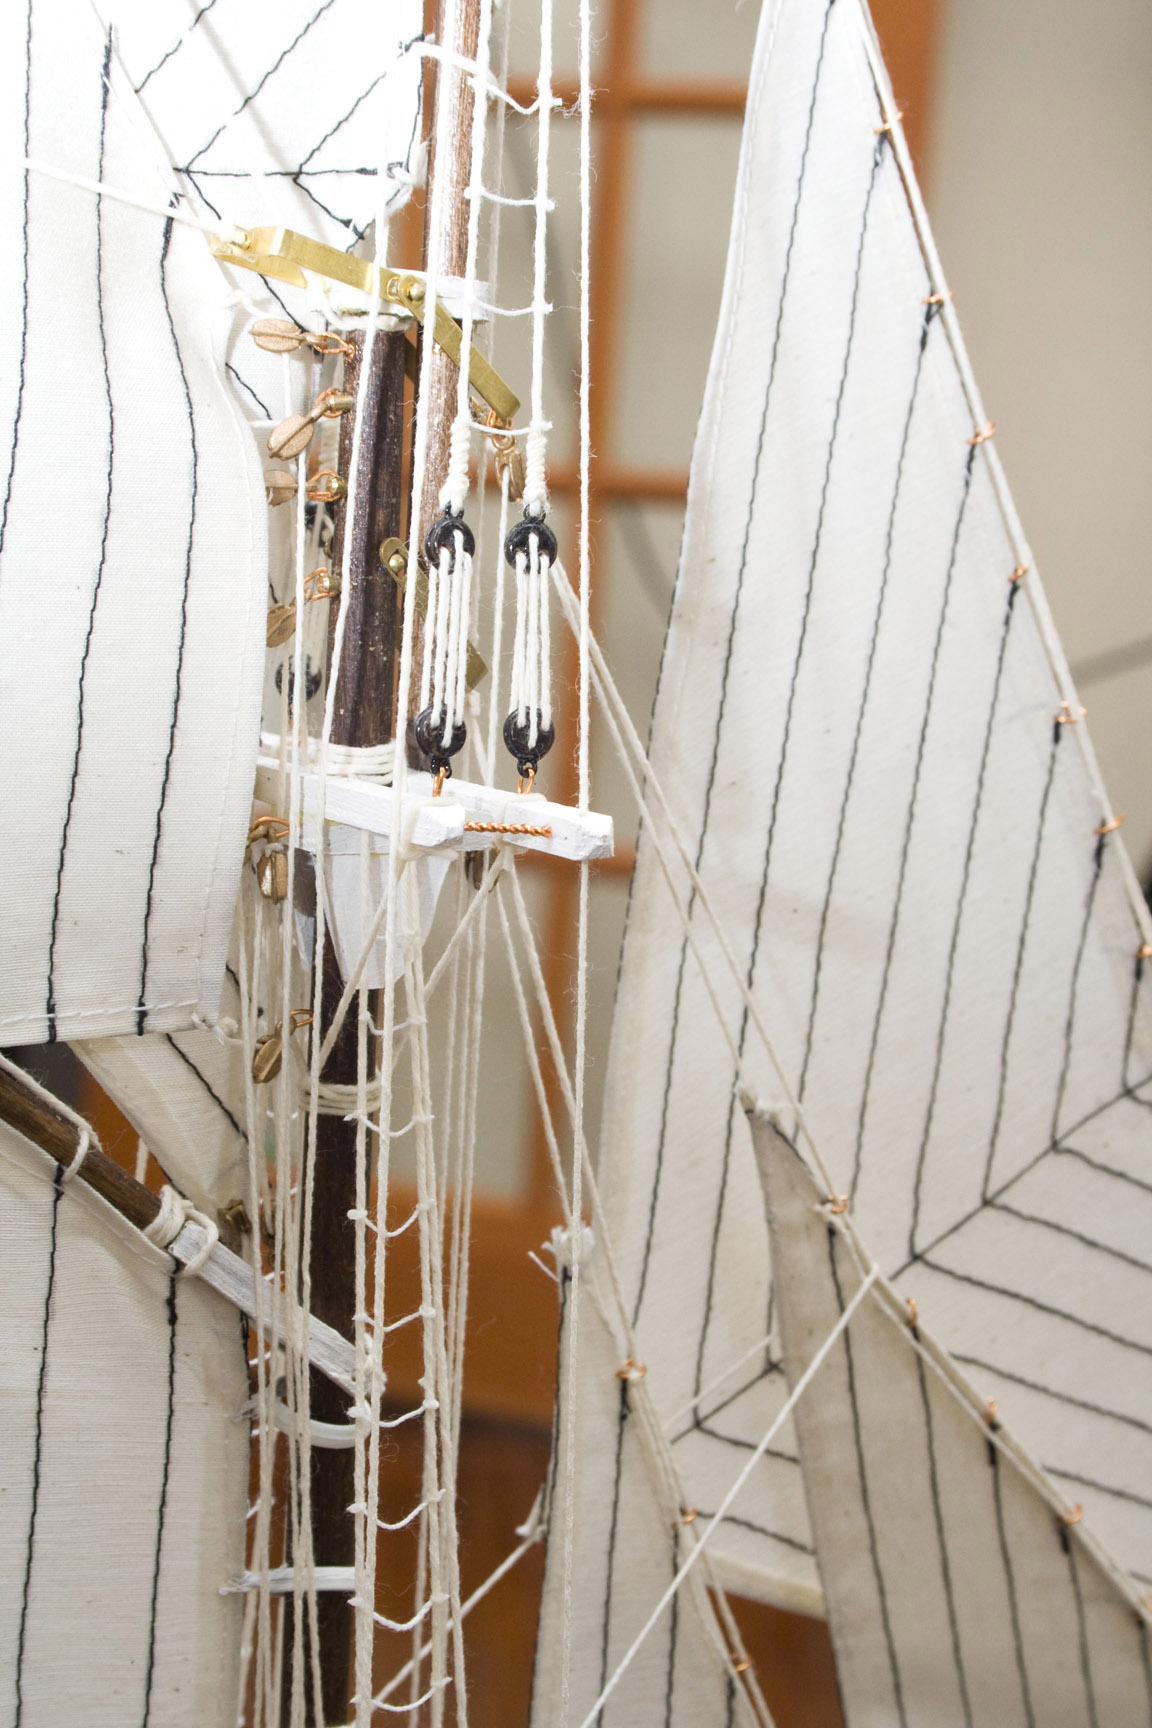
Only rigging left, but that's no small task. The only instruction for any of the rigging was a single view on the blueprint so it took some time to decipher what needed to go where. I'm sure that would have been a lot easier if I had the slightest clue how a large sail boat worked. It was a bit of a puzzle deciding what order to do things in. I decided to only do a few of the shrouds to begin with to get the masts roughly in place. I didn't want to get all of them in so that I would have enough room to get my mitts in place to put in the running rigging.


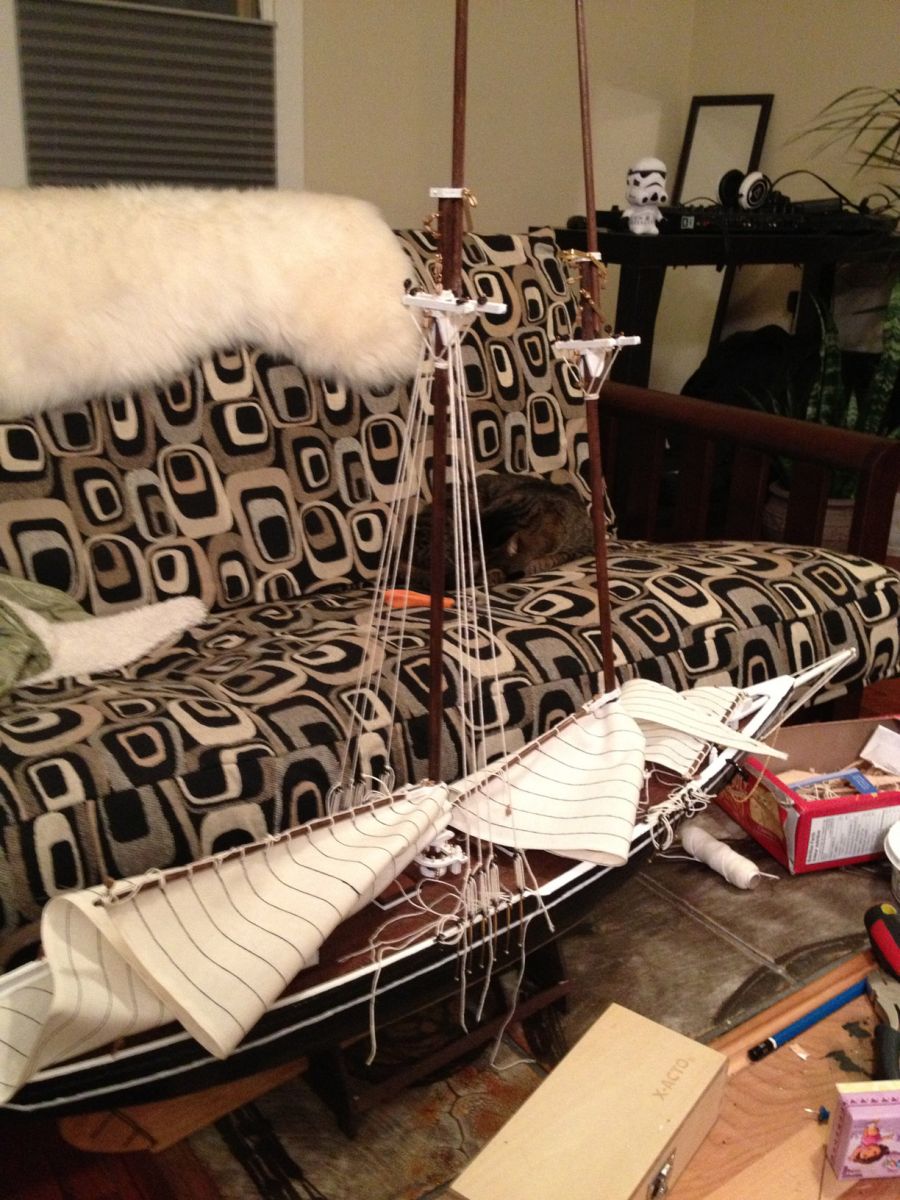
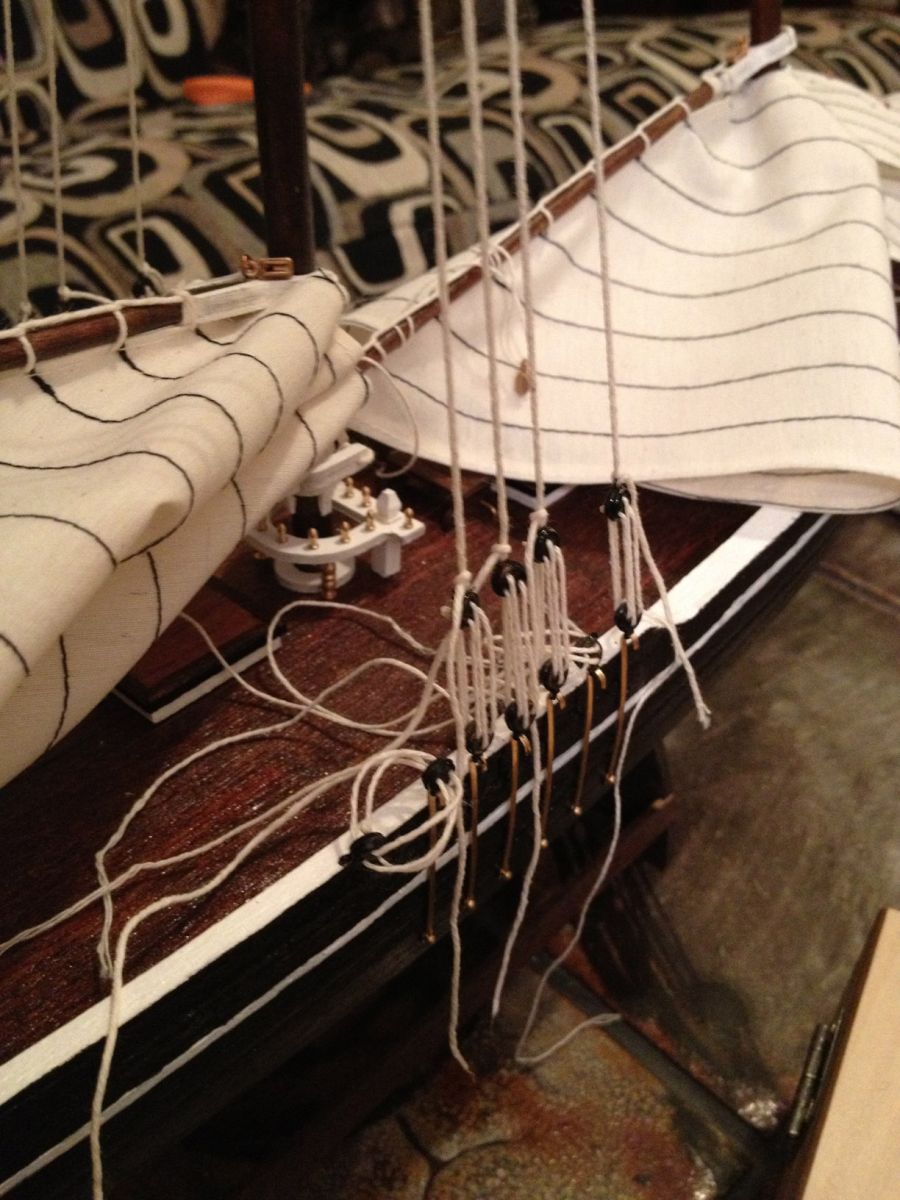
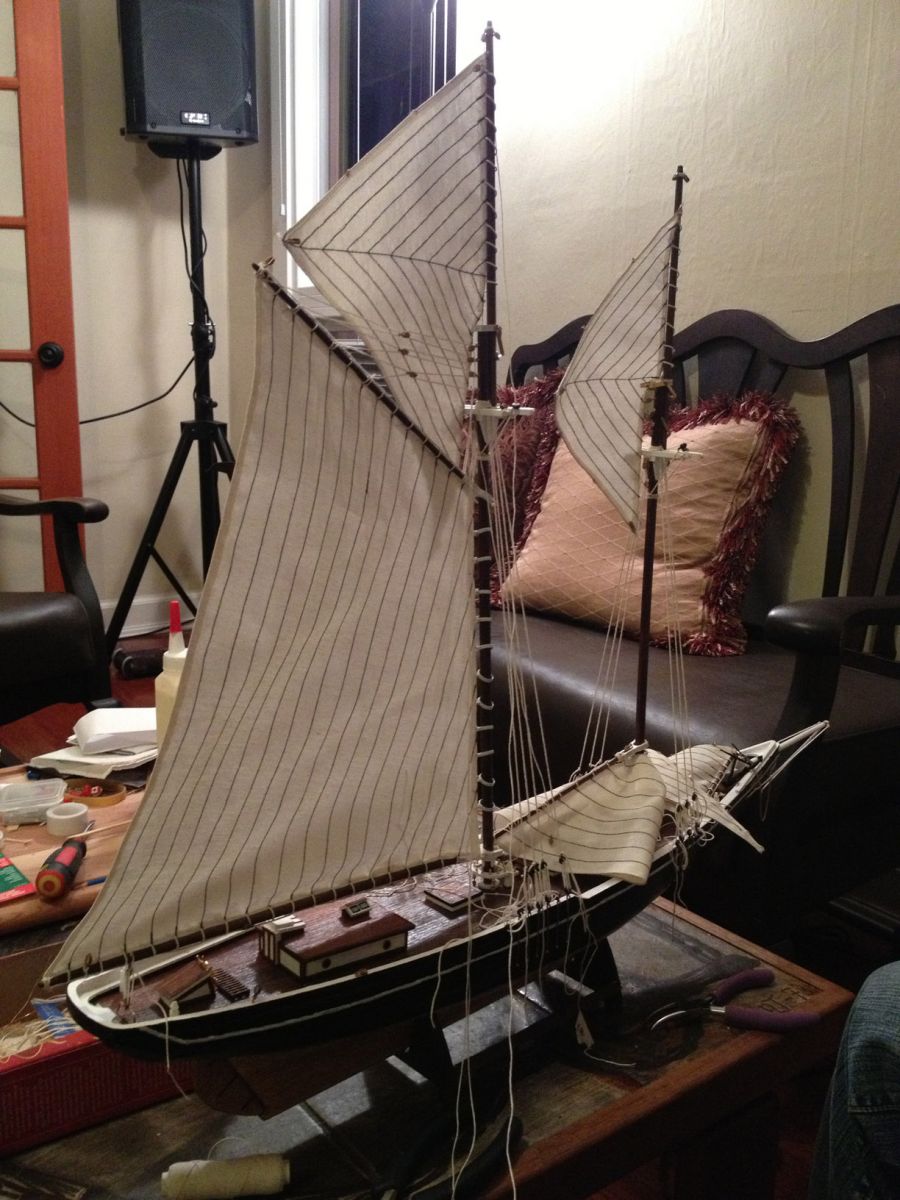
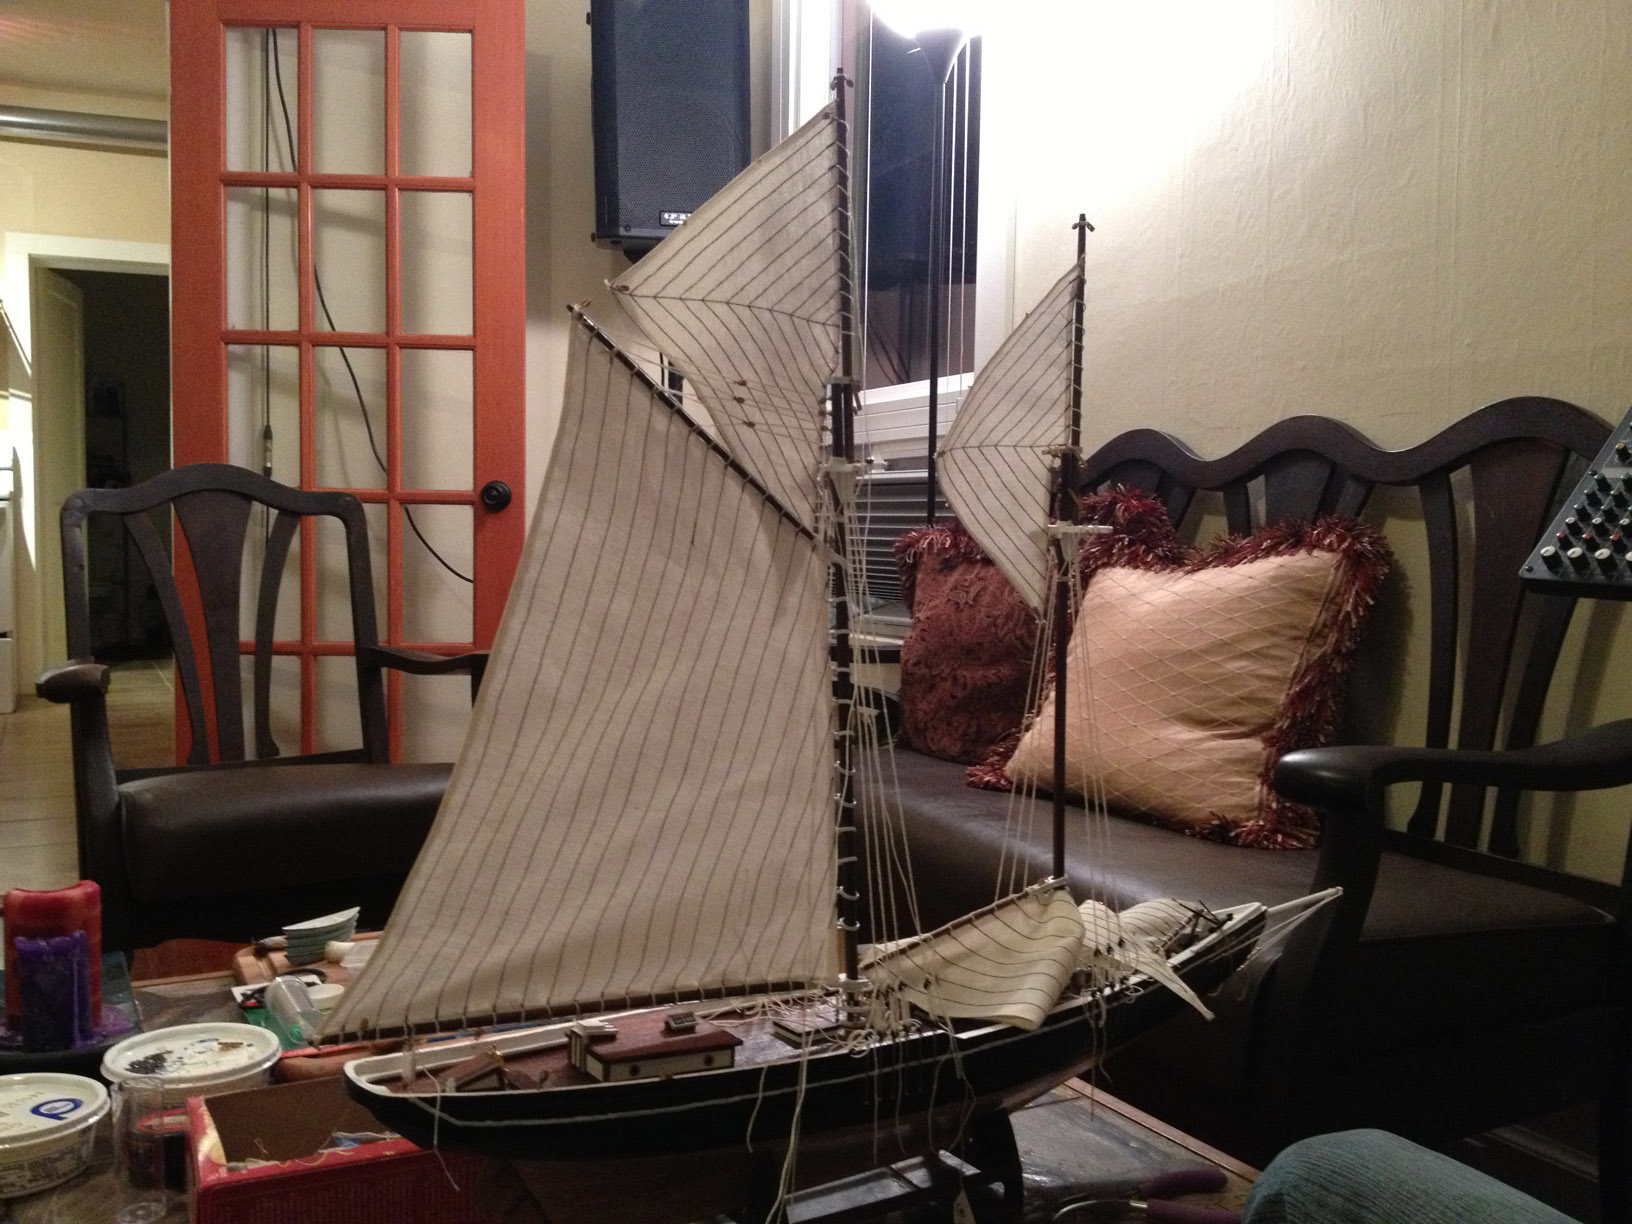
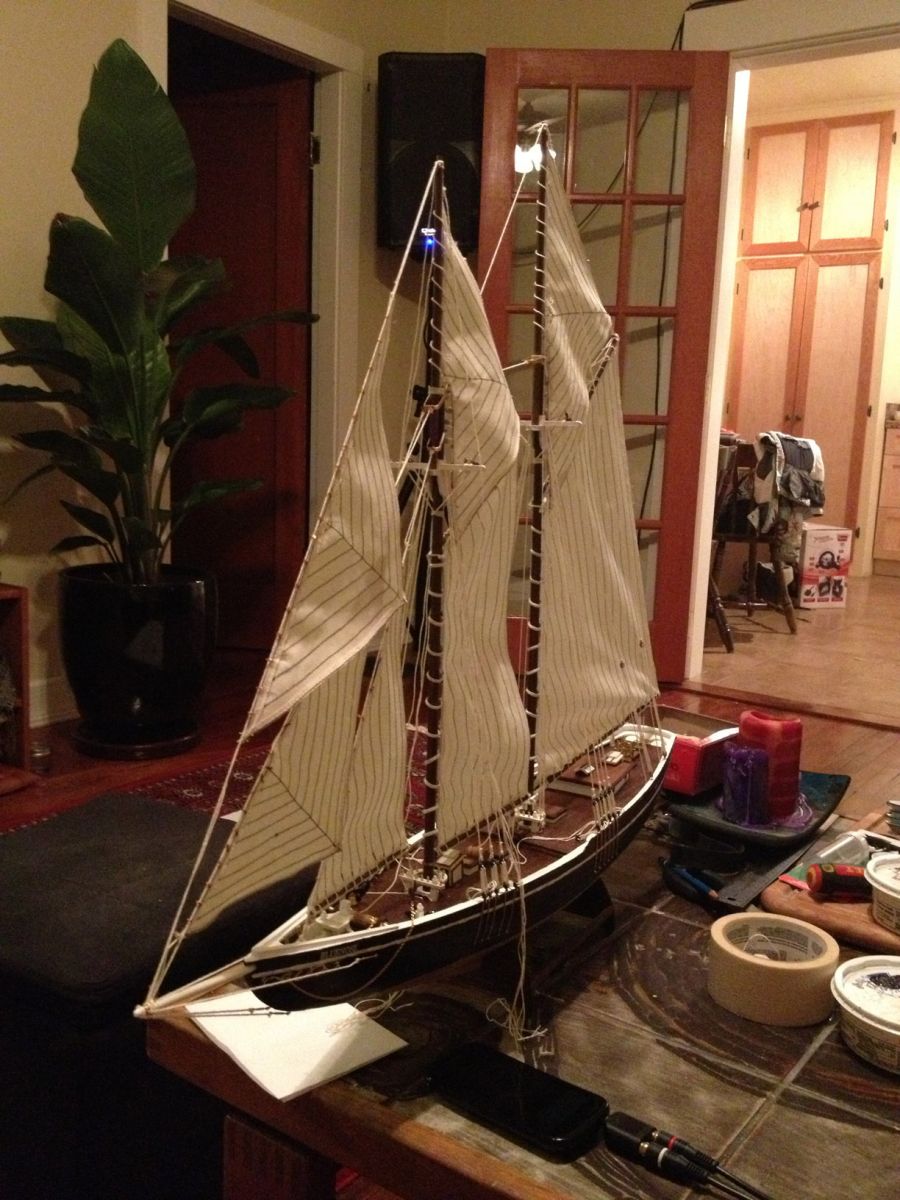
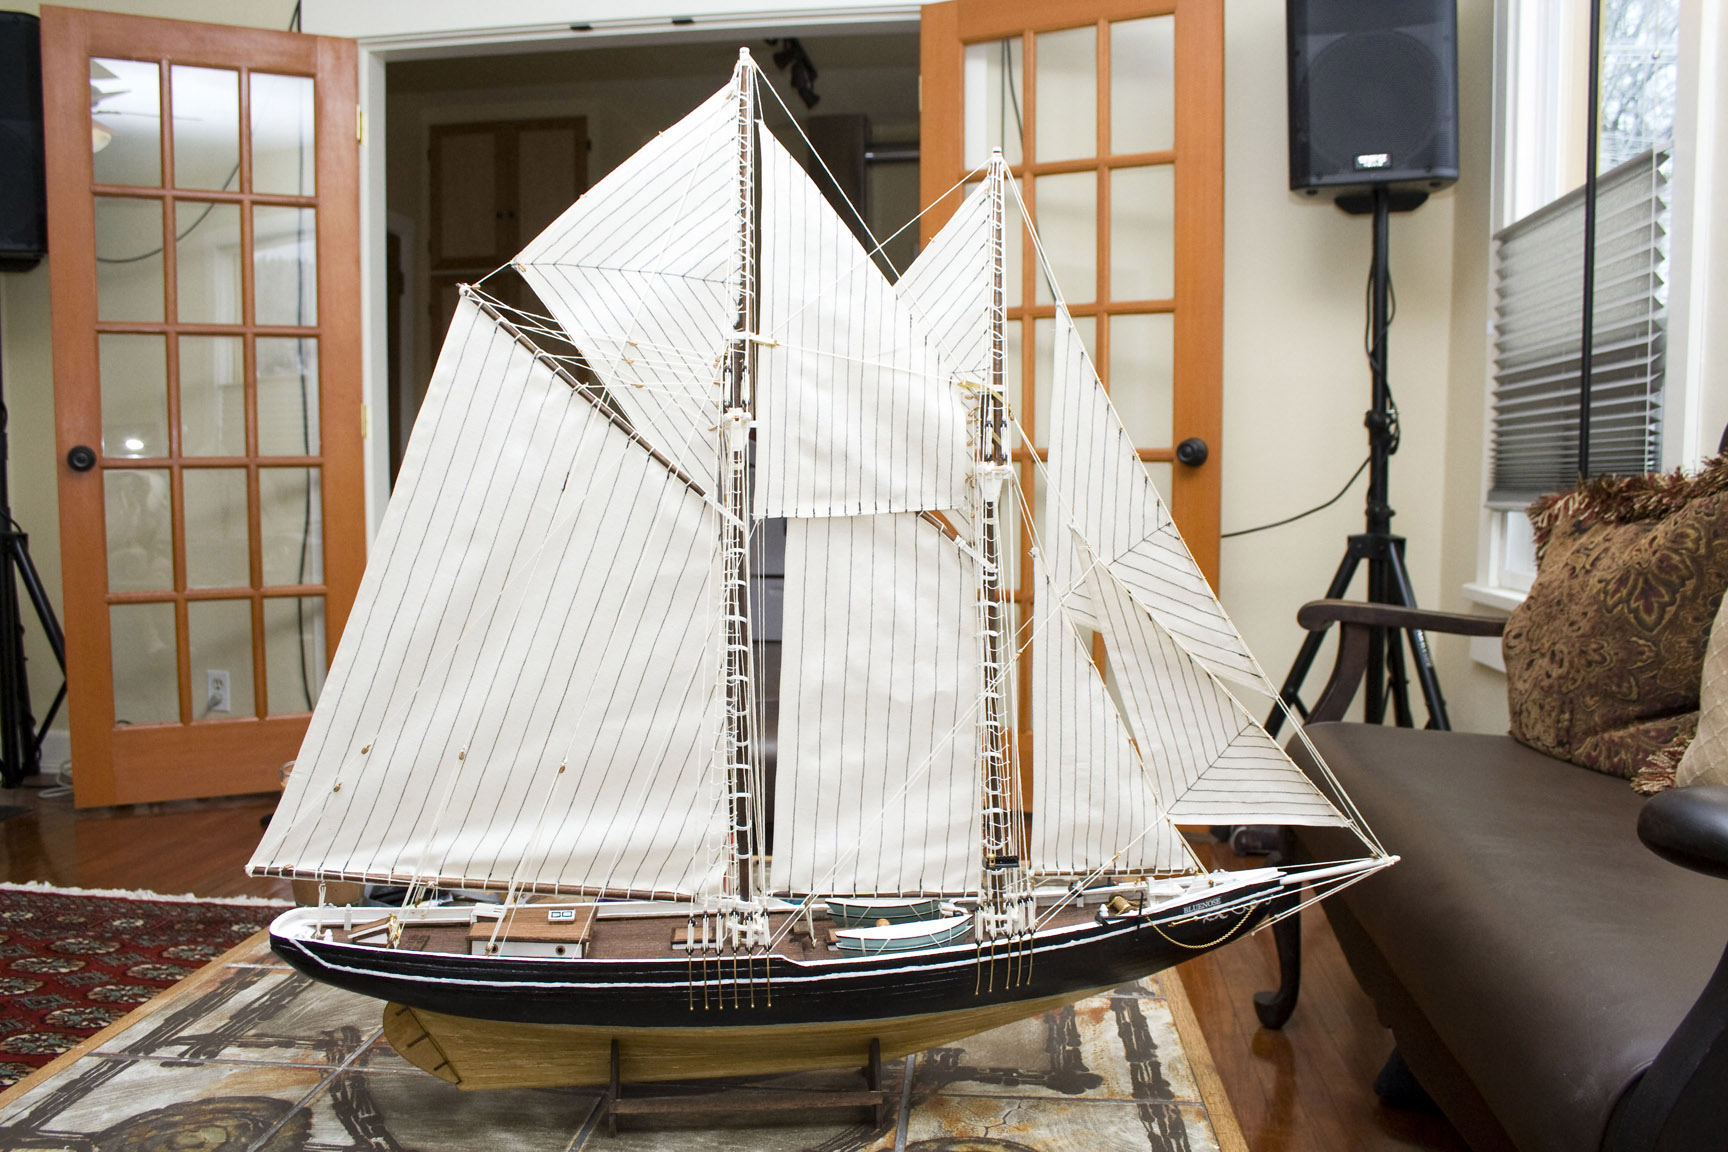
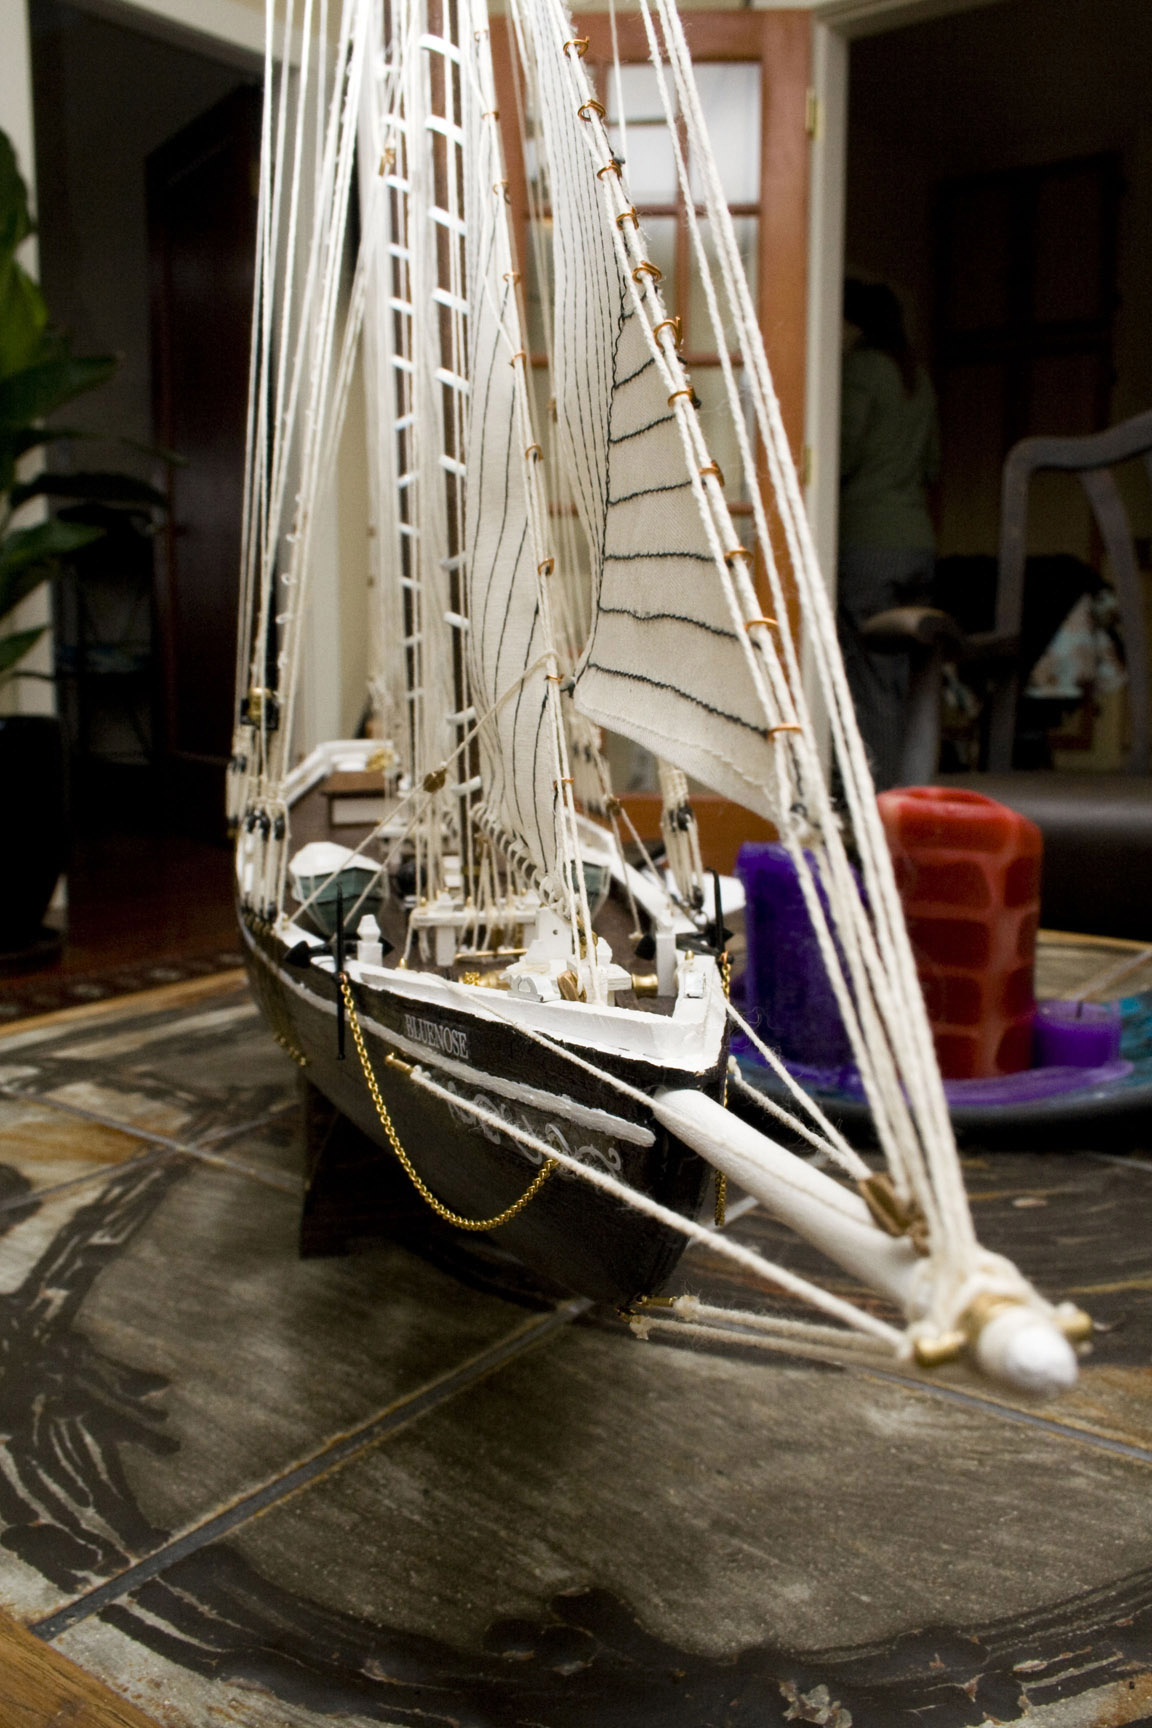
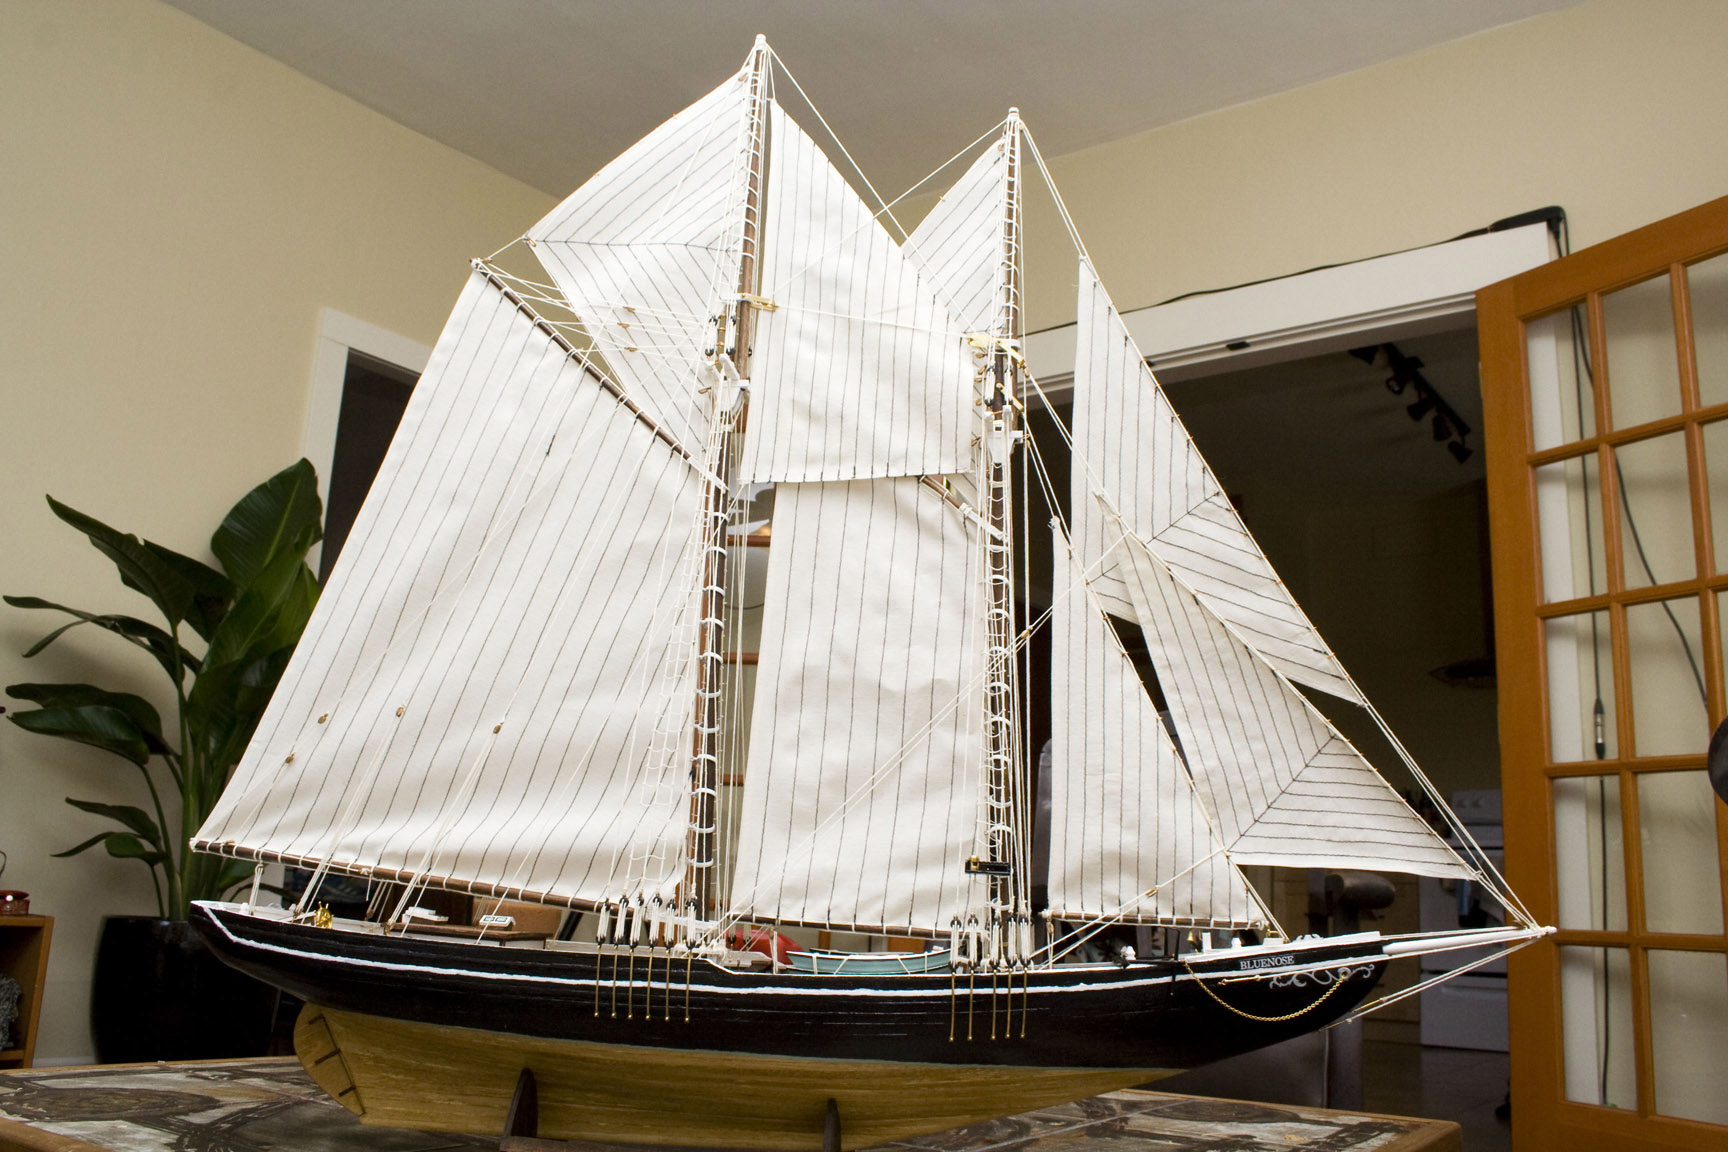
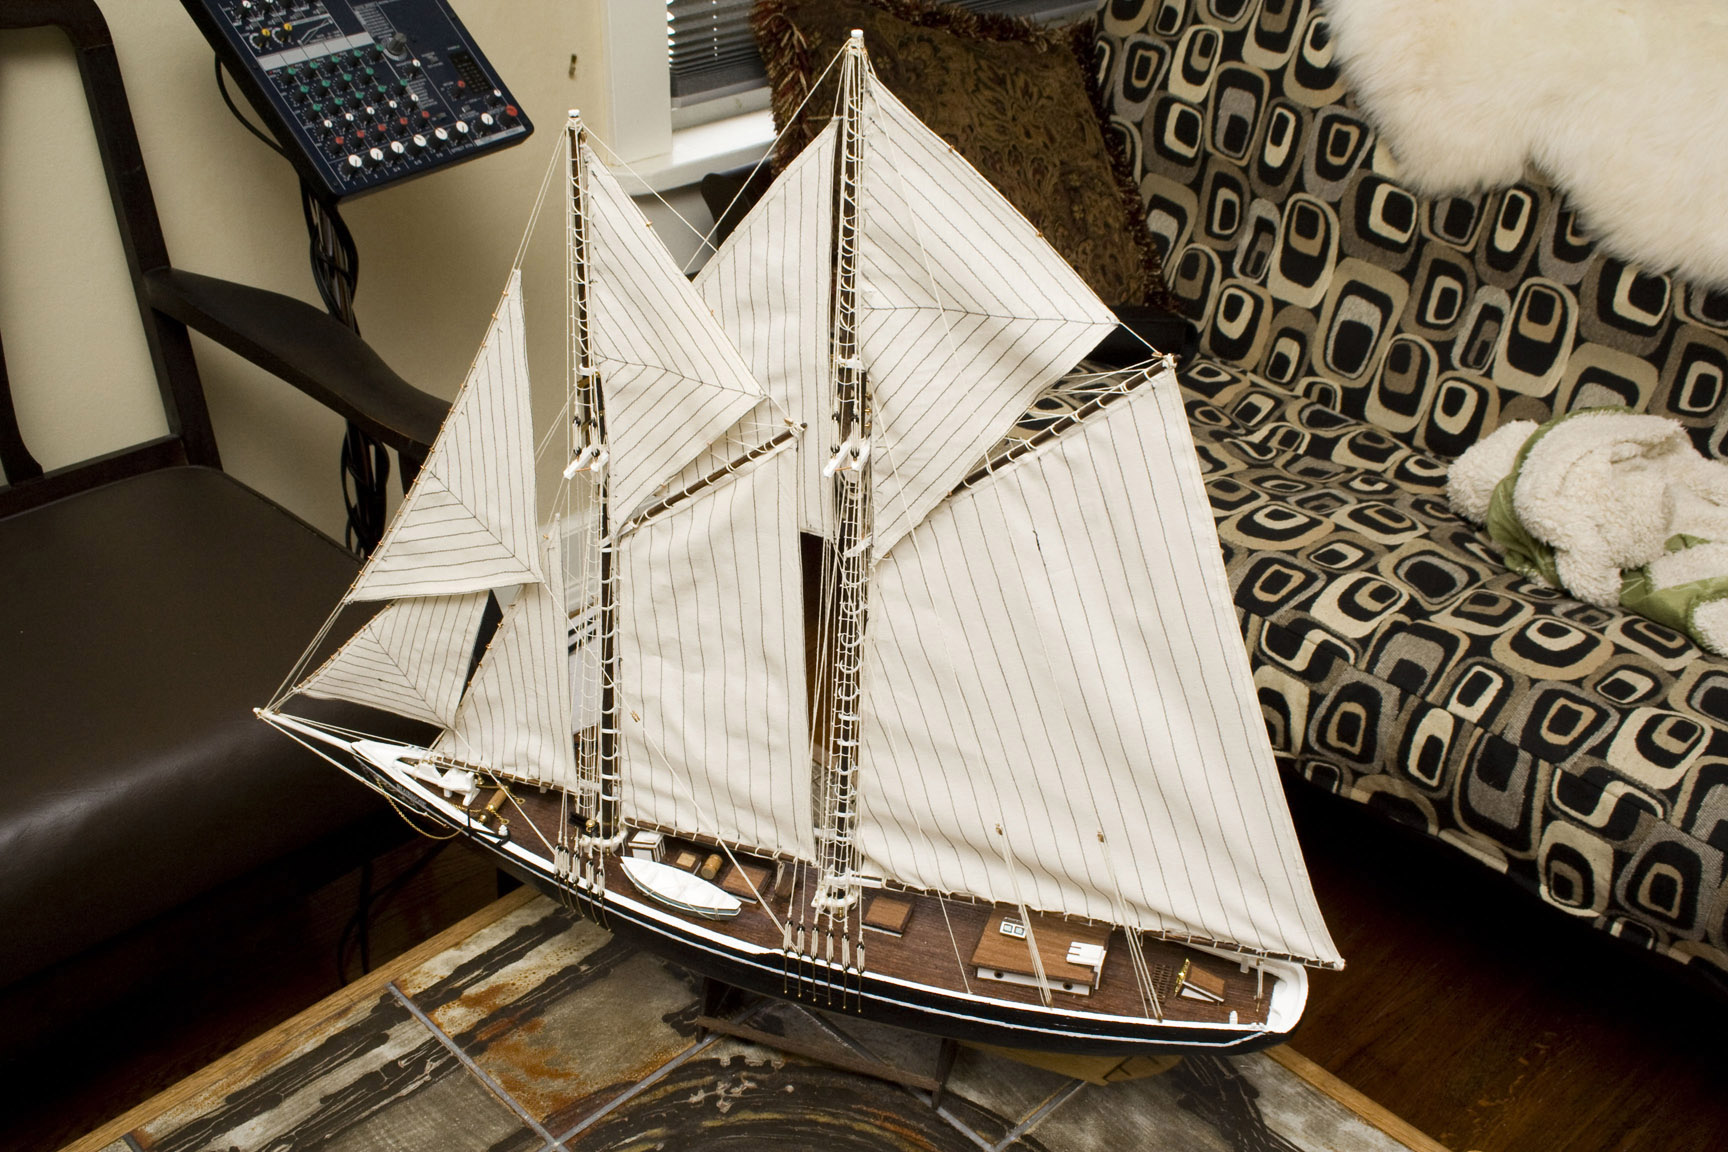
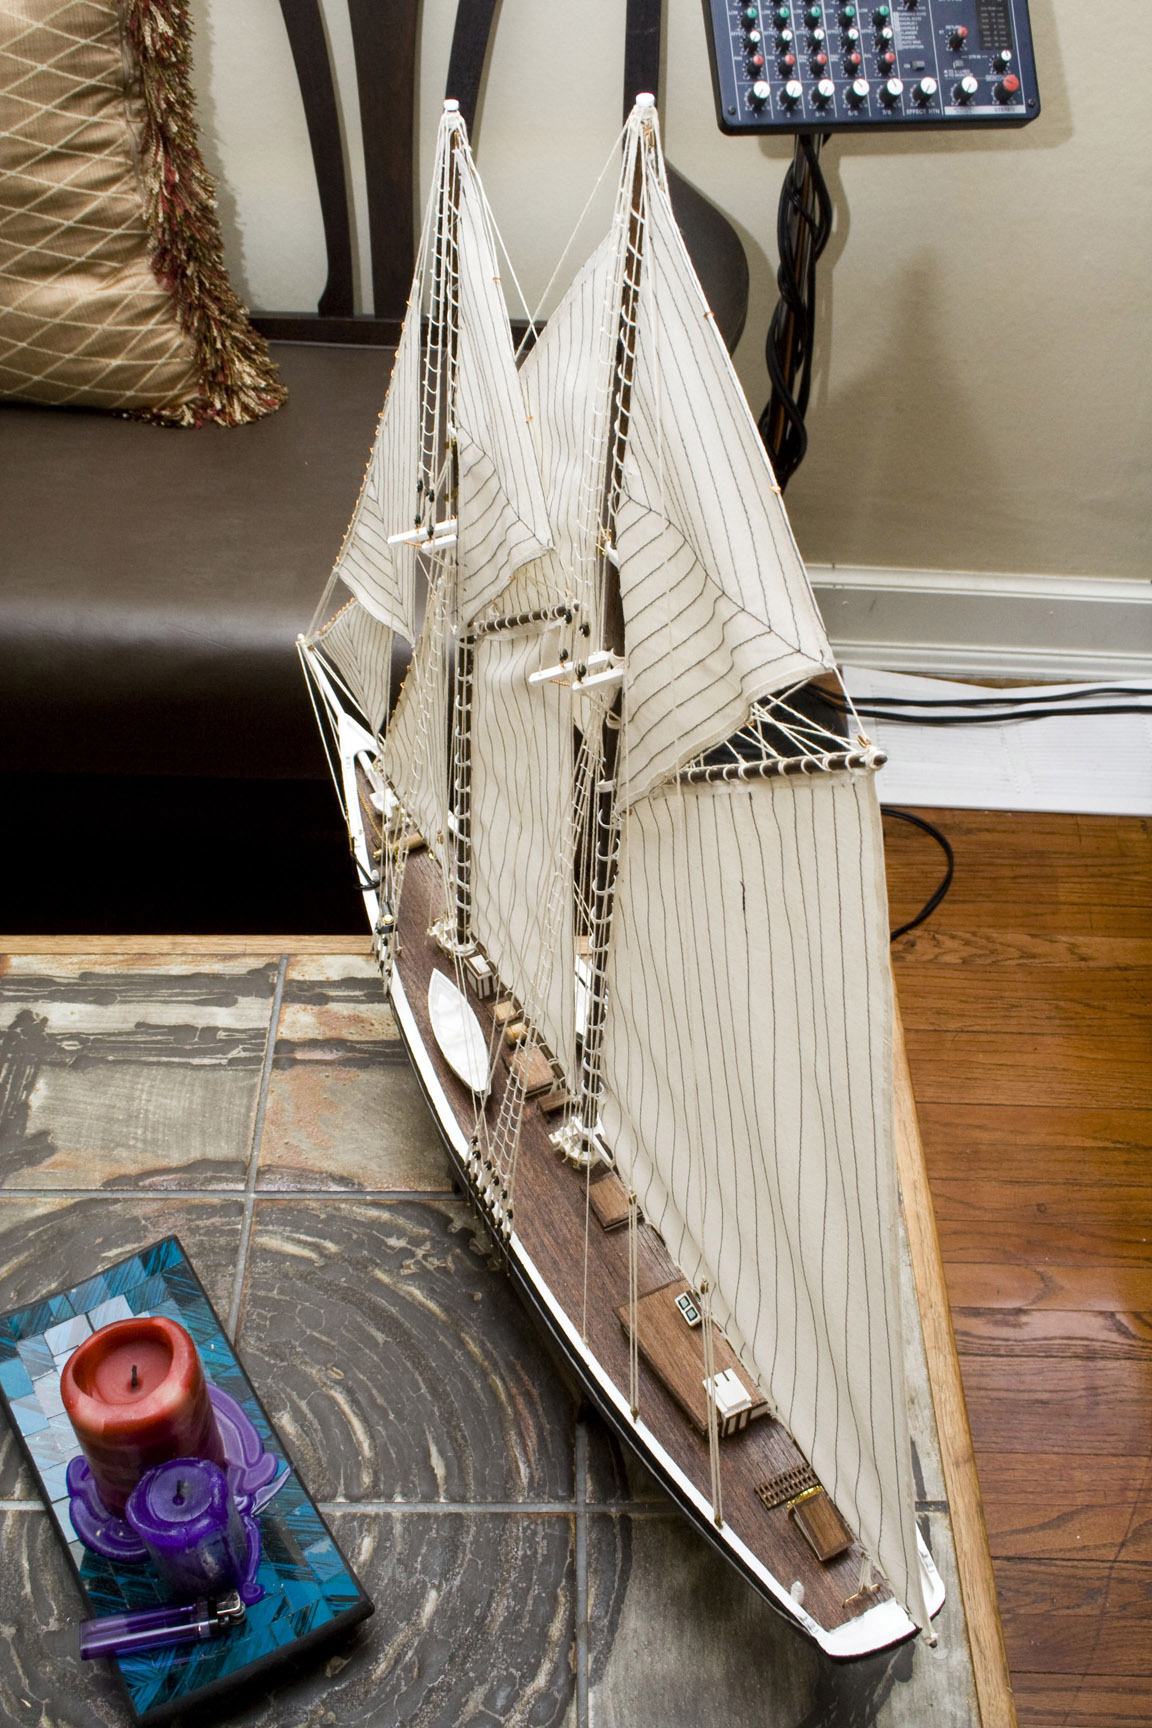
Once all of the rigging was in place and tensioned I did the ratlines and the the last couple of shrouds. I left that stuff until last so that it wouldn't be in my way getting to all of the belay pins to tie off the running rigging. Ratlines took quite a bit longer than expected at probably 7 hours to get them finished. With the rigging finished all that was left was a few minor details on the deck and two months after starting the Bluenose was finished. I could have spent way longer building this and gotten far more picky with details but it seemed like it was time to move on to other projects and get my life back. The next project is going to be a copper and plexiglass shelf/case with LED lights to display the boat. It will probably be a while before I want to do another large model like this again though.

Check out all of the finished build photos below.

Comments

JB - Very cool.

Very cool.

Blair - Thanks JB

Thanks JB

paul - building the bluenose

HI i am building this model at the moment, how did you get the top rails to curve around. great looking model you have made

Blair - Thanks for the comment!

Thanks for the comment! If you're talking about the really long rail that goes from bow to stern, I soaked the wood in boiling water and started bending it when it softened up a bit. I found that wasn't super effective so then I tried taking the soaked wood and held it over a candle flame while bending it. The candle flame worked much better but you have to be very careful not to light the plank on fire (or burn your thumbs). It is a bit of a procedure re-soaking the wood then going back to the candle and it took several hours to get those two pieces bent nicely. Let me know if you have any other questions.

Eric - Rigging

I am laughing at some comments! Same experience on this ship with the lack of instructions. Your rigging pics are a big help.

Blair - Thanks for the comment Eric,

Thanks for the comment Eric, I'm glad the photos helped!

Carlos - Great ship

I building the same ship,your pics help me so much,thanks

Blair - Nice! Send me a link to

Nice! Send me a link to photos of yours when you get it finished.

Carlos - Great ship

Ok :)

Kent Frandsen - Bluenose

Thanks from Denmark. Good job. The photos realy helped during the process.

Carlos - Great ship

I almost finish,the instruccions are so bad but with your photos Are very helpful,thank you so much,i send you link when i finish, The good to do this model is my stress is gone :)

Suavek - Great Job!

Great job for finishing this off without detailed instructions! Really impressed as there supposingly is a course that teaches you how to build bluenose consisting of just under 400 pages by http://www.lauckstreetshipyard.com/college.htm

Blair - 400 Pages? That's nuts.

I think I actually came across that while I was looking for instructions and pictures when I was building mine. I can't imagine paying that much for a course to build a model boat though. Half the fun of building this thing had to have been trying to make sense of the horrible instructions from Billing Boats. Every step seemed like a small victory once I figured out how to do it, especially the rigging.

Stephen - Bluenose

Congratulations on completing your model in what must be record time for this kit. I have been working on mine off and on (more off than on!)for the best part of 5 years! I am an Engineer and ex Royal Navy and can't believe how poor the plans and instructions are for this kit from Billings Boats so I commend you on your achievement. I am at the Rigging stage now on my model and I know that your photographs will really aid me at this stage. For anyone just starting out I would recommend using Balsa cement for building the hull it is fast drying and strong. I struggled with wood glues, epoxies and super glues before finalizing on this.Congratulations again.

Blair - More Photos!

Thanks Stephen. I get way too into things when I start on something that I find challenging and interesting. I probably would have taken longer to do this if I didn't have a large graphic design project that I needed to start. Good tip about the balsa cement. It was a bit of a pain using wood glue with pins to do the planking. Let me know if you can't find a view on any areas that you need a visual of when you're doing the rigging. I tried to get photos that would show details of some of the areas that confused me but I'm sure I missed some. Enjoy the rest of your build!

Dennis - About the brass hardware

You did a fantastic job on this boat and the finished product look great. I have a Old billings boat Blue nose that is about 30 years old and it didn't come with the brass hardware, did yours? This is a project I started many years ago. I got the hull finished but after that never finished it. Your project spurred me on to get it done, but the kit I have does not have the brass hardware, even though the details show that the finished boat will have them. If there is an address or company to order them from, please let me know. Thanks!

Blair - Fittings

Thanks Dennis! If you're in Canada I know that Great Hobbies carries fittings for Billing Boats. You may be able to find what you need there. My Bluenose kit did come with almost everything. I only had to track down a few small things. Another small Billing kit that I have was missing some parts though and I just emailed the Canadian distributor, P.M. Hansen, and they sent me what I needed. Good luck!

Rinaldo - Bluenose II by Billing Boats

First of all, thank you very much for all pictures and congrats for the result! I bought my Bluenose II today here in Edmonton (Great Hobbies) and I can't say enough about how much I am disappointed with the instructions. I was not happy to see so many plastic parts such as blocks and deadeyes, but was pleased at seeing some really nice brass pieces. I am an Architect and used to be a model maker (25 years ago) but I know nothing about rigging...:-P Thanks to your pictures I believe that rigging will be easier now. I hope I can finish this model using your photos, this file http://www.billingboats.com/instructions/Modeling%20Hints%20EN.pdf, and some of the great PDF files available here http://modelshipworldforum.com/ . A guy from Great Hobbies recommended Tamiya Craft Bond, a water-based glue for this kit. Do you know if this glue is good for this type of kit? Again, thank you for your photos.

Blair - glue

I'm not a particularly serious modeller so I have not used that glue before. I just used regular old hardware store wood glue for my kit and I didn't have any issues with it. I did try to heat bend any planks that needed a bit of a curve before I glued them in place. I figured that would help reduce the stress on the glue and hopefully make the finished model last longer. I'm sure there are much better methods I could have used to build mine, but it still seemed to work out alright for a first attempt. Have fun building your, let me know if you need any other photos, and send me a link to photos of yours when you get it done or if you're keeping a build log.

Ron Brown - Thank you thank you thank you!

I bought this kit a couple of years ago and only got as far as the bulkheads (i.e. 'not far') and then set it aside. Never did anything like this before and found the instructions included to be 'cryptic' (to say the least). Found your website today. Wonderful. Great photos and suggestions! So, back to the shipyard tonight with your site up on the laptop for inspiration and guidance. Well done.

George - Beautiful job!

A beautiful job! The photos will be very helpful as I build my model! Many thanx!

Blair - Thanks!

Thanks George! Good luck with your build.

Keith Bell - Bluenose planking

Hi, Blair...feel like we're old pals since I've been studying your EXCELLENT photos on the Bluenose model build. Quick question: some other sites I have seen mention planking the hull TWICE! Did you do so? OMG, once is enough!! Thanks, Keith

Blair - Planking

Hi Keith, I did not double plank the model. I can't imagine having to do that, once was certainly enough. I don't think there would have been enough material in the kit to do it twice anyway. Thanks for the comment, as I've mentioned before in other comments, let me know if you require any more detailed shots of any areas.

Mike Carter - Just starting

Hi. I have just got the kit. All the comments have been very useful giving me the will to start. As well as scaringthe living daylights out of me!!

Craig - Just starting

Keith Excellent results and site. Just got the kit and will start in the next few weeks. Built several RC planes over the years but this will be my first boat. Like you, no idea on rigging etc so your site is going to help out tremendously.

Jason - Sails

Beautiful ship! And wonderful work. I'm about to start rigging up the sails on the Billing model "Marie Jeanne". Smaller ship as it's a 19C fishing boat, but still a ton of work. Wished I'd viewed your site before starting. Thanks!

Fredk Brighton - Nearly finished

Excellent pics - without them I do not think that I would be able to rig the topsails as the plans are rubbish and in my case very old as I started this kit around 50 years ago. There are some differences between my kit and the current kit but basically it is the same. Billings boats say this is not one of there very difficult kits but after my experiences I would not like to try a difficult one. Again thanks

Nino Campana - bending wood easily

Splendid work. To bend wooden sticks get a piece of pipe, copper, plastic, whatever. just a trifle longer than the wood to made pliant. cork one end. put the wood to be bent into the pipe, then add ammonia from your wife's laundry room. Let it soak through. About an hour at most. Pour the ammonia back in its bottle (Wifey need never know) then take out the soaked wood. You can tie it into a bowtie, and when it dries you'll have a stiff wooden bowtie you can't untie. Believe me. If you soak in ammonia again, you can turn it back into a straight stick.

norm sunray - Bluenose 1

I built a Bluenose 2 many years ago, and it was complete and fairly easy to build. Now I am building a blue 1 and as every body noted , without your fine webpage, we would be floundering!The instructions are awful with my Billings kit. A friend of mine started me off about 2 weeks ago, and as he is a masterbuilder, helped greatly. He told me how to bend the strips....push steam thru an ABS 2 pipe with your wood inside. after 5 min take them out and pin them to the plans. Altho this is painless, it does take about 6-7 days to keep it's memory! Pardon my ignorance but is a 576 the same as a bluenose 1?

Blair - Hey Norm, thanks for the

Hey Norm, thanks for the comment. Glad the photos are a help to you. That's a good tip with the steam bending, I don't know if I would have had the patience to wait that long for the wood to set in place though. My dad used a similar technique a few years ago to build a full scale row boat. Billings' kit 576 is the original Bluenose. As far as I know it isn't called Bluenose 1 since there was no Bluenose 2 before the original one sank so there would have been no reason to put a 1 at the end of the name. It's pretty cool how many people have found my site to help build their kits. I had no idea so many people would find it a help especially because I had no ship building experience going into this. I can only imagine that experienced builders cringe at my shoddy craftsmanship. Have fun with the rest of the build. Let me know if you need any further photos of areas that I missed.

norm sunray - Bluenose 1

Just a note to mention that the timeline on bending in the manner i specified I took a piece off the pinned table to see if it would hold it' s shape and after 4 days it did! I'm thinking that it could be less days with a bit of experiment. Norm

Kris - Question and congrats

Hello Blair. Great model, i'm looking for one like this myself. But i plan on modifying for it to be RC. Do you thing this model can be modified to be "sea worthy" and RC?

Henry - Planking Question

Hello Blair. I'm currently also building this kit and just got to planking the hull. In the instructions is written, that there are supportive pieces for the bow to start the planking, but they're not on the blueprint, neither could I find any in the box. How did you put the planks on the bow? On some of your planking pictures the bow looks really rough, with the planks sticking out the front, but in the later ones after painting it's all smooth and closed. how did you do that?

Blair - Hey Henry, sorry to take a

Hey Henry, sorry to take a bit to get back to you. I don't really check on my site very often these days. I don't recall there being any supportive pieces for the bow to start planking. On mine I bevelled the end of each plank a bit so that it had more surface area to glue to the keel strip. I left the planks long and sticking off the front so that when I was finished planking I could trim them all down to an even length then just did a bunch of sanding to get it all smooth. The stern of the ship was similar but in that case there is an extra piece that goes on after the planking so the planks needed to be kept a bit longer to leave room for that piece to tuck in. Let me know if you have any other questions. I'll try to remember to keep checking back on this.

Mr Edward W Cresswell - Biuenose 11 Rigging

Congrats! A great job. I am at the rigging stage after slowly completing the hull and deck fittings (2 years)Your excellent photos will help me work out how to proceed.My first hurdle will be how to thread the rigging thread thro the dead eyes (mounting dead eyes to the chain plates) I am mid 80,s so fingers not so nimble now. Many thanks,Ted Dover UK.